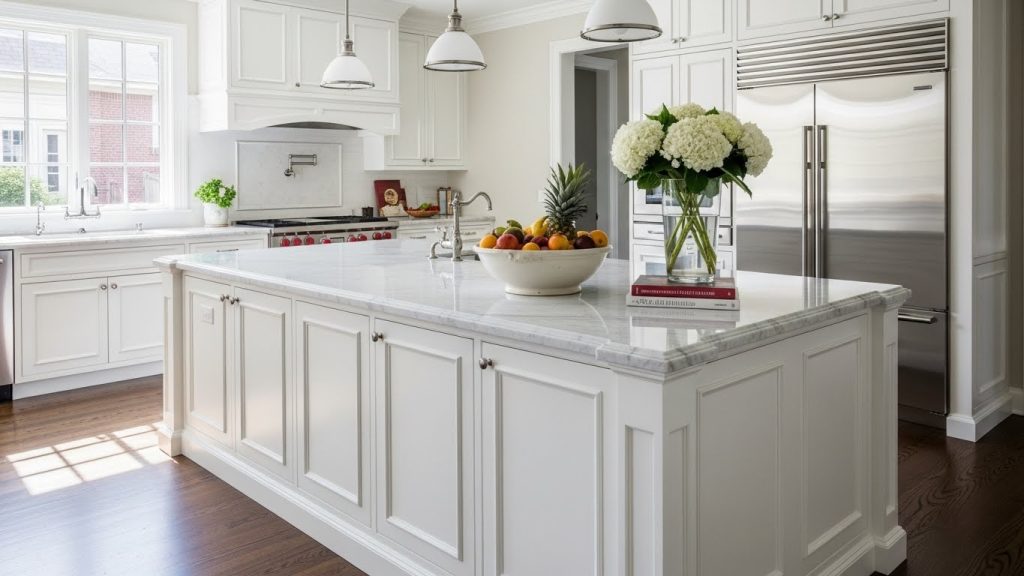
A white kitchen feels bright and spacious. The right trim adds character without overwhelming the space. It frames your cabinets and defines your style. From modern to traditional, trim is a simple way to make a big impact. These ideas show how detail can transform a plain kitchen into a personal and polished room.
1. The Timeless Shaker-Style Trim

Shaker trim is a classic for good reason. Its simple frame and flat center panel work with any decor. This style is durable and easy to clean. You can find Shaker cabinets at most home stores. For a custom touch, paint the center panel a different color. A DIY approach is to add a thin wood frame to a flat cabinet door. This creates the Shaker look without a full replacement.
2. Sleek and Simple Flat-Panel Trim

Flat-panel trim offers a clean, modern look. It has no raised details or grooves, making it easy to wipe down. This style helps a small kitchen feel larger and less busy. You can achieve this look with laminate or plywood. Use magnetic push-to-open hardware for a seamless appearance. It is a budget-friendly option, as the simple construction often costs less than detailed styles.
3. Ornate Victorian-Inspired Molding

Victorian trim brings a touch of old-world elegance. It features curved lines, floral patterns, and deep carvings. This style makes a strong statement in a traditional kitchen. You do not need to do all your cabinets. Add ornate molding just to your island for a focal point. Look for pre-made polyurethane moldings at a home improvement store. They are lightweight and easy to install yourself.
4. Modern Slab Cabinet Trim Ideas

Slab cabinets are the essence of modern design. They are a single, flat piece of material with no extra framing. This creates a uniform, streamlined look. Materials like laminate, wood, or acrylic work well. For a budget-friendly update, consider covering old cabinet fronts with new laminate sheets. The lack of hardware and detail makes this a simple, cost-effective style that always looks current.
5. Beadboard for a Cozy Cottage Feel

Beadboard adds instant charm and texture. Its vertical lines make ceilings feel higher and add visual interest. It is perfect for creating a cozy, cottage-style kitchen. You can use beadboard panels on island sides or as a backsplash. Install a beadboard backsplash yourself using pre-primed panels from a hardware store. It is an easy weekend project that brings big character without a big cost.
6. Elegant Glass-Front Cabinet Trim

Glass-front cabinets make a kitchen feel more open. They break up solid walls of cabinetry and let you display favorite items. The trim around the glass can be simple or detailed. For a budget-friendly change, remove the doors from a few upper cabinets and paint the interior white. You get the open feel of glass without the cost. It is a simple way to refresh your space.
7. Picture Frame Molding on Islands
Picture frame molding turns a plain island into a furniture piece. It involves applying thin wood strips to create framed panels. This adds architectural detail and depth. You can do this with simple lattice strips from a hardware store. Measure and miter the corners for a professional look. Paint the molding the same white as the island for a cohesive, built-in appearance. It is a high-impact DIY project.
8. Rustic Reclaimed Wood Accents
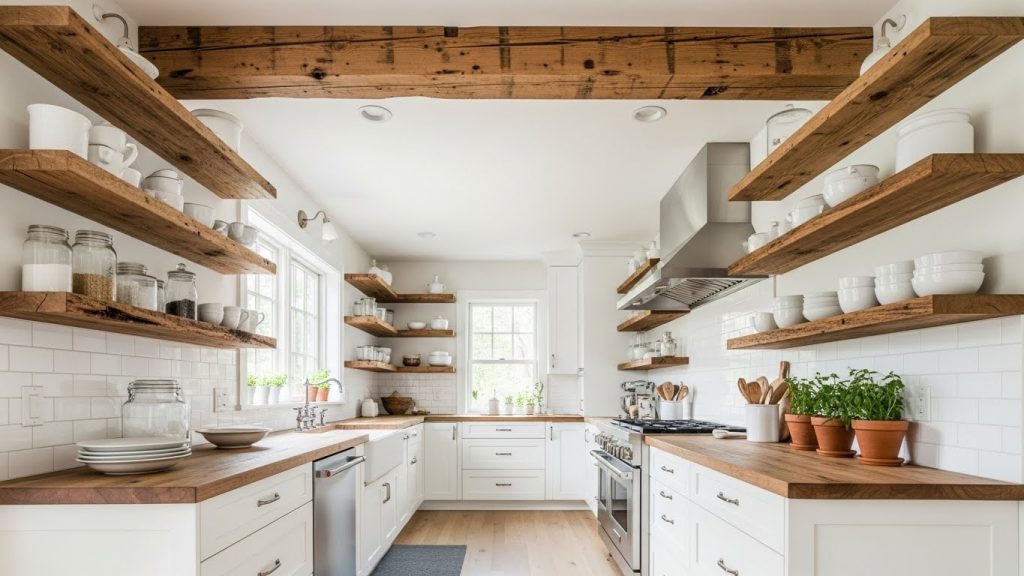
Reclaimed wood brings warmth and history to a white kitchen. Use it for open shelves, a range hood, or a small accent wall. The natural imperfections add character. Look for old barn wood or salvaged floorboards. A single reclaimed wood shelf above the sink adds texture without commitment. You can often find small, affordable pieces at architectural salvage yards.
9. High-Contrast Two-Tone Trim

Two-tone cabinets create visual interest. Paint your upper cabinets white and your lower cabinets a darker color. The white trim on the darker base creates a crisp outline. This helps define the kitchen’s layout. You only need paint to try this trend. It is a cost-effective way to experiment with color. Keep the hardware consistent to tie the two tones together.
10. Crown Molding for a Grand Finish

Crown molding gives cabinets a custom, built-in look. It fills the space between the top of your cabinets and the ceiling. This makes the cabinets look taller and the room more complete. Use lightweight polyurethane crown molding for an easy installation. It is pre-primed and can be cut with a basic hand saw. This single addition makes a huge difference in the room’s overall polish.
11. Clean-Lined Inset Cabinet Trim

Inset cabinets have doors and drawers that sit inside the cabinet frame. This creates a very flat, seamless look. It is a sign of fine craftsmanship. The trim is the cabinet frame itself. While custom inset cabinets can be pricey, you can update hardware to simple, recessed pulls to mimic the clean feel. This style is easy to keep clean because there are no protruding edges.
12. Charming Craftsman-Style Details
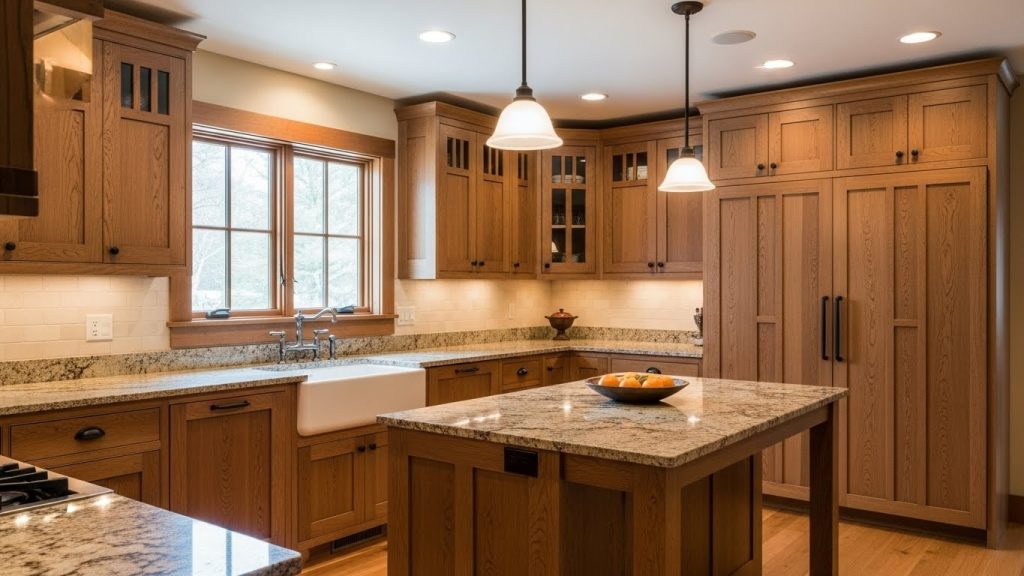
Craftsman style emphasizes simple, solid wood construction. The trim is usually thick and square with a flat panel. It feels sturdy and honest. This style works well in bungalows or homes with an Arts and Crafts influence. Look for stock cabinets with a “mission” style to get this look affordably. The straightforward design is timeless and pairs well with natural materials like stone and wood.
13. Adding Depth with Shadow Gaps
Shadow gaps are the intentional spaces between cabinets. They create clean lines and dramatic shadows. This is a key feature in modern and minimalist design. It makes each cabinet door look like a floating panel. To achieve this, your installer will set the doors with precise spacing. You can create a similar effect by painting the cabinet edges a dark color before hanging the doors. This adds depth on a budget.
14. Fluted Trim for Textural Interest

Fluted trim features vertical grooves that add rhythm and texture. It looks like columns from classical architecture. This detail works well on islands or pantry doors. You can buy fluted wood panels or MDF. Apply a fluted panel to one section of your kitchen as an accent. It is an easy way to incorporate a trending texture without redesigning the entire space.
15. Metal Edging for an Industrial Twist

Metal edging gives a kitchen a sharp, industrial feel. Thin strips of black or brass metal outline the cabinet doors. This defines the shape and adds a modern edge. Use iron-on veneer tape for a simple, DIY version of this look. The tape has a heat-activated adhesive and can be trimmed with a utility knife. It is a very low-cost way to add a custom detail.
16. Painted Brick as a Textural Trim

Painted brick provides fantastic texture. If you have a brick wall or a brick veneer, painting it white keeps the pattern but brightens the space. It acts as a natural, textured trim for your kitchen. Whitewash the brick for a less solid look that allows some of the original color to show through. This is a great way to add character without adding new construction.
17. Open Shelving with Decorative Brackets
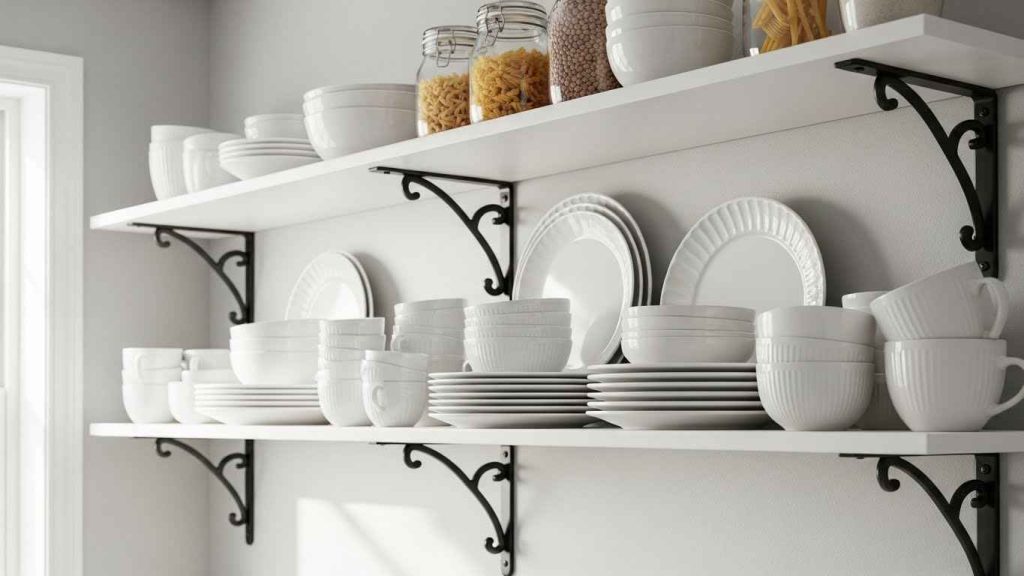
Open shelves make a kitchen feel larger. The brackets that hold them up can be a major style element. Choose brackets with an interesting shape or finish. Simple shelf brackets are an easy DIY project. You can mount a wood shelf on brackets in an afternoon. This is far cheaper than installing new cabinets and gives you a place to display pretty dishes.
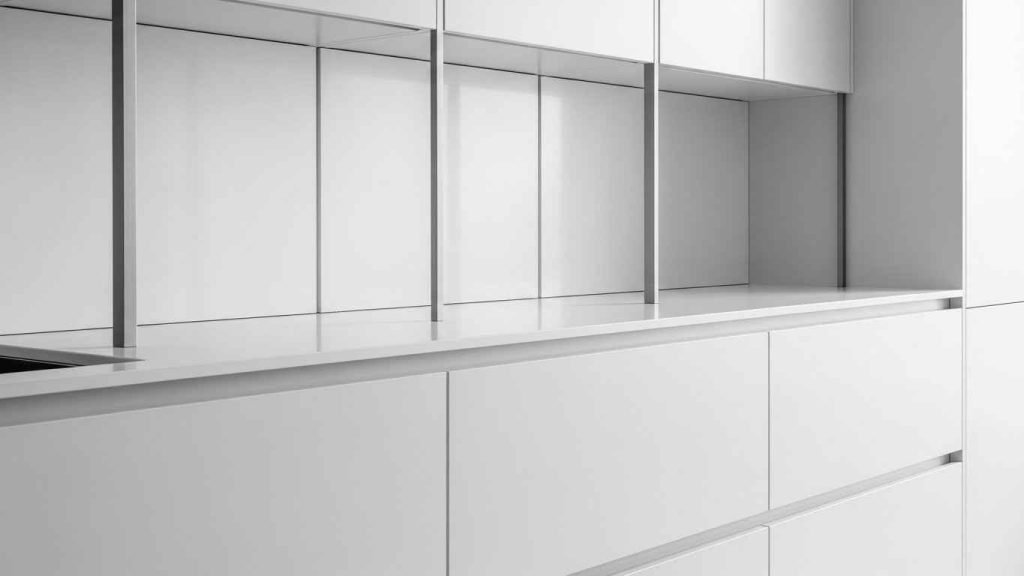
18. Subtle and Modern Reveal Trim

Reveal trim is a small lip or step on the cabinet frame. It creates a thin shadow line around the door without needing hardware. This is a very subtle and modern detail. It gives a custom look to simple slab cabinets. A carpenter can router a small reveal into existing cabinet doors. This is a more advanced DIY project, but it creates a high-end, integrated appearance.
19. Ceiling-Medallion-Inspired Hood Trim

A range hood can be a kitchen’s centerpiece. Using trim that looks like a ceiling medallion adds drama and elegance. It frames the hood and makes it a work of art. Find a lightweight polyurethane medallion and cut a hole in the center for your hood to pass through. This is an affordable way to create a custom hood surround that looks built-in.
20. Wainscoting on the Kitchen Island

Wainscoting on an island adds furniture-style charm. It protects the island sides from kicks and scratches. The paneled look is traditional and welcoming. Use pre-made wainscoting panels for a simple installation. You can nail them directly to the island frame and then paint everything the same white. This is a durable and beautiful finish that makes your island feel permanent and valued.
21. Arched Cabinet Trim for Softness

Arches soften the hard lines of a kitchen. An arched cabinet front or a pass-through window adds a graceful curve. This detail feels custom and thoughtful. Create a temporary arch with a flexible wood trim to see if you like the look before making a permanent change. This detail works especially well in homes with Spanish or Mediterranean influences.
22. Geometric Patterns with Molding
You can create art with trim. Use thin molding to make geometric patterns on a plain cabinet door or a blank wall. This is a very personal and creative touch. Painter’s tape is your best friend for planning the design. You can create a hexagon or grid pattern easily. Paint the entire surface white afterward for a cohesive, architectural look that is uniquely yours.
23. Layered Trim for a Custom Look

Layered trim combines different moldings for a rich, custom effect. A base trim with a smaller detail on top adds depth and complexity. This is often seen in very traditional or high-end kitchens. Layer a thin batten strip over a flat panel to create your own design. You can build up the look with pieces from the molding aisle. Glue and nail them in place for a secure fit.
24. Stainless Steel and White Pairing

Stainless steel provides a cool, sleek contrast to white. Use it for appliance handles, cabinet pulls, or even as a thin inlay. This combination is clean and timeless. Update your cabinet hardware to brushed stainless steel for an instant refresh. This is one of the easiest and most cost-effective updates you can make. It ties your appliances into the kitchen’s decor seamlessly.
25. Minimalist Finger-Pull Trim Details

Finger-pull trim eliminates the need for hardware. A small groove routed into the top or side of the cabinet door allows you to open it. This creates a completely smooth, minimalist appearance. A router can create this groove in a weekend. It is a more advanced DIY task, but it results in a very high-end, custom look. It also makes cleaning your cabinets simpler.
26. Floor-to-Ceiling Pantry Trim Ideas

A floor-to-ceiling pantry maximizes storage. The trim should match the rest of your kitchen cabinets to make it look built-in. This creates a seamless, unbroken wall. Use the same crown molding from your uppers on top of the pantry for continuity. Painting the pantry door the same white as the walls helps it disappear. This is a smart way to add function without sacrificing style.
Start with one small change. Paint a single piece of trim or update your hardware. See how a little detail can make your white kitchen feel entirely new.