Cooking in a small space requires smart planning. A good layout makes everything easier. It helps you move freely and store your tools well. These ideas show how to arrange your kitchen for better workflow. You can create a space that feels larger and works harder. Many of these solutions are simple and affordable to try.
1. The Galley Kitchen Layout

This layout uses two parallel walls. It creates a very efficient work corridor. Your sink, stove, and fridge form a perfect triangle. This makes cooking tasks quick and fluid. The narrow shape uses floor space well. It keeps all your essentials close by. Use the vertical space on both walls for open shelving. A budget-friendly upgrade is to install a hanging pot rack. This clears up lower cabinet space for other items.
2. The L-Shaped Kitchen Layout

This shape fits perfectly into a room’s corner. It opens up the floor plan and avoids tight corners. You get a continuous countertop for prep work. It also allows for a small dining table nearby. The open end makes the room feel bigger. Maximize corner storage with a lazy Susan. A simple DIY project is to add peel-and-stick tile to the backsplash. This adds color without a major renovation.
3. The U-Shaped Kitchen Layout
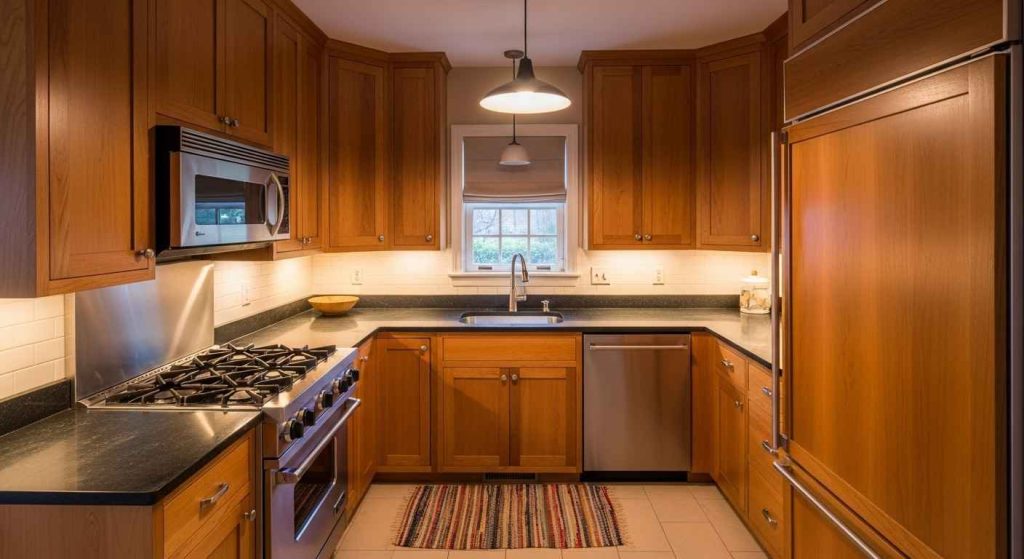
Cabinets and counters on three walls surround you. This gives you a huge amount of storage and work surface. Everything you need is just a step away. It is a very safe layout for cooking with multiple people. The enclosed feel can be very efficient. Install pull-out shelves in deep base cabinets. For a budget-friendly fix, use tension rods inside cabinets to create dividers for baking sheets and cutting boards.
4. The Single-Wall Kitchen Layout

All your kitchen elements line up on one wall. This is ideal for studio apartments and very narrow spaces. It keeps the kitchen area defined but unobtrusive. The key is to organize the wall from floor to ceiling. Go for uniform appliances to create a streamlined look. A DIY idea is to mount a sturdy wooden plank on brackets as an extra counter extension that folds down when not in use.
5. The Peninsula Kitchen Layout

A peninsula is a connected island that extends from a wall or counter. It adds extra prep space and seating without taking up too much room. It acts as a gentle room divider in an open plan. This creates a natural spot for quick meals. Use the back of the peninsula for extra shelving or a wine rack. A budget-friendly tip is to use a freestanding butcher block cart against the end to mimic a peninsula.
6. The Island Kitchen Layout (for the brave!)
An island can work in a small kitchen if it is the right size. Choose a narrow, mobile island on wheels. This gives you extra counter space where you need it. You can roll it against a wall when more floor space is required. Look for a model with storage underneath. A DIY solution is to repurpose an old wooden desk or table. Add casters to the legs for a custom, movable island.
7. The Corridor Kitchen Layout

Similar to a galley, this layout has a walkway between two counters. It is designed for one cook to move in a straight line. This is a common and very practical design for small homes. Keep the color palette light to avoid a tunnel feel. Keep the walkway clear of any floor obstructions. A budget-friendly idea is to use matching bins or baskets on top of the cabinets for a cohesive look and extra storage.
8. The Galley-with-Pass-Through Layout
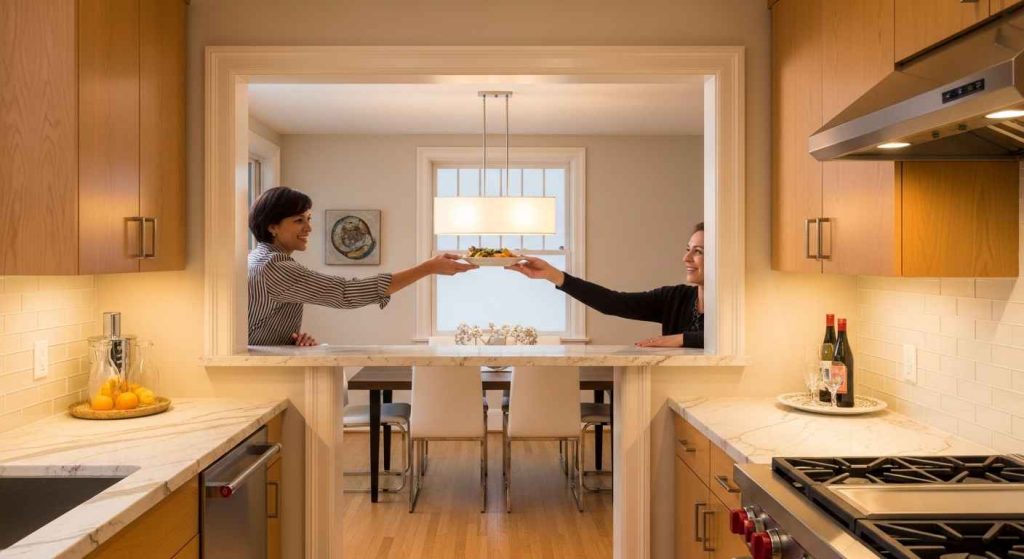
This design includes a large opening in one wall, like a window without glass. It connects the kitchen to an adjacent dining or living area. This makes serving food easy and allows you to talk with guests. It also lets in more light and makes the kitchen feel less closed off. Use the pass-through ledge as a mini breakfast bar. A simple DIY project is to paint the interior of the pass-through a bold color to define the space.
9. The Open-Plan Tiny Kitchen Layout

The kitchen blends with the living and dining areas without walls. This makes a small home feel much larger and less divided. The kitchen needs to be tidy since it is always on display. Use furniture and rugs to define the kitchen zone. Choose a cohesive color scheme that flows from the kitchen into the living space. A budget-friendly trick is to use a tall, slender bookcase as a room divider that also offers storage.
10. The Fold-Down Kitchen Layout

Everything folds up against the wall when not in use. This is the ultimate space-saver for micro-apartments or converted rooms. A countertop, small sink, and shelving can all be designed to disappear. This frees up the entire room for other activities. Ensure all hardware is sturdy and can support the weight. A DIY approach is to mount a sturdy, wall-mounted folding table as your primary prep surface.
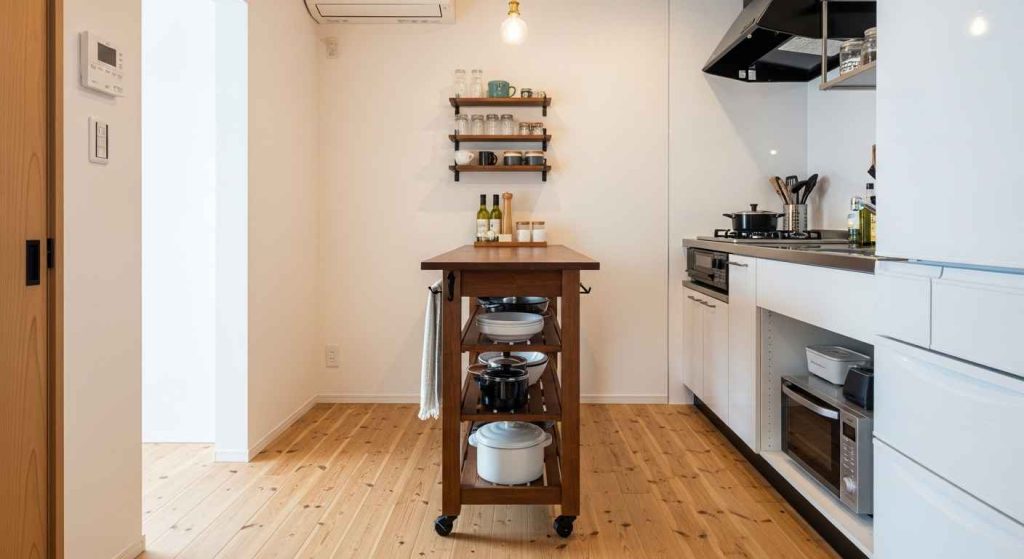
11. The Rolling Cart Kitchen Layout

A rolling cart is a flexible addition to any small kitchen. Use it for extra prep space, to hold appliances, or as a portable pantry. You can move it wherever you need it during cooking. When guests arrive, simply roll it out of the way. Look for carts with wheels that lock for safety. A budget-friendly find is a vintage wooden cart from a flea market. Sand it down and seal it for a new finish.
12. The Vertical Storage Kitchen Layout
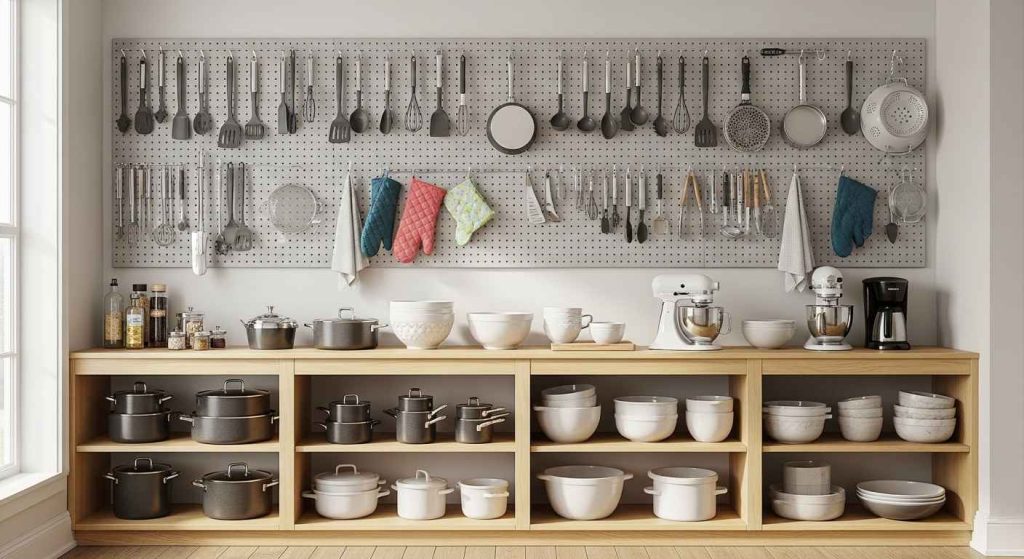
Look up. The space from your countertops to the ceiling is valuable real estate. Install shelves all the way to the ceiling. Use a pegboard for hanging tools and cookware. This clears your counters and lower cabinets. Group items by use for a clean look. A simple DIY project is to install a sturdy wooden plank on metal brackets. This creates instant, cheap shelving for dishes and cookbooks.
13. The Corner-Centric Kitchen Layout

Corners are often dead space. Make them work harder. Install a corner sink to free up wall space for other things. Use a lazy Susan or pull-out corner drawers in base cabinets. This gives you easy access to items stored deep inside. A corner sink can be a smart choice for a better window view. A budget-friendly solution is a tiered corner shelf that spins, allowing you to store more items accessibly.
14. The Appliance Garage Kitchen Layout

This is a small cabinet built on the countertop. It has a door that closes to hide small appliances like your toaster and blender. This keeps your counters clear and the look seamless. When you need to use something, just open the door. Match the cabinet door to the rest of your kitchen for a built-in look. A DIY version can be made by modifying a standard upper cabinet and installing a tambour door.
15. The Pull-Out Pantry Kitchen Layout

A tall, narrow cabinet with shelves that pull out like a drawer. This lets you see and reach everything at once. No more lost items in the back of a deep cabinet. It uses a small footprint very effectively. These are perfect for the space next to a refrigerator. For a budget-friendly option, use a tension rod system and baskets in a existing closet to create your own pull-out pantry system.
16. The Sink-Under-Window Layout
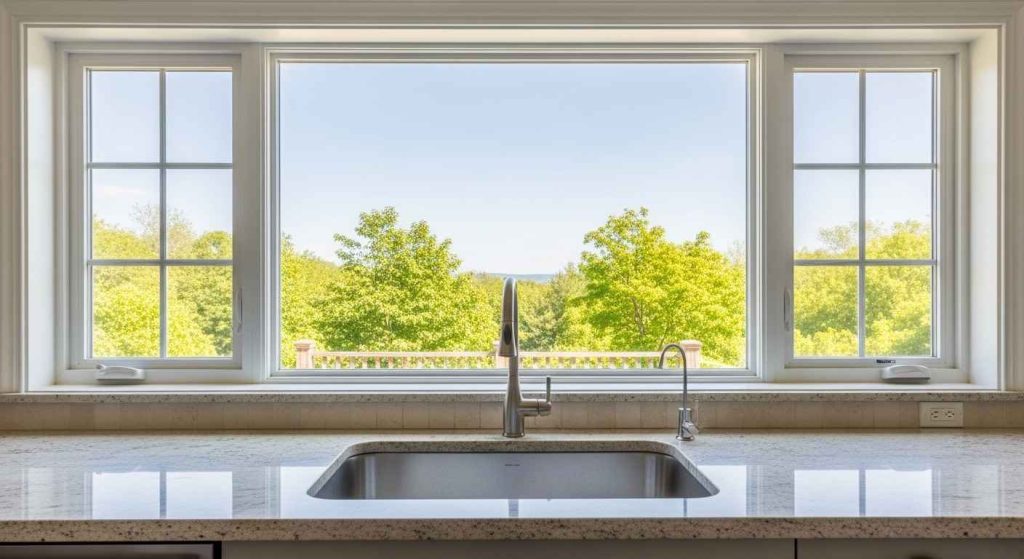
Placing your sink under a window is a classic choice for good reason. It gives you natural light and a view while you wash dishes. This can make a tedious chore feel less confined. It also often becomes the natural focal point of the kitchen. Keep the windowsill clear to maximize light. A simple DIY touch is to add a small, waterproof LED strip under the cabinet above for task lighting at night.
17. The Stovetop-and-Drawers Layout

Instead of a stove with a full oven below, use a standalone cooktop. The space below can then be used for deep, full-extension drawers. This is perfect for storing bulky pots and pans. You can pull a drawer all the way out to see everything inside. This layout saves you from bending and searching in dark corners. A budget-friendly idea is to use a plug-in induction cooktop on a standard counter.
18. The Top-Drawer Dishwasher Layout

A dishwasher installed at waist level is much easier to load and unload. You do not have to bend down as far. This can be a standard dishwasher designed for this or a smaller drawer-style model. It fits well into a tight layout and improves comfort. This is a great accessibility feature. Look for slimline models if you have very limited space. This is a splurge that pays off in daily ease.
19. The Magnetic Wall Kitchen Layout

Turn a wall into a tool holder. Use a magnetic knife strip or paint a section of wall with magnetic paint. You can stick up metal utensils, spice cans, and knives. This clears your countertops and keeps tools within sight and reach. This works for any metal object. A budget-friendly project is to paint a small section of wall with magnetic primer. Then you can hang lightweight metal items with small magnets.
20. The Multi-Level Island Layout

An island with two different counter heights serves two purposes. The standard height is for food preparation. A lower section creates a comfortable spot for seating and eating. This defines the spaces without needing extra furniture. The lower level can also hide appliances from the seating side. A DIY version can be built by stacking and joining two different-sized wooden tabletops on a base.
21. The Breakfast Nook Kitchen Layout

A built-in bench with a table uses a corner efficiently for dining. It often includes storage under the seat. This creates a dedicated eating area without needing multiple chairs that take up floor space. It makes the kitchen feel more inviting. Add comfortable cushions for seating. A budget-friendly idea is to use a small, round table with a pedestal base. This allows for easier leg room than a table with four legs.
22. The See-Through Shelving Layout
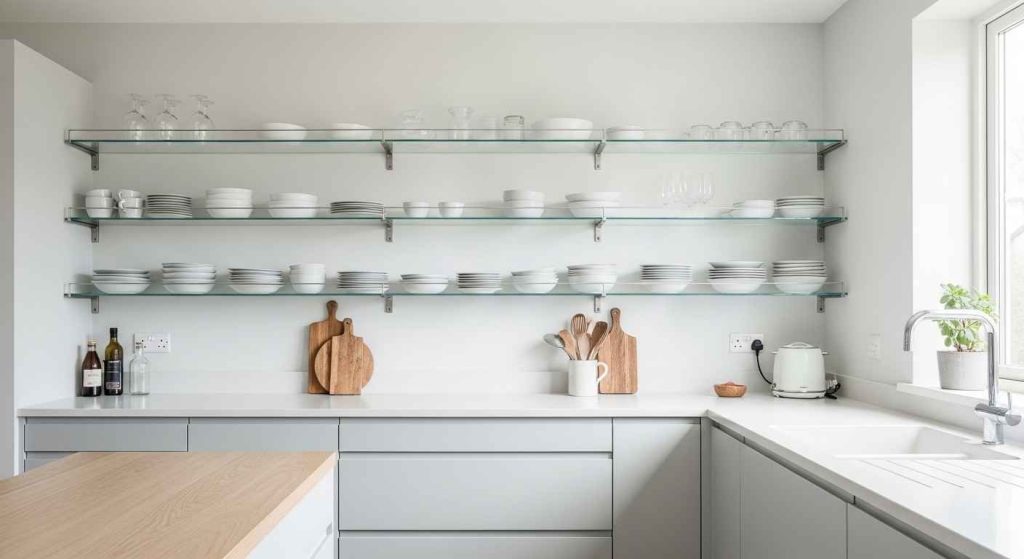
Open shelves make a space feel bigger, but solid wood can look heavy. Use glass shelves or wire grid shelving instead. They hold your items but allow light to pass through. This maintains an open feeling while still providing storage. Glass shelves are easy to clean. A DIY alternative is to use clear acrylic brackets and shelves. They are strong and nearly invisible, making your dishes appear to float.
23. The Pocket Door Kitchen Layout

A pocket door slides into the wall cavity instead of swinging open. This saves the floor space that a swinging door would need. It is perfect for separating the kitchen when needed without a permanent wall. You can close it to hide cooking mess from view. This is a great way to open up a small floor plan. Installing one is a project that can add function and modern style to an older home.
24. The Appliance Hiding Cabinet Layout
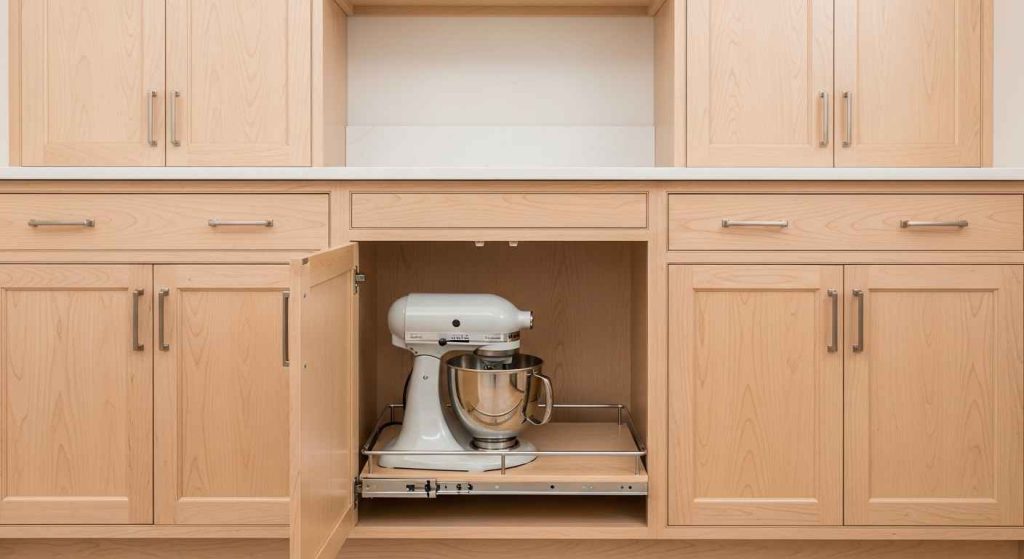
Designate a specific cabinet for your large appliances. Install a pull-out shelf inside to make them easy to lift out. When you close the door, the kitchen looks clean and minimalist. This works for mixers, air fryers, and slow cookers. Measure your largest appliance before designing the cabinet. A budget-friendly tip is to use a sturdy, pull-out wire shelf from a home store inside an existing cabinet.
25. The “Kitchen in a Closet” Layout

For the absolute smallest spaces, the entire kitchen fits inside a closet. A small sink, a single induction burner, and minimal storage are built in. When you are done, you can simply close the doors. This is a solution for tiny houses or studio apartments. Use a plug-in induction cooktop for safety and flexibility. A DIY approach involves retrofitting a pre-existing closet with a bar sink and some shelving.
Start with one change. Pick the idea that solves your biggest kitchen challenge. Maybe you need more counter space or better storage. Even a small adjustment can make cooking easier and more enjoyable. Your kitchen does not need to be perfect. It just needs to work better for you.