A well-arranged kitchen makes cooking and cleaning feel simpler. Good cabinet placement improves how you move through the space. It puts items right where you need them. These ideas help you use every inch. You can apply many of these concepts to your current kitchen. Small changes often make the biggest difference.
1. The Classic Work Triangle Setup
The work triangle connects your sink, stove, and refrigerator. This layout minimizes steps between the three main work areas. Keep the path clear of obstacles like islands. The total distance between all three points should be manageable. A good flow makes meal preparation faster. For a budget-friendly update, simply rearrange items in your existing cabinets to align with this triangle. Store pots near the stove and dishes near the sink.
2. The Galley Kitchen Maximizer
Galley kitchens use two parallel walls of cabinets. This design is very efficient for small spaces. Use the full height of both walls with tall units. Install cabinets that go all the way to the ceiling for extra storage. This prevents wasted vertical space. A simple DIY project is to add hooks or rails to the cabinet sides for hanging utensils. This keeps tools accessible without using counter space.
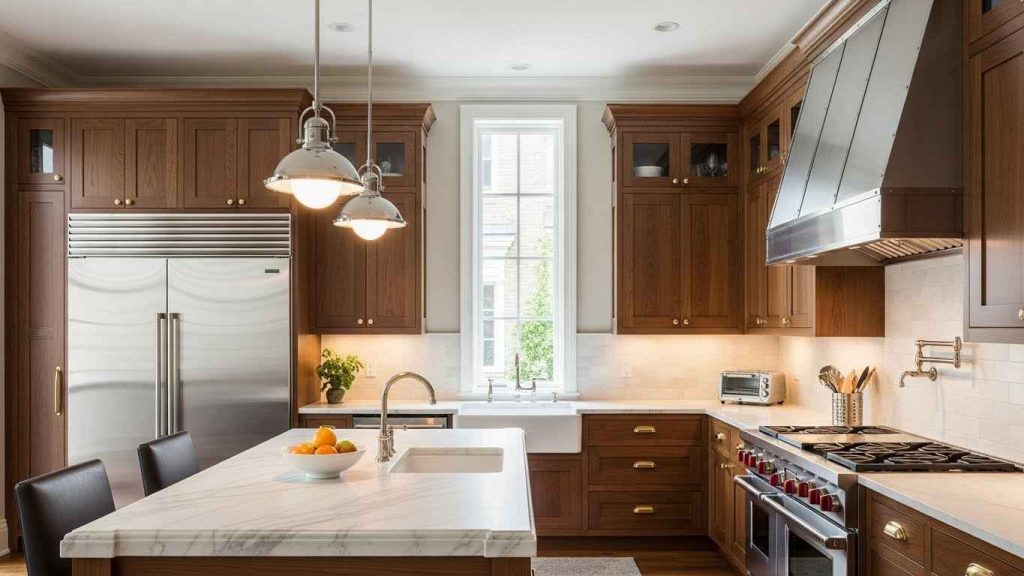
3. The L-Shaped Layout Solution
An L-shaped layout uses two adjoining walls. It opens up the room and creates a natural work triangle. This shape is great for corner spaces. It allows for an easy addition of a small table or island later. Make the corner cabinet work hard. A budget-friendly tip is to use a tiered shelf in a deep corner cabinet. This lets you see and reach items stored at the back.
4. The U-Shaped Cabinet Wrapper
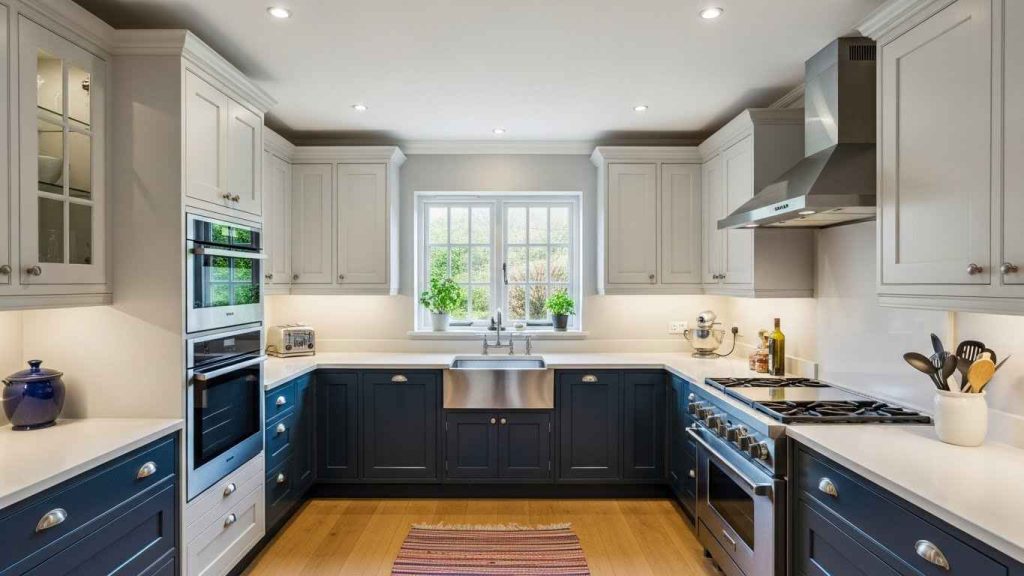
A U-shaped kitchen surrounds you with storage and counter space. It offers plenty of room for multiple cooks. Each wall can be dedicated to a different task: cleaning, cooking, and prep. This layout provides a large amount of cabinet storage. To keep it feeling open, choose lighter colors for the upper cabinets. You can install open shelving on one wall as a DIY alternative to upper cabinets.
5. The Peninsula Power Play
A peninsula is a connected island that acts as a room divider. It adds extra counter space and seating without needing a full island. Use the side facing the living area for open shelving or drawers for linens. The kitchen side can house appliances or pots and pans. For a budget-friendly update, use the end panel of the peninsula to hang a towel rack or mount a paper towel holder.
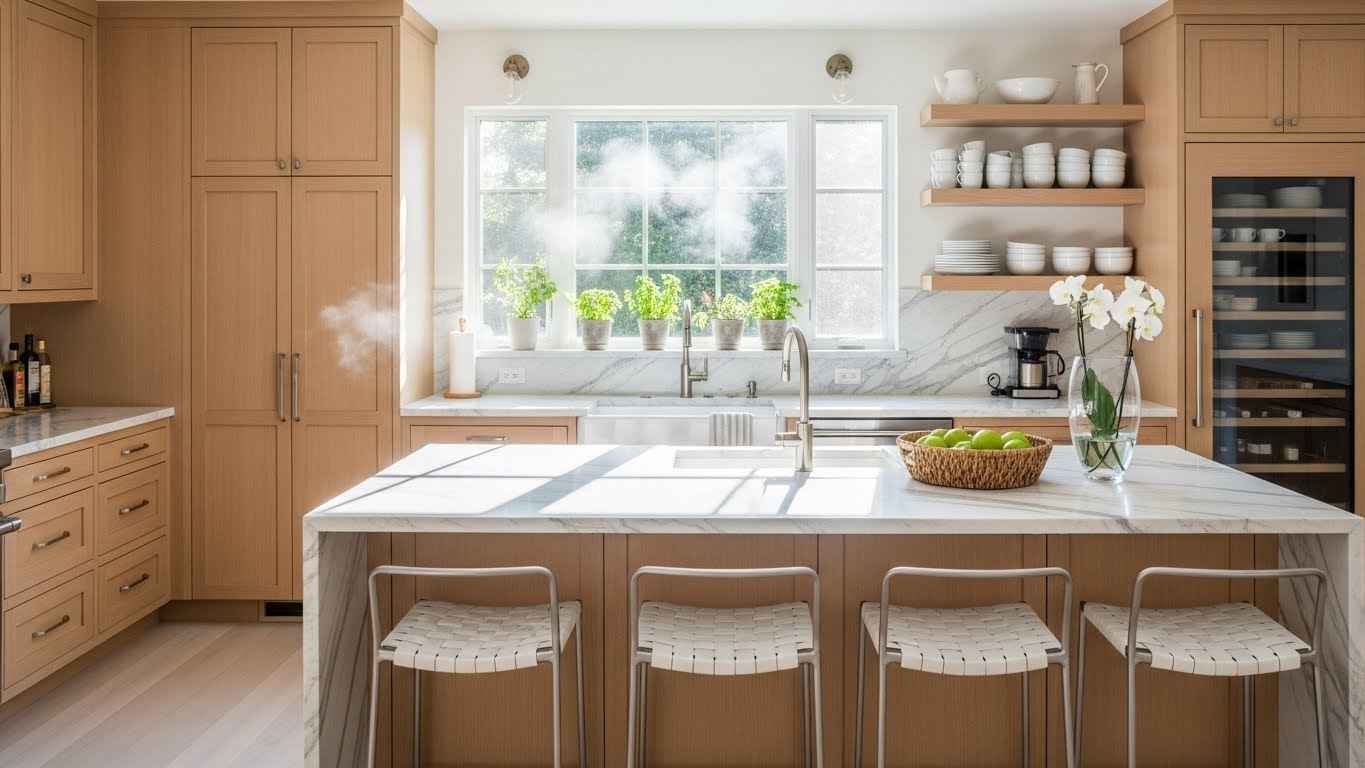
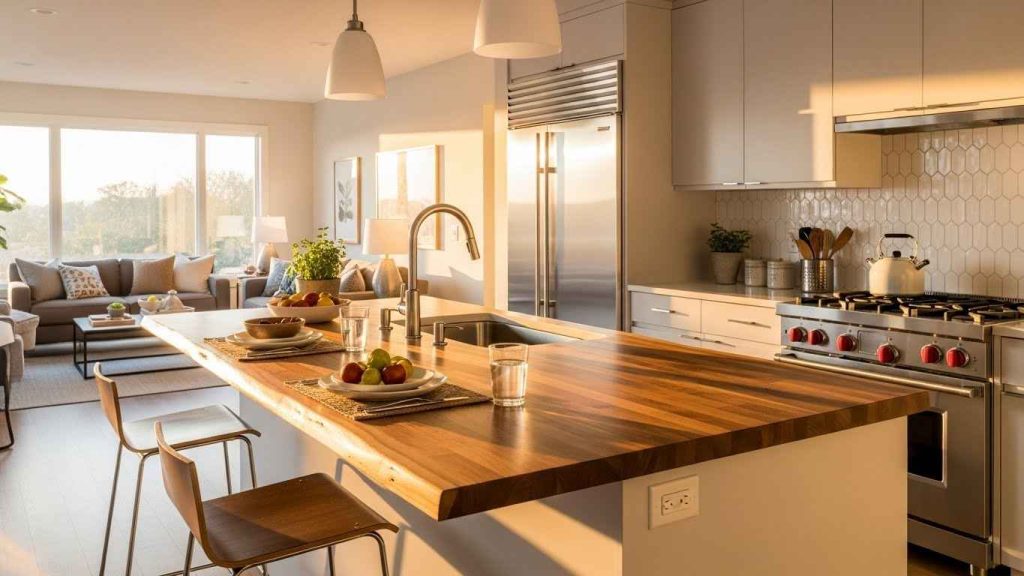
6. The Island as a Command Center
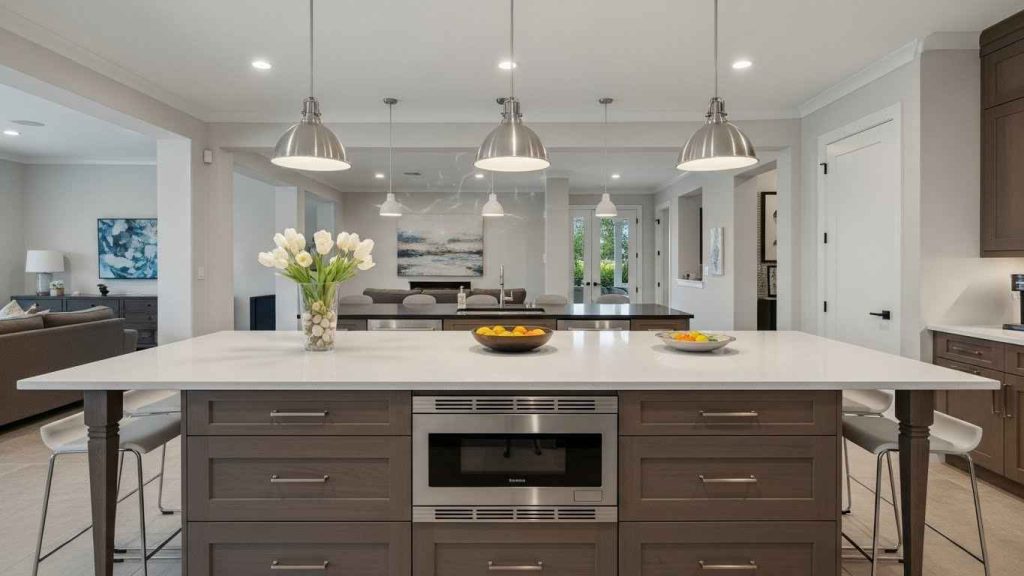
A kitchen island can be the main hub for prep work and socializing. Include a mix of drawers and cabinets tailored to your tasks. Deep drawers are perfect for pots, while shallow ones are great for cutlery. If you have plumbing, a sink in the island is very useful. A DIY idea is to add a power strip to a drawer to create a hidden charging station for devices.
7. The Vertical Storage Lift
Use the full height of your walls. Tall cabinets make a room feel larger and provide immense storage. Store less frequently used items on the highest shelves. Consider a library-style rolling ladder for safe access. This approach keeps clutter off your counters. A budget-friendly solution is to use tension rods inside a tall cabinet to create dividers for baking sheets and cutting boards.
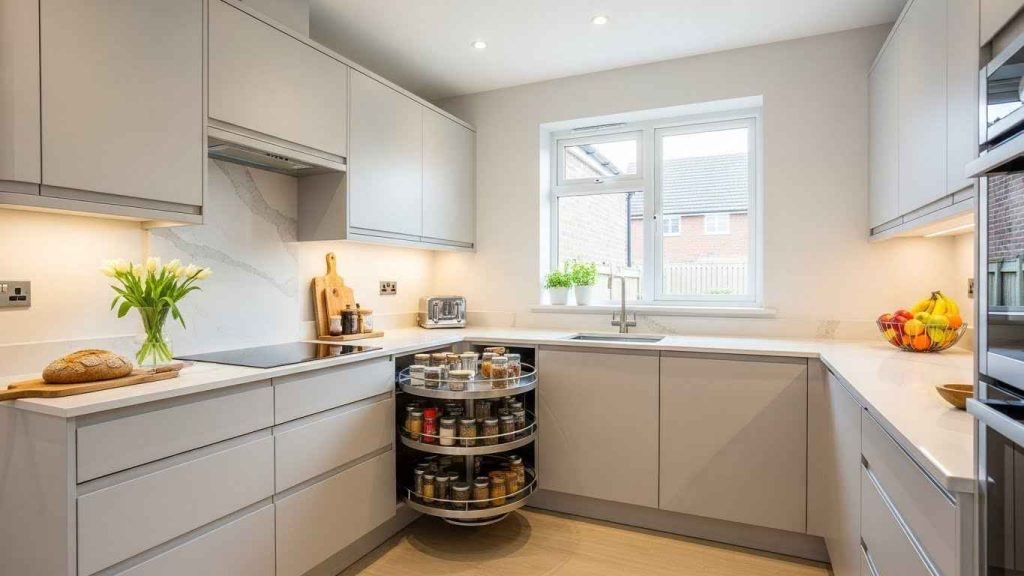
8. The Corner Cabinet Revival
Corner cabinets often become black holes. Revive them with functional inserts. Swing-out shelves or lazy Susans bring items to you. Pull-out systems use the full depth of the cabinet. This turns a difficult space into a highly useful one. Installing a lazy Susan is a cost-effective DIY project that anyone can tackle. It instantly doubles the usability of a corner.
9. The Appliance Garage Hideaway
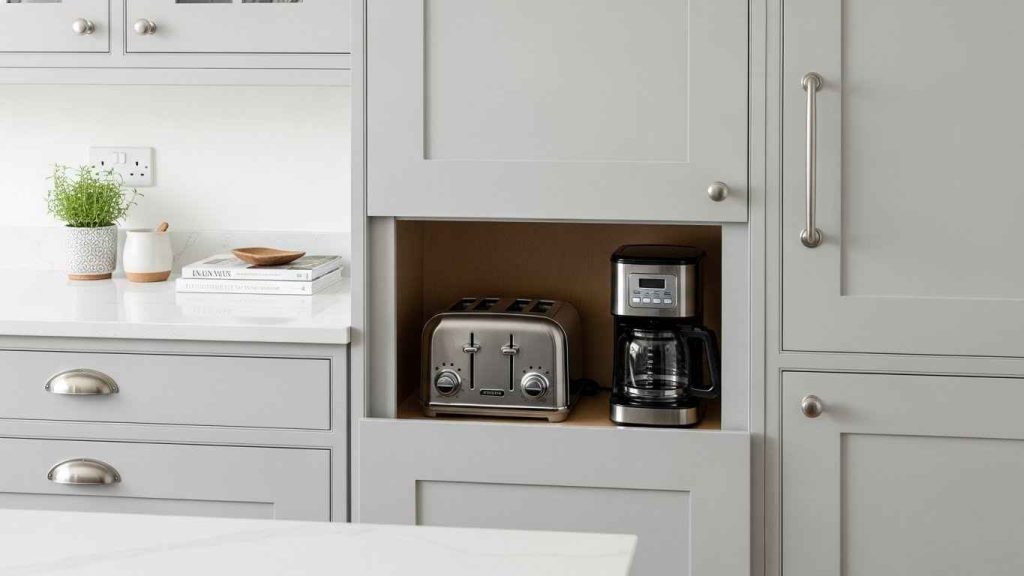
An appliance garage is a small cabinet that sits on the countertop. It hides small appliances like blenders and toasters. This keeps your counters looking clean. A tambour door that rolls up is a common feature. It saves space compared to a swinging door. You can build a simple box with a hinged door as a DIY garage. Just make sure there is an outlet inside for power.
10. The Open Shelving Swap
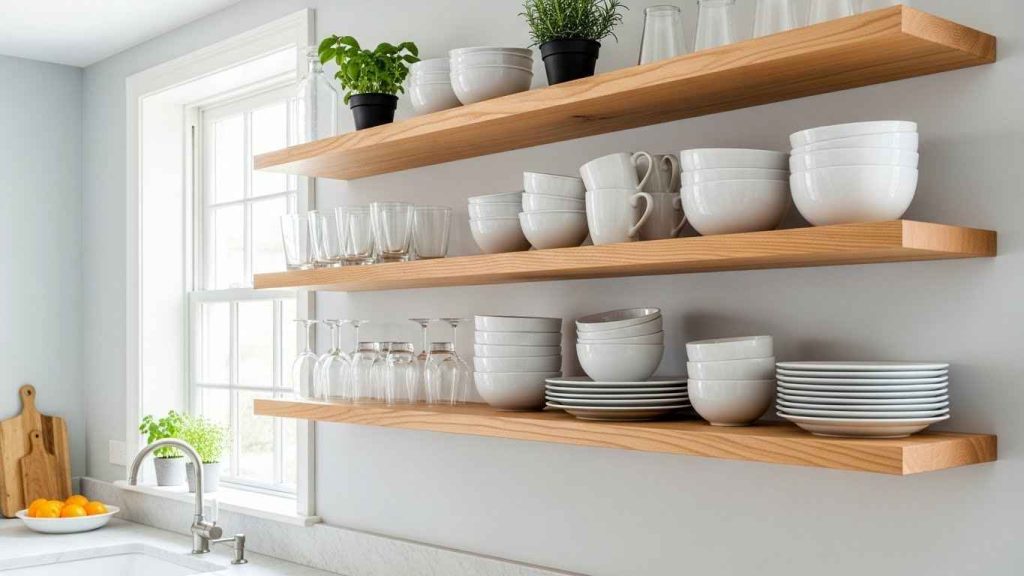
Replacing some upper cabinets with open shelves makes a kitchen feel larger. It encourages you to keep your prettiest dishes on display. This is also a great spot for frequently used items like everyday plates and mugs. It forces you to be tidy. This is a budget-friendly project because shelves are cheaper than custom cabinets. Use sturdy brackets and solid wood for a lasting finish.
11. The Under-Cabinet Drawer Dive
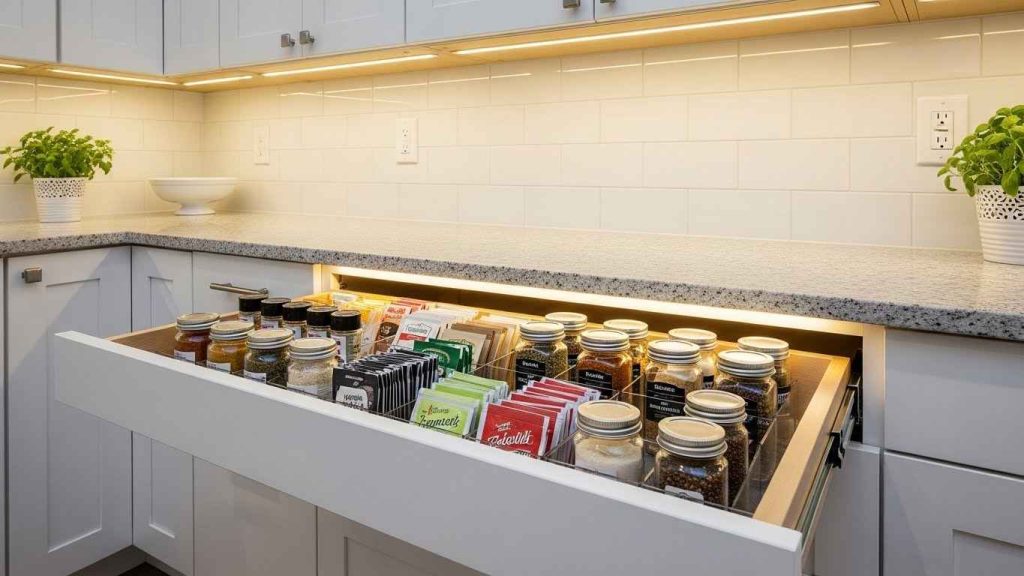
The space between your countertop and the bottom of your wall cabinets is valuable. Install shallow drawers here. They are perfect for flat items like lids, placemats, or spice jars. This keeps these items off the counter and within easy reach. You can attach a small, shallow basket with screws as a simple DIY under-cabinet holder for recipe cards or tea bags.
12. The Toe-Kick Drawer Secret
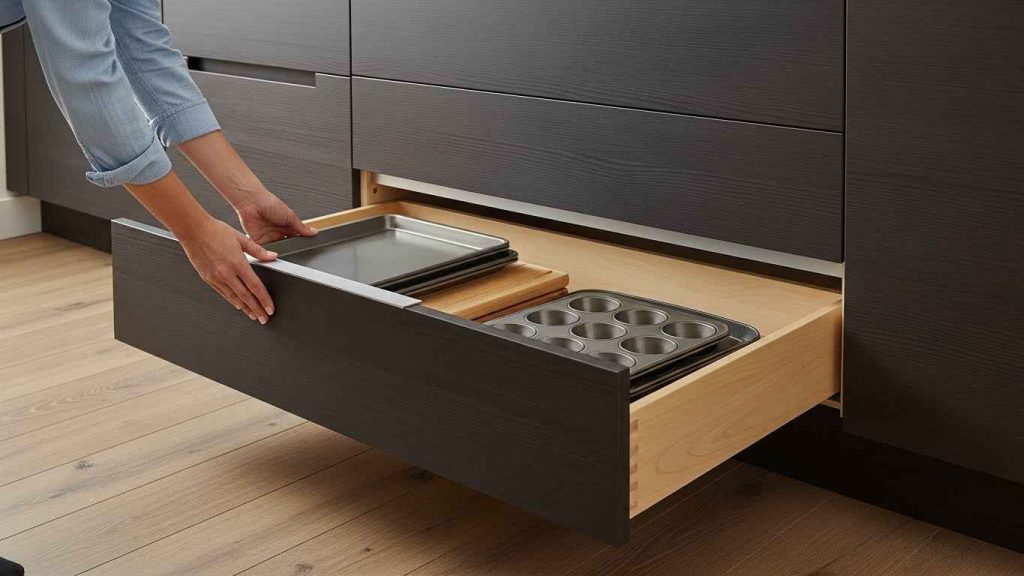
The toe-kick space under your base cabinets is often wasted. Toe-kick drawers are shallow compartments that slide out. They are ideal for storing flat pans, baking sheets, or even step stools. This uses every possible inch of your kitchen’s footprint. These are surprisingly easy to install as an aftermarket addition. You can find kits that fit standard cabinet depths.
13. The Plate Rack Insert
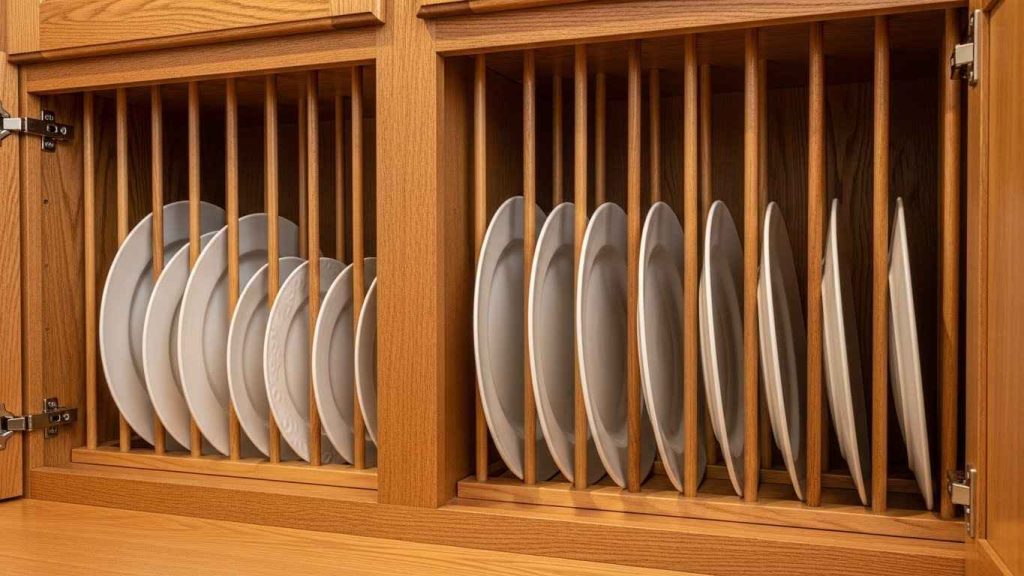
A plate rack keeps your dishes organized and prevents chipping. Plates stand on their edges, so you can see all your options at once. This also makes it easier to unload the dishwasher. You can find inserts for existing cabinets or build them into new ones. You can make your own plate racks with wood strips as a DIY weekend project. This protects your good dinnerware.
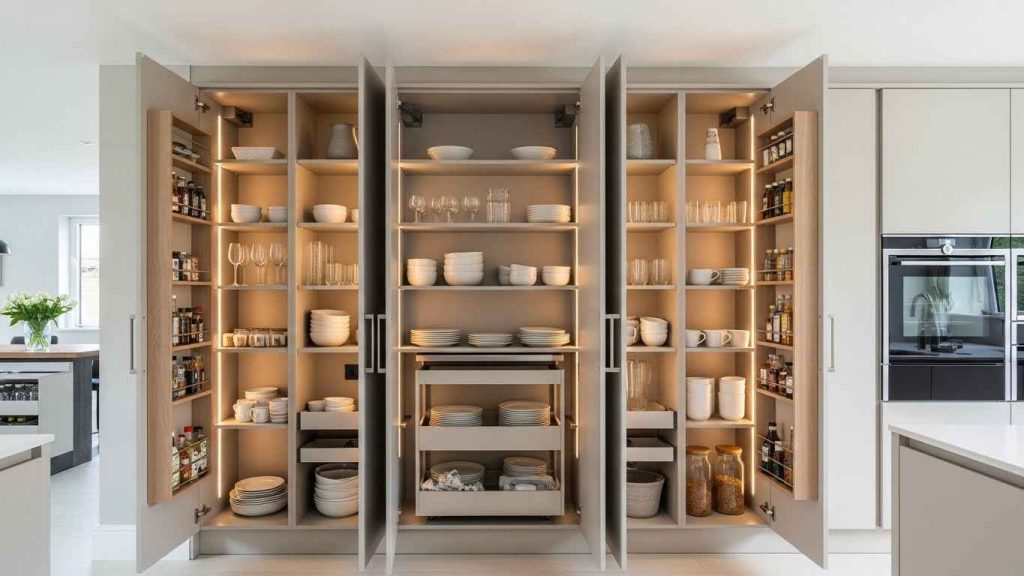
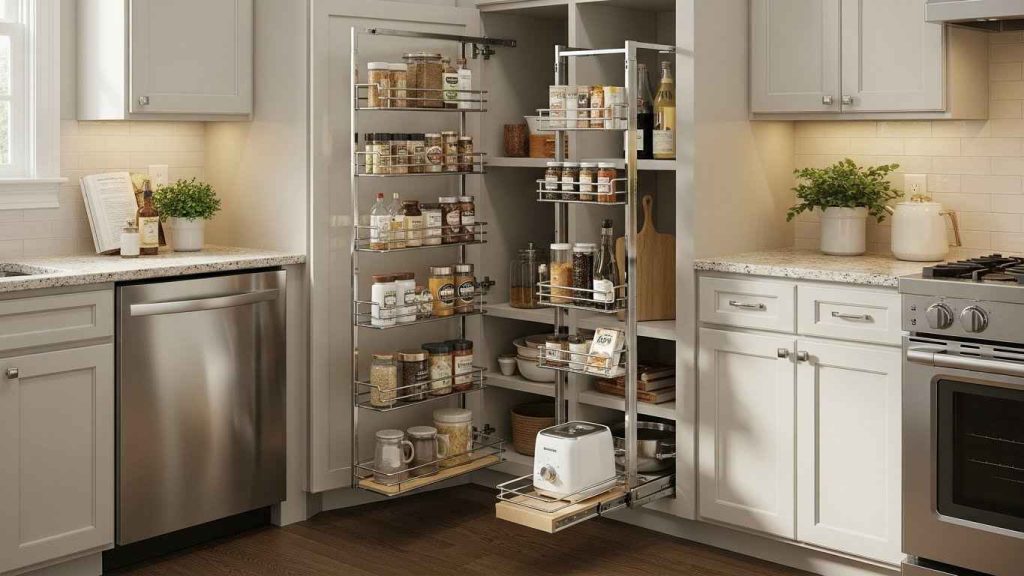
14. The Pull-Out Pantry Magic
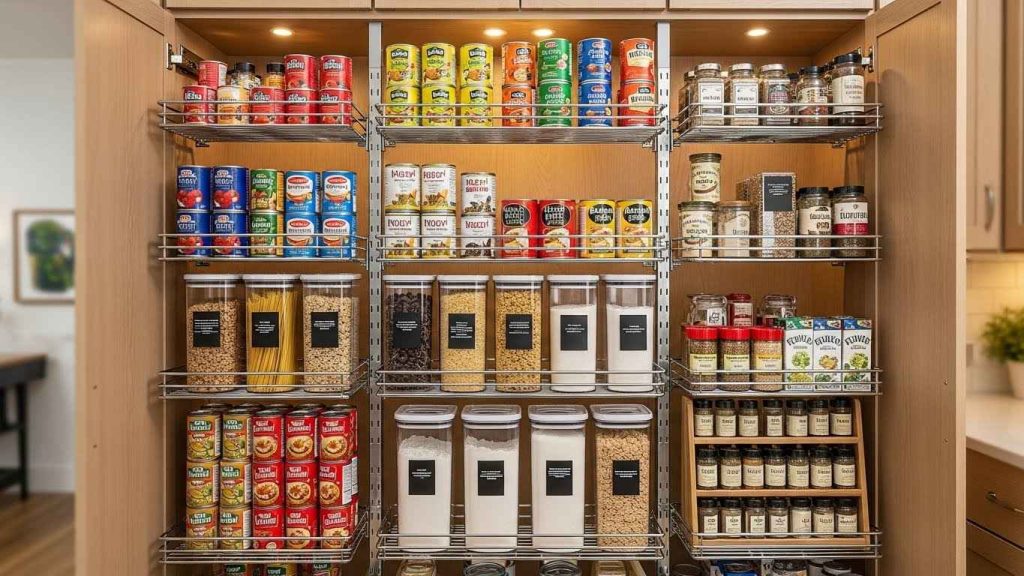
A pull-out pantry fits into a standard cabinet width. It brings all your food items into view with a simple pull. No more lost cans in the back of a deep cabinet. These systems use narrow spaces very effectively. For a budget-friendly version, use rolling wire shelves designed for closets. They can be placed inside a standard cabinet frame.
15. The Utensil Divider System
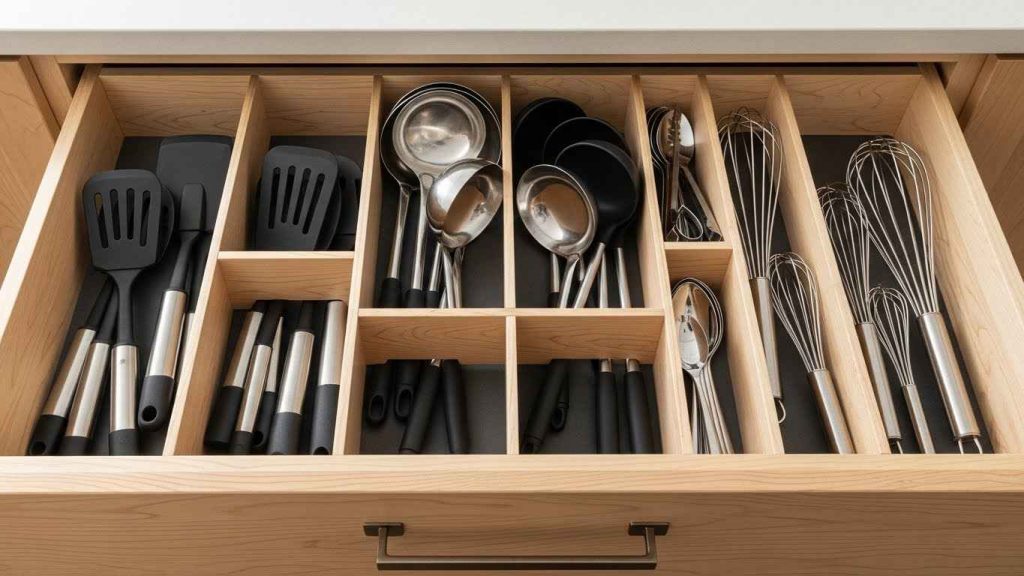
Dividers stop your utensil drawer from becoming a jumbled mess. You can find adjustable systems or custom-cut inserts. This saves time searching for the right tool while cooking. It also protects your utensils from getting scratched. A simple DIY fix is to use small cardboard boxes or inexpensive plastic bins to create sections within a large drawer.
16. The Spice Rack Reach
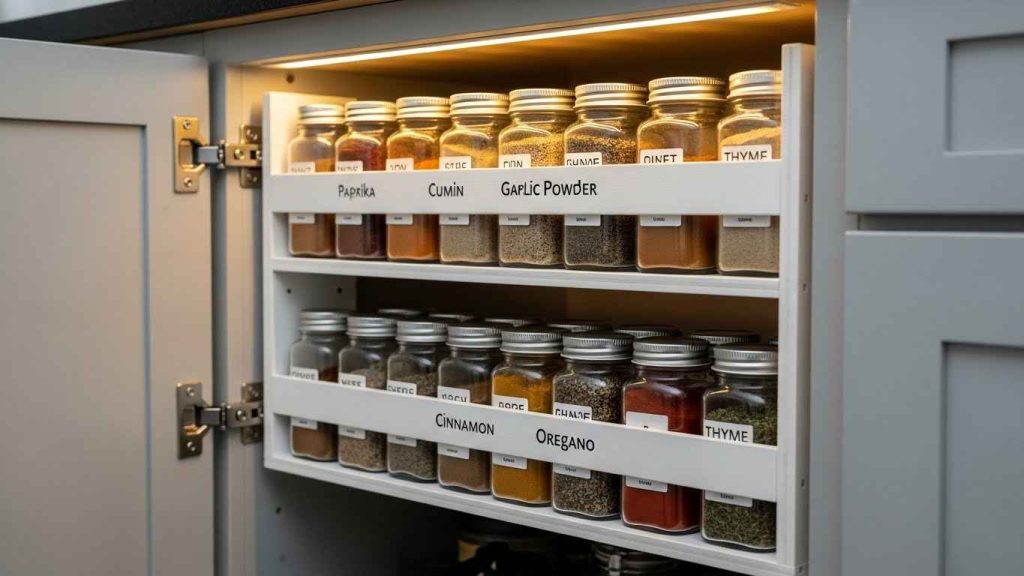
Store spices where you use them most—near the stove. A door-mounted rack keeps them visible and organized. This frees up valuable drawer or shelf space. Magnetic spice tins can also stick to the side of a refrigerator or a metal backsplash. You can attach a narrow, store-bought rack to any cabinet door with screws. This is a quick and budget-friendly organization project.
17. The Pot and Pan Hang-Up
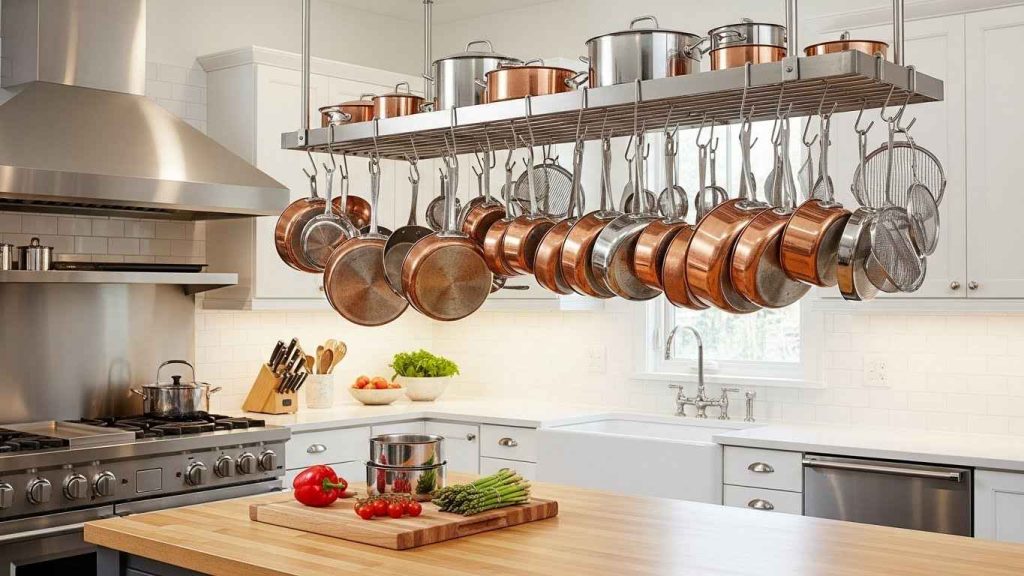
Hanging pots and pans saves cabinet space and makes them easy to grab. Use a ceiling-mounted rack or a wall-mounted system. This is especially helpful for heavy cast iron and large stockpots. It also adds a decorative element to your kitchen. A simple DIY option is to install a strong towel bar on your wall and use S-hooks to hang lighter pots and lids.
18. The Trash and Recycling Hub
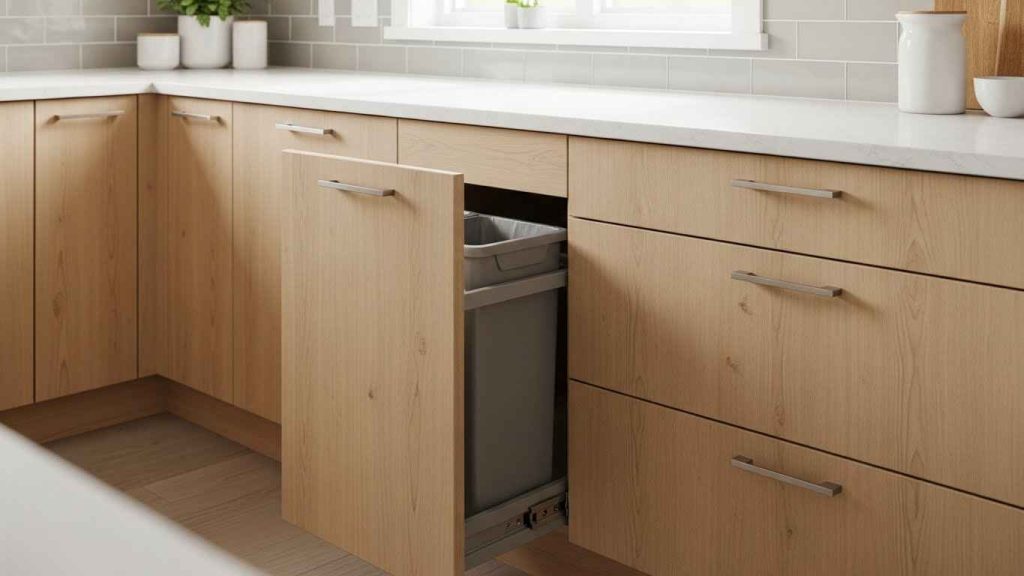
A dedicated cabinet for trash and recycling keeps bins out of sight. Pull-out systems make disposal neat and easy. You can often fit two or three bins for sorting waste. This is much better than a freestanding bin that gets in the way. You can retrofit a simple slide-out frame into an existing cabinet. This is a budget-friendly way to upgrade your kitchen’s functionality.
19. The Breakfast Station Nook
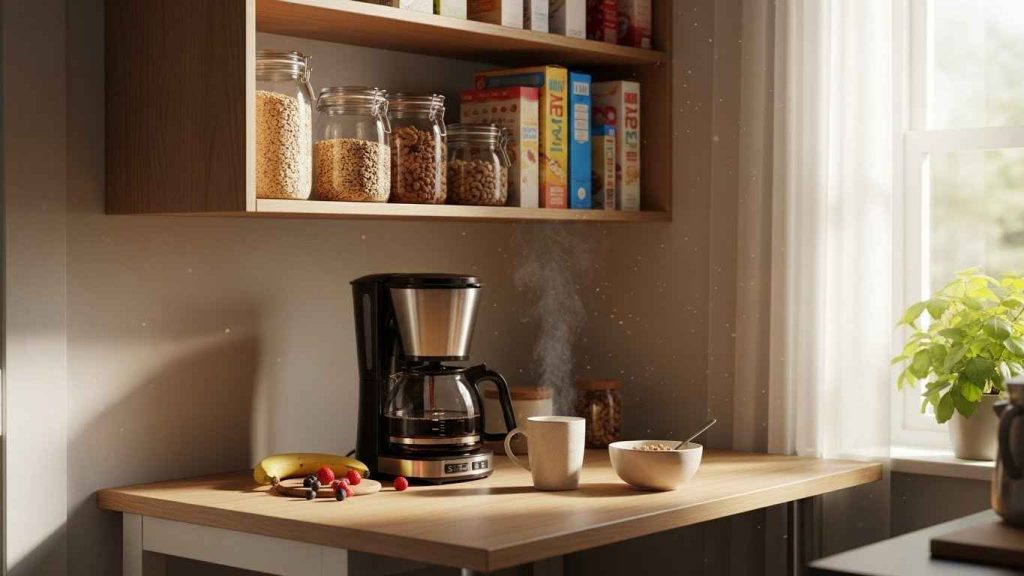
Designate a small area for morning routines. A breakfast nook might include a coffee maker, toaster, and storage for cereals and bowls. This prevents morning traffic jams at the main counter. Use a small section of countertop and the cabinet above it. You can create a dedicated zone by simply grouping these items together in one cabinet and on one counter section.
20. The Coffee Bar Corner
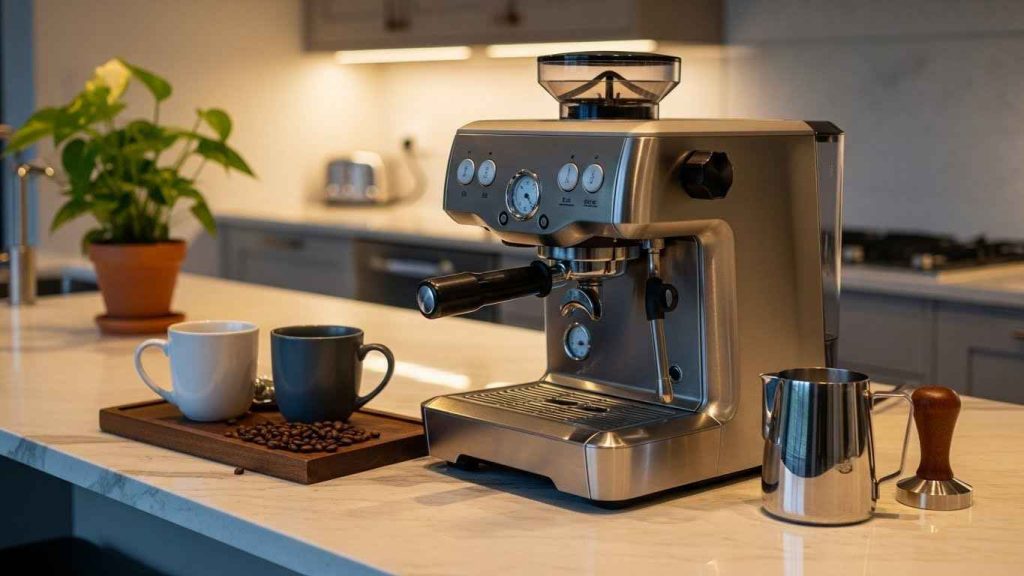
A dedicated coffee bar makes your morning ritual special. It can be as simple as a tray on the counter with your machine and mugs. Store coffee, filters, and sweeteners in the cabinet or drawer directly below. This contains the mess and creates a pleasant spot. Use a wall-mounted mug rack as a DIY project to keep favorite cups handy and add character.
21. The Baking Center Configuration
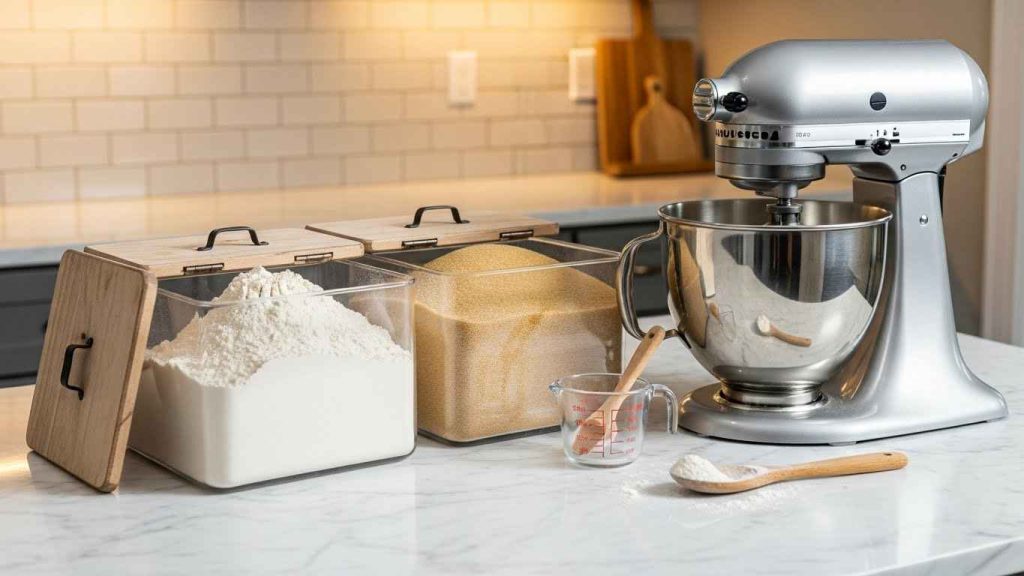
Group all your baking supplies in one area. This includes flour, sugar, baking powder, rolling pins, and mixers. A countertop for kneading dough is helpful. Store these items in a base cabinet with deep drawers for heavy bags of flour. You can use clear, airtight containers to store ingredients. This keeps them fresh and lets you see when you are running low.
22. The Double-Decker Wall Cabinets
Double-decker cabinets use vertical space efficiently. The bottom section is at a comfortable height for everyday items. The top section holds seasonal or less-used dishes. This design is perfect for kitchens with high ceilings. You can add a second set of doors to existing tall cabinets as a DIY project to create this two-level effect.
23. The Glass-Front Illusion
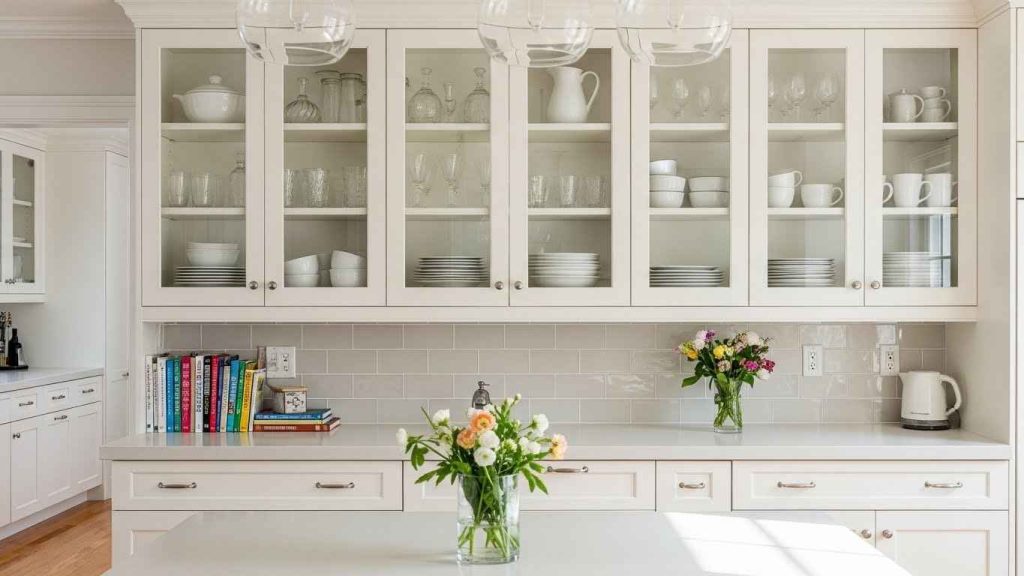
Glass-front cabinets make a kitchen feel more open and less heavy. They encourage you to keep the contents tidy. Use them for displaying nice glassware or a matching dish set. Frosted or textured glass can hide less-than-perfect items. For a budget-friendly change, you can remove the solid doors from a few cabinets and paint the interior a bright color.
24. The Flush-Fit Inset Style
Inset cabinet doors fit within the cabinet frame for a flat, uniform look. This style offers a clean, classic appearance. It requires precise craftsmanship for a perfect fit. The result is a seamless and elegant kitchen. While custom, you can achieve a similar look by updating your cabinet hardware. Choose simple, flat pulls that enhance the clean lines.
Start with one change that would help your kitchen flow better. Maybe it is adding a lazy Susan to a corner or installing a drawer divider. Small, intentional updates can make your daily routine much smoother. You do not need to do everything at once. Choose one project for this weekend.