Luxury kitchen inspo grabbed me after the time I ruined a Carrara countertop with red wine. I still save kitchens that look effortless but survive daily life. Here are exactly 14 kitchens I keep in my future-house folder, budgets mostly $50 to $6,000, a few splurges up to $15,000. Zillow still says kitchen remodels often recoup about 70% at resale, and Houzz finds kitchens remain homeowners’ top renovation focus.
I’m pulling styles from modern to farmhouse, mostly under $1,500 for the smaller tweaks, with a few full-kitchen splurges. These suit open-plan, small, and family kitchens. Lately I’ve noticed warmer woods, mixed metals, and green cabinetry showing up everywhere.
1. Open Shelving with Warm Wood and White Ceramics
Style: Bright & Airy | Budget: Under $200 | Best For: Small kitchens
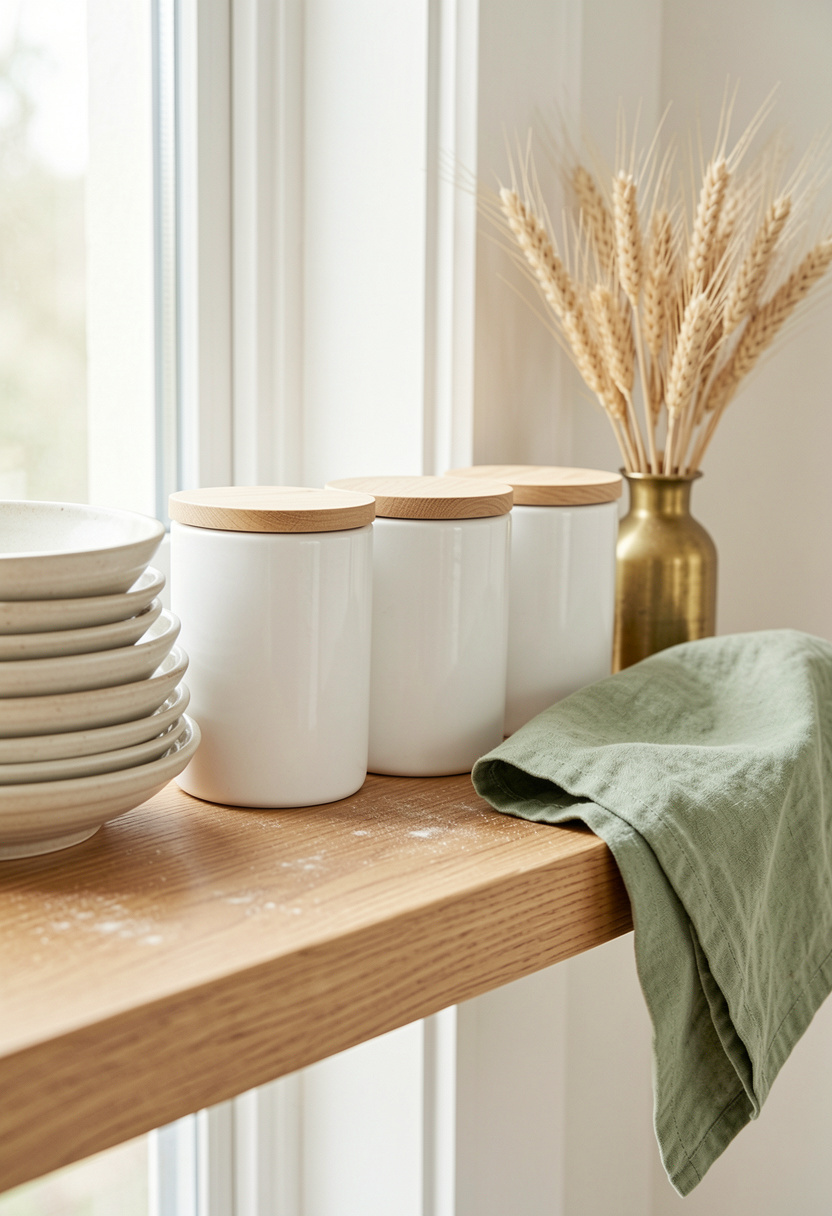
Open shelving looks expensive but hides dirt poorly. The trick is to limit display to the prettiest everyday items. I used 24-inch acacia shelves and matched matte white ceramic canisters to keep things uniform, which cost me around $35 to $50 per canister set. Install shelves on studs and use concealed brass brackets for strength. I found the canisters at HomeGoods once, but Amazon search saved me time for replacements.
Shop this idea:
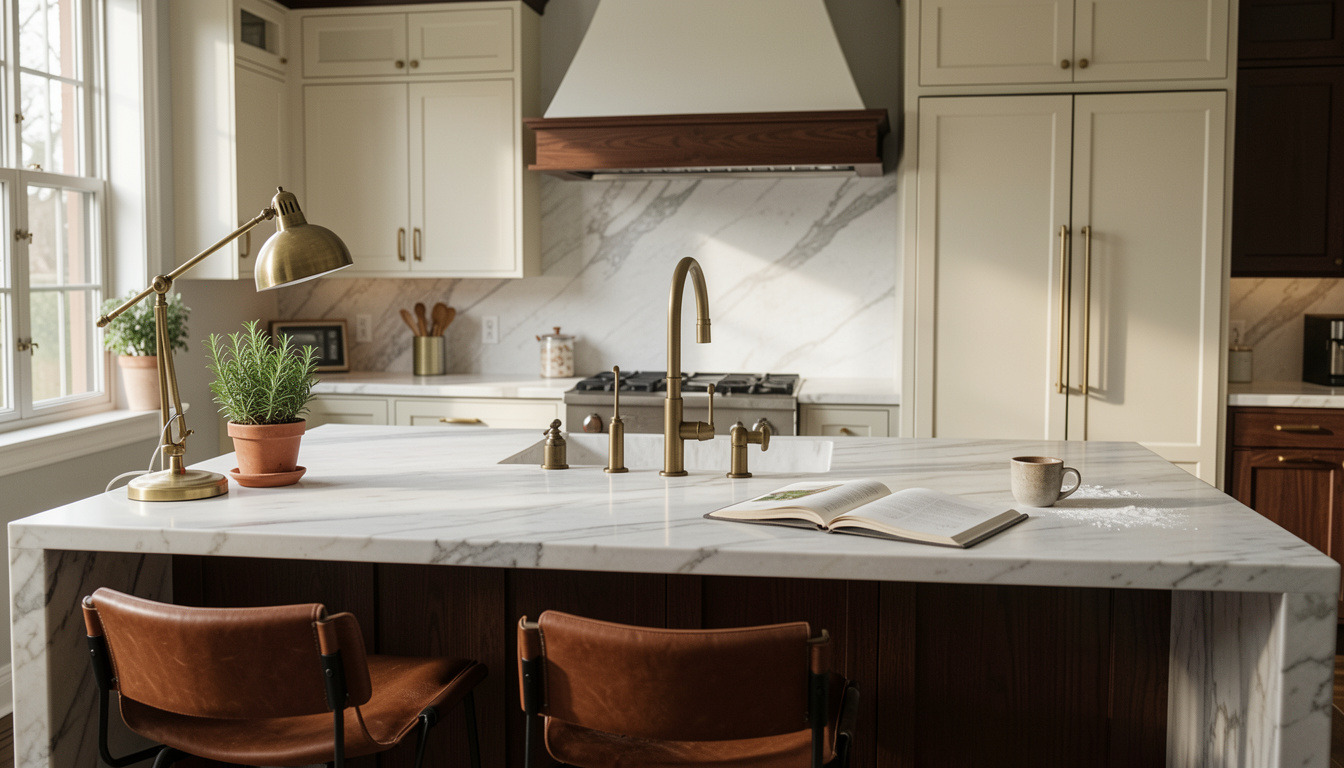
2. Marble Waterfall Island With Leather Stools
Style: Modern Luxe | Budget: $1,200 to $8,000 | Best For: Open-plan homes
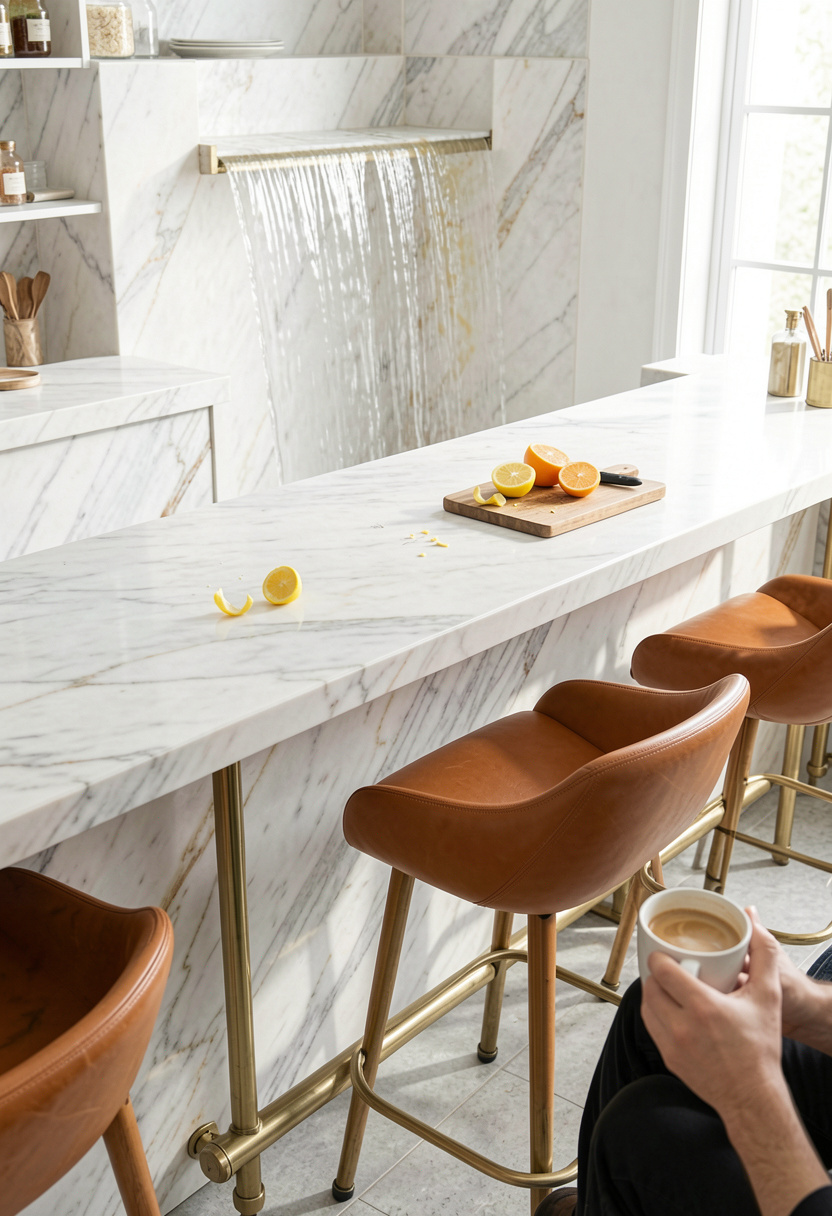
A waterfall island looks like money, but real marble stains and chips easily. I went honed quartz with a marble look for about $1,200 to $3,500 and got the aesthetic without constant coddling. Leather stools in saddle brown warm the palette. For maintenance, seal natural stone yearly, or pick quartz for near-zero upkeep. I once tried raw Carrara and regretted the etch marks after a spilled salad dressing.
Shop this idea:
3. Two-Tone Cabinetry: Deep Green Base, Cream Tops
Style: Bold & Saturated | Budget: $400 to $3,000 | Best For: Statement kitchens
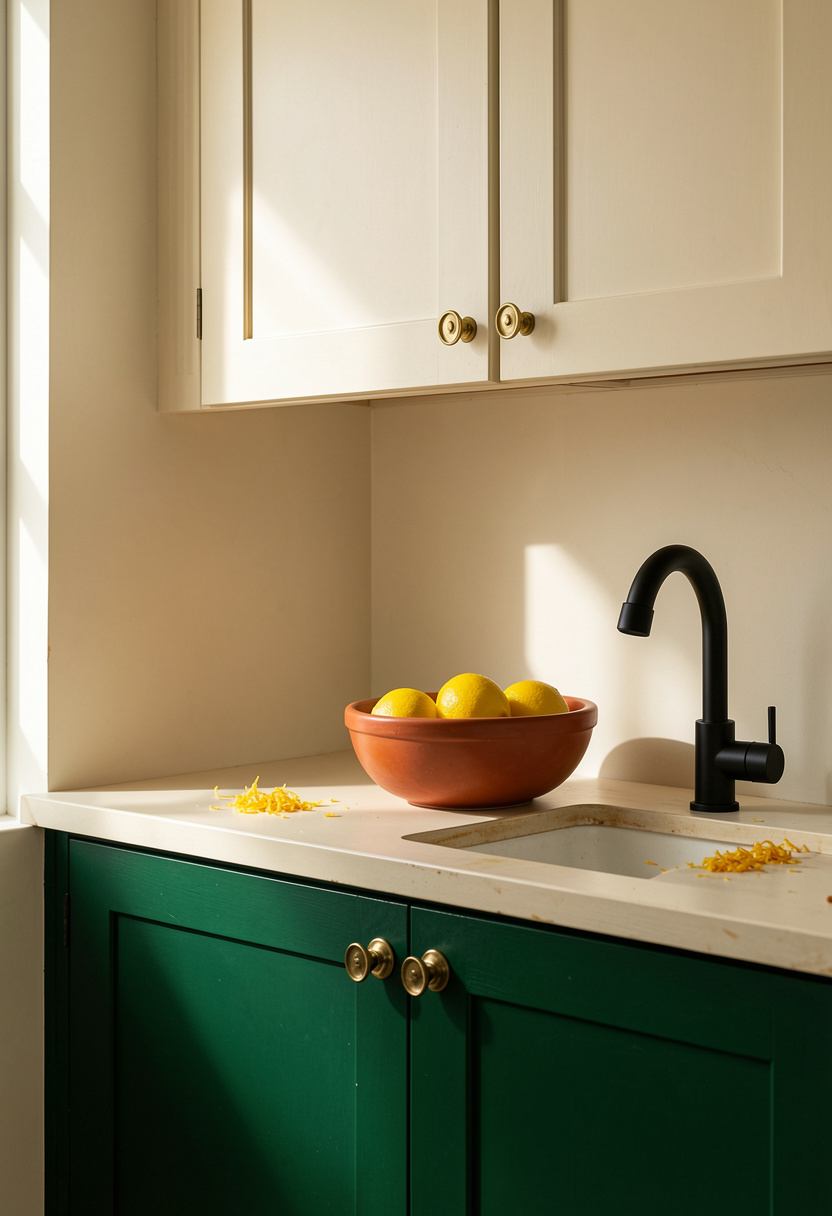
Painting lowers in deep green and uppers cream immediately elevates a kitchen and hides scuffs on the base. I used satin cabinet paint in Forest Night for the lowers and Benjamin Moore Chantilly Lace for the uppers, costing around $400 to $1,000 if you DIY. Tip: sand, prime, and use cabinet-grade semi-gloss for durability. People assume darker paint shows less wear, but low-traffic matte finishes can show finger marks.
Shop this idea:
4. Integrated Appliance Walls for Sleek Lines
Style: Modern | Budget: $2,000 to $15,000 | Best For: Large kitchens
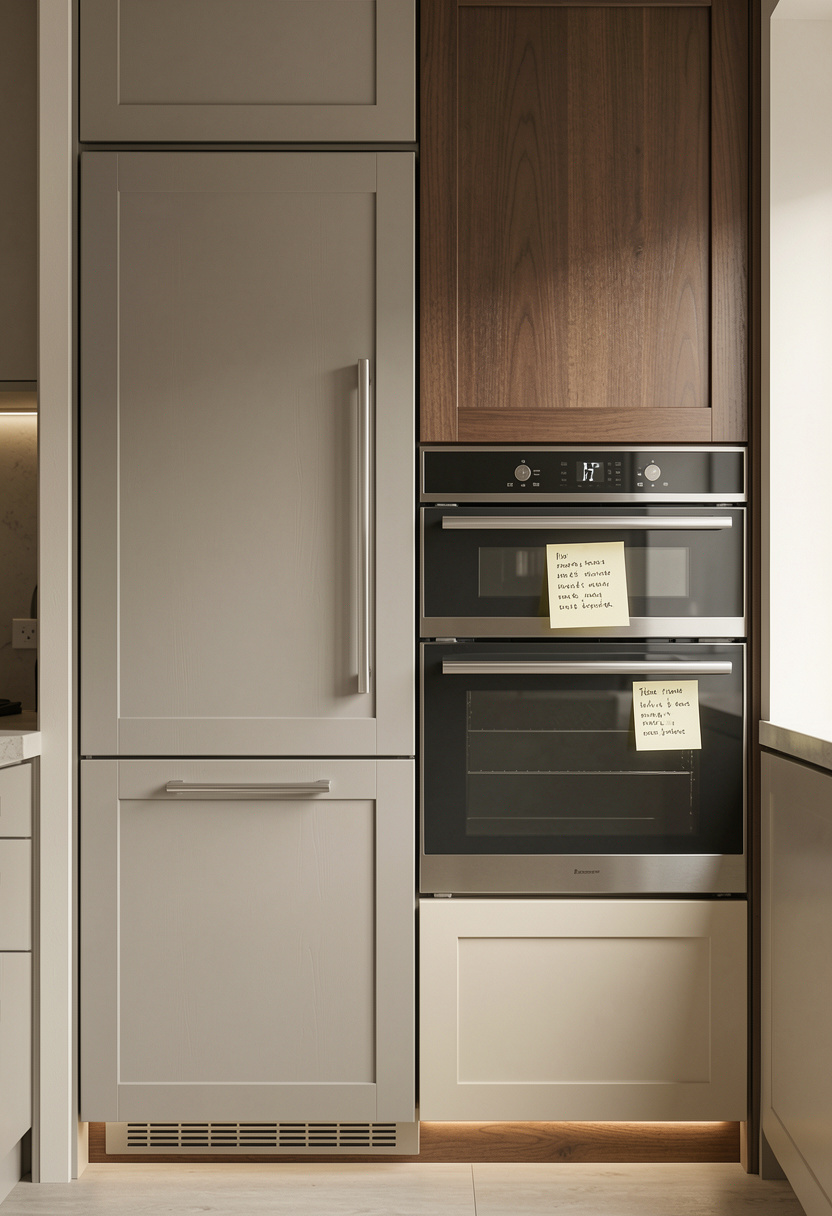
Integrated appliances make a kitchen feel custom but add cost and complexity. I swapped my old fridge for a panel-ready model and paid about $2,500 to $6,000. Measure clearances carefully and leave room for ventilation. One ugly truth is that panel-matched fridges can go out of alignment and need shim adjustments. My contractor taught me to keep a 1/8-inch gap allowance for doors.
Shop this idea:
5. Statement Brass Faucet and Mixed Metals
Style: Moody & Cozy | Budget: $150 to $900 | Best For: Traditional and modern mixes
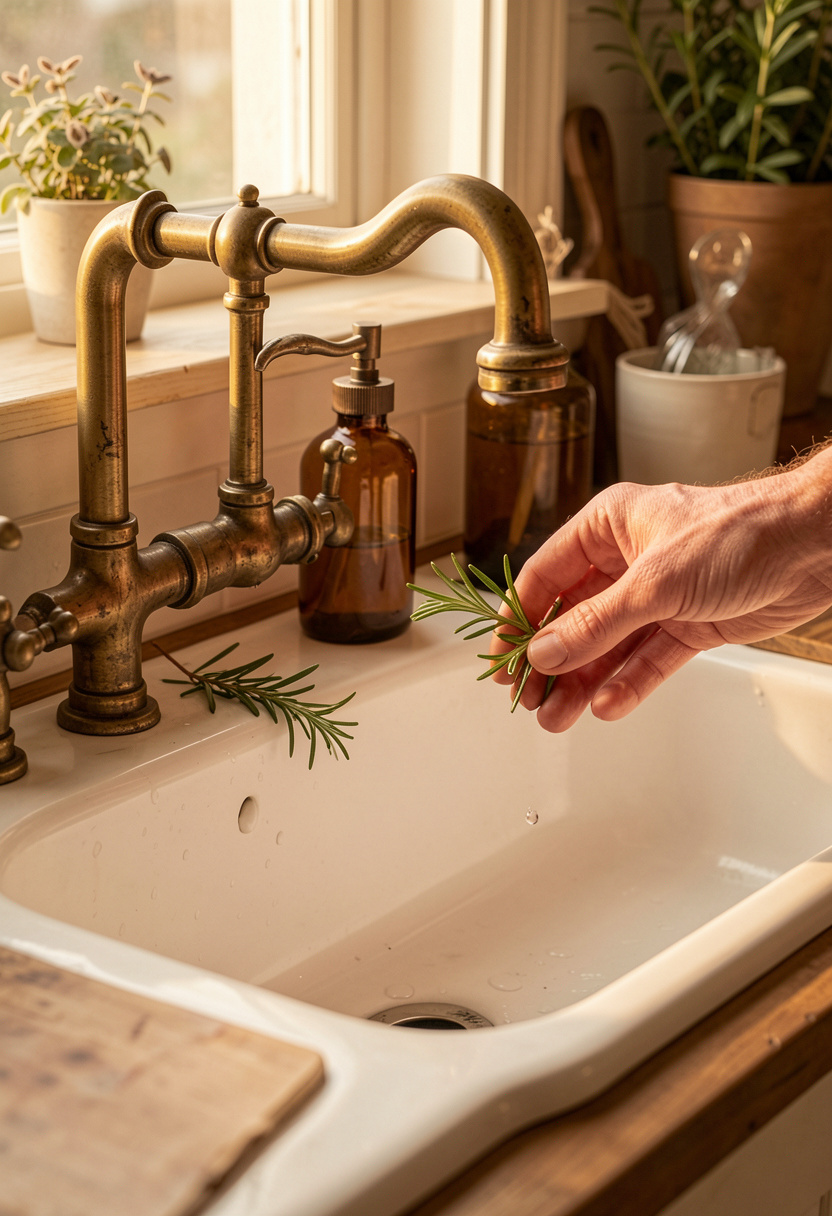
Brass lifts a kitchen instantly but often needs polishing. I went for aged brass finish so it patinas beautifully and hides fingerprints, which cost around $150 to $450. Mixing metals feels intentional when you repeat one metal in small doses, like cabinet pulls and light fixtures. Install with plumber’s tape to avoid leaks. I regret my first shiny brass choice; the finish felt cheap after six months.
Shop this idea:
6. Full-Height Backsplash in Large Porcelain Slab
Style: Modern Minimal | Budget: $200 to $2,000 | Best For: Sleek kitchens

A single porcelain slab behind the cooking zone looks luxe and wipes clean better than grout. I sourced a veined slab that cost around $400 to $1,500 including cuts. Leave a small reveal at the edges for expansion and choose a calibrated slab for predictable veining. Ugly truth: subway tile is cheaper but grout yellows over time, so if cleanliness matters, splurge on large-format.
Shop this idea:
7. Hidden Pantry With Sliding Barn Door
Style: Rustic Luxe | Budget: $300 to $2,000 | Best For: Homes needing storage

A hidden pantry hides clutter but can feel like a missed opportunity if shallow. I built deep adjustable shelves and used uniform glass jars for visibility. Costs vary, $300 for a basic barn door to $2,000 for custom joinery. Tip: use sliding hardware rated for the door weight to avoid sag. Early in my renovation I used cheap hardware and the door stuck constantly.
Shop this idea:
8. Built-In Coffee & Beverage Station
Style: Modern Farmhouse | Budget: $150 to $2,500 | Best For: Busy mornings
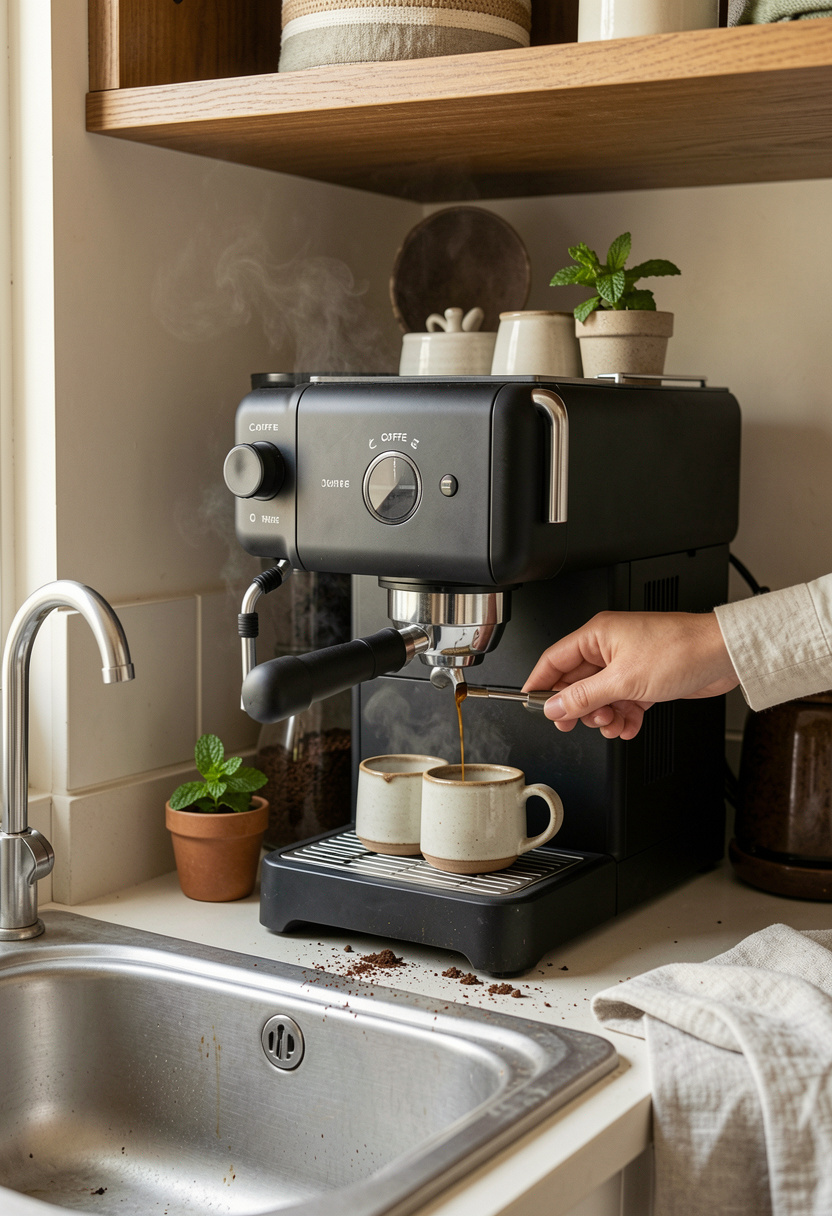
Designate a different counter for caffeine to keep the main prep area clear. My mini station has a small under-counter fridge, espresso machine, and drawer for filters, costing $150 to $2,500 depending on appliances. Use a water-softening filter if your machine is sensitive. I used to keep my coffee on the island and the constant crumbs drove me nuts.
Shop this idea:
9. Statement Hood With Tile or Metal Cladding
Style: Bold & Saturated | Budget: $300 to $5,000 | Best For: Chef-level kitchens
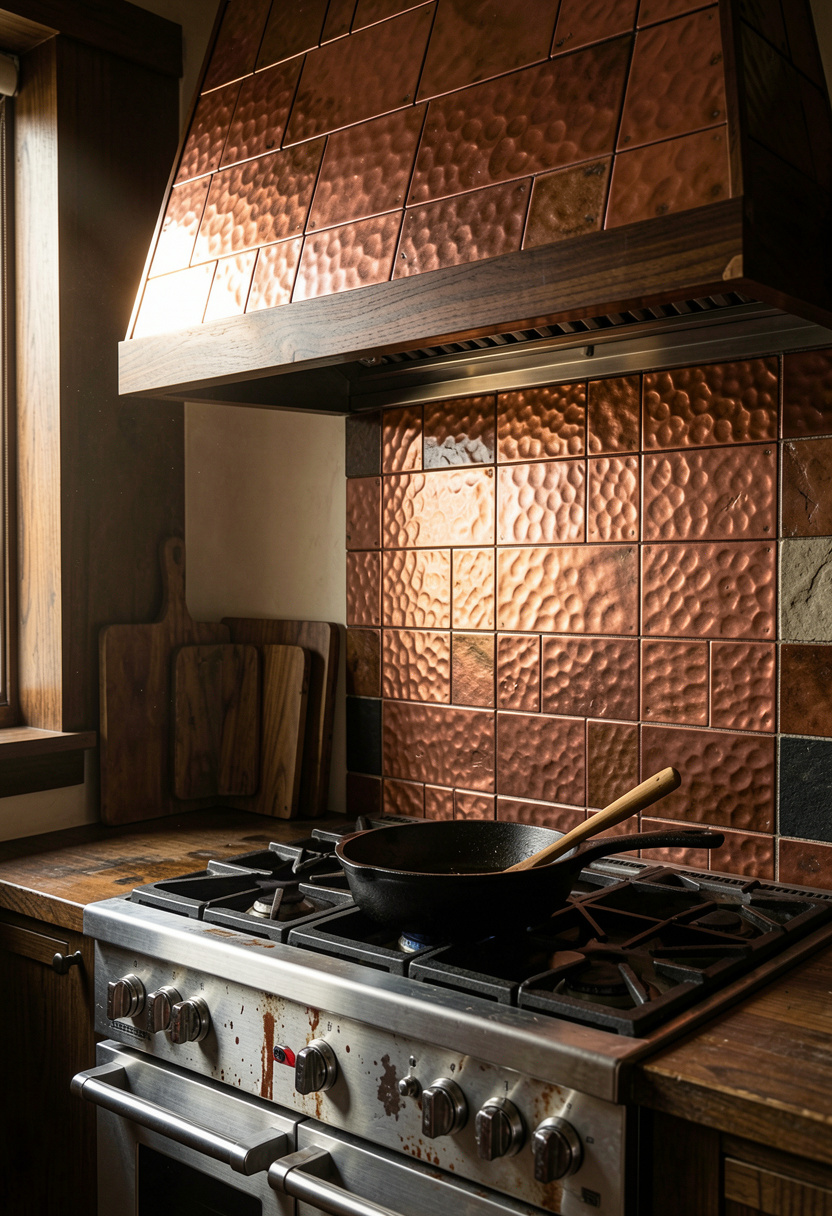
A statement hood pulls the room together but can overwhelm a small kitchen. I picked a hammered copper cladding at about $1,200 to $3,000 including install. If you want drama without cost, tile a hood surround instead. Ugly truth: ornate hoods require regular degreasing or they look shabby. My first ornate hood collected grease and needed pro cleaning.
Shop this idea:
10. Glass-Front Cabinets to Showware
Style: Bright & Airy | Budget: $150 to $1,200 | Best For: Collected kitchens
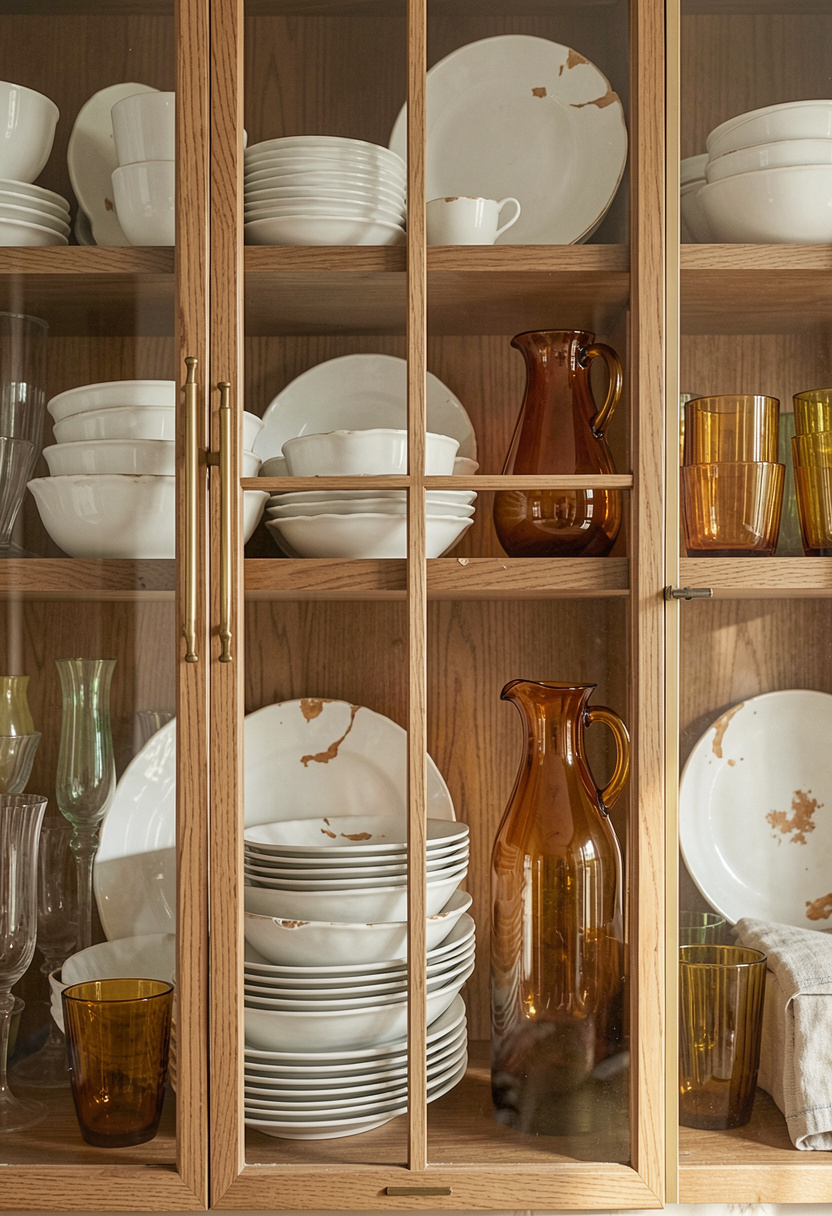
Glass fronts show off the best pieces but reveal the rest. I limit displays to 12-15 items per cabinet and use consistent white or clear glassware to look curated. Lighting inside cabinets makes a real difference. I once left mismatched dishes behind glass and guests asked where my good plates were, which taught me to edit ruthlessly.
Shop this idea:
11. Under-Cabinet Drawers and Appliance Garages
Style: Functional Luxe | Budget: $100 to $1,500 | Best For: Practical families
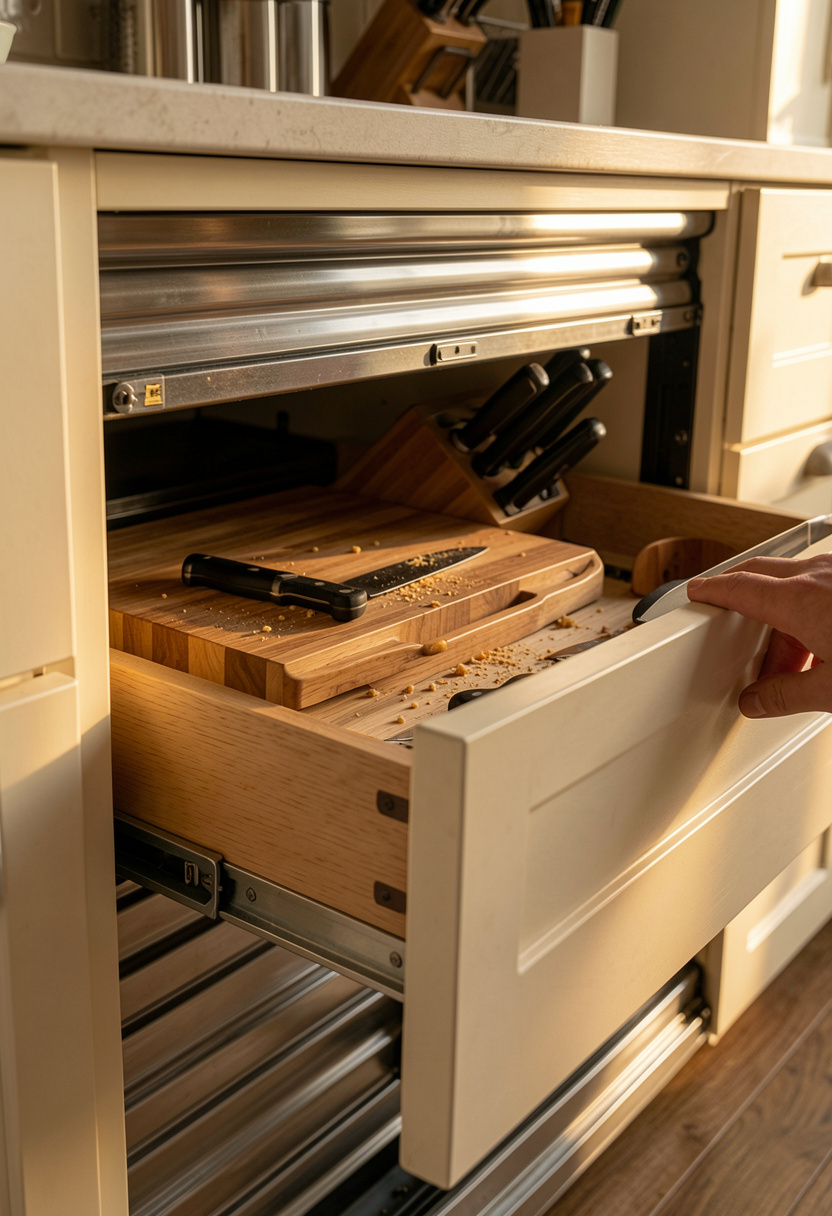
Hidden storage transforms counters. I installed a roll-up tambour appliance garage for my toaster and stand mixer to free counter space, costing $150 to $900. Soft-close under-cabinet drawers are a small splurge that prevents slamming. Practical tip: keep heavier appliances in lower pull-outs for safety. I learned the hard way when my mixer nearly fell during a rushed morning.
Shop this idea:
12. Layered Pendant Lighting Over Island
Style: Modern Farmhouse | Budget: $80 to $1,200 | Best For: Islands and breakfast bars
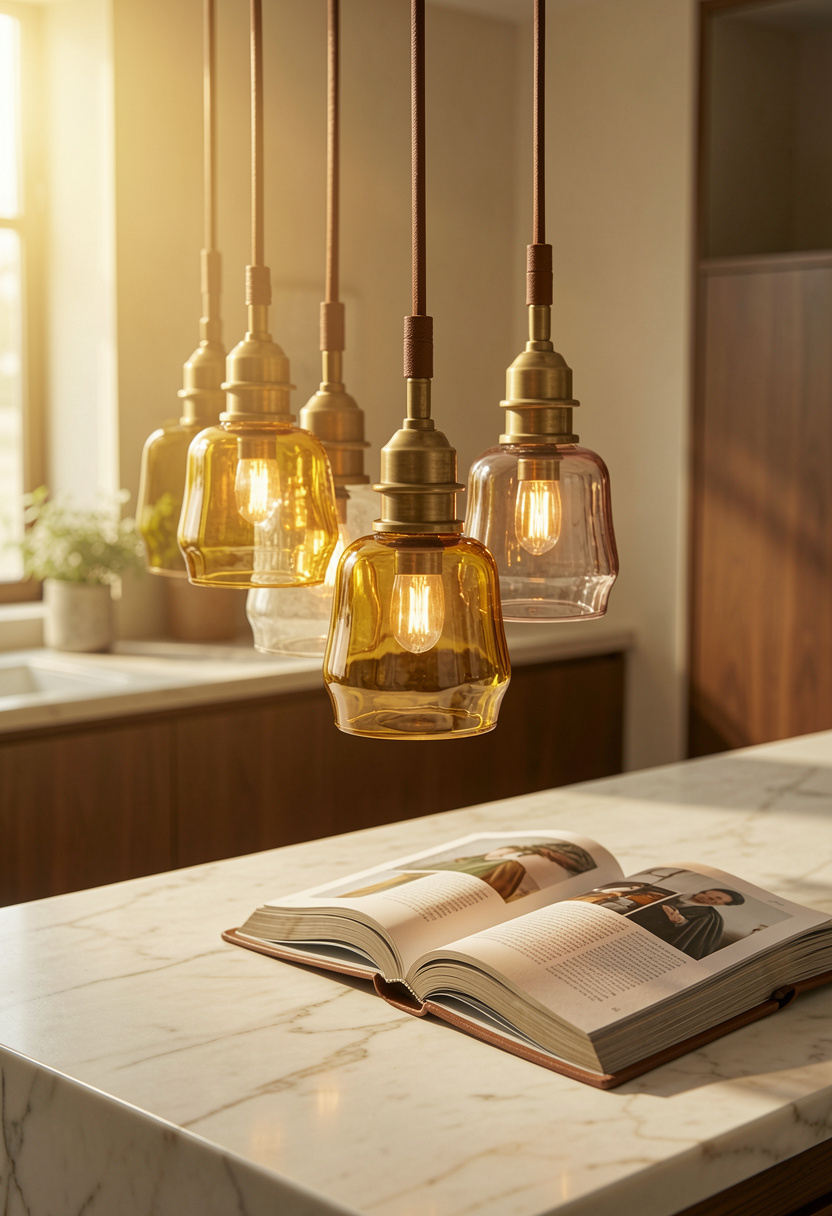
Pendant lighting can define an island but scale matters. I use pendants roughly one third the island depth and stagger heights by 3 to 4 inches for a layered look. My pendants cost $80 to $350 each, and swapping bulbs can change the mood. Ugly truth: oversized fixtures dwarf islands; measure before you buy. Guests still comment on my pendant heights, so it’s worth the fuss.
Shop this idea:
13. Terracotta Tile Accents and Warm Floors
Style: Bold & Saturated | Budget: $300 to $4,000 | Best For: Mediterranean and eclectic kitchens
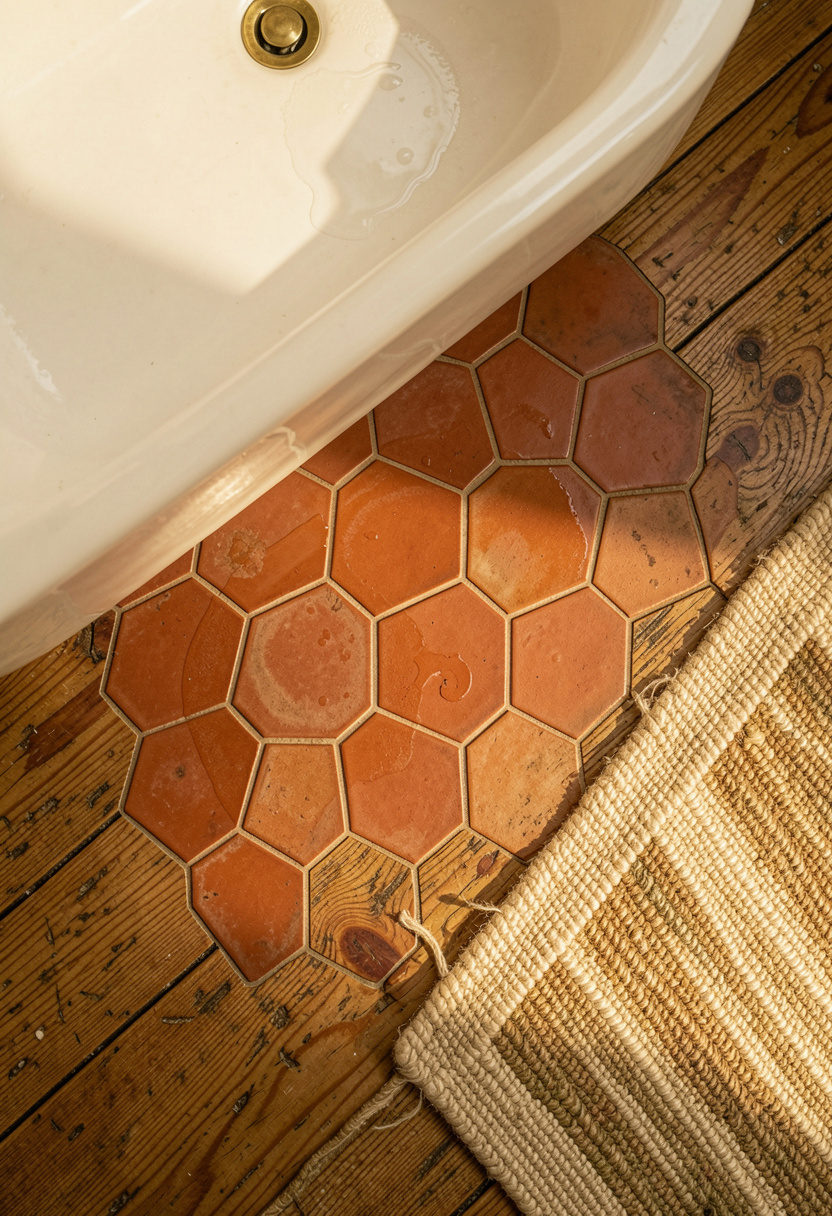
Terracotta brings warmth and hides dirt well on floors near prep zones. I inset a terracotta tile hex at the sink for visual interest and used sealed tiles costing around $300 to $1,200. Use a penetrating sealer designed for terracotta and re-seal yearly. I learned to seal twice after the first rainy season and the color settled into a richer tone.
Shop this idea:
14. Window Herb Garden and Deep Sill Styling
Style: Bright & Airy | Budget: Under $150 | Best For: Urban kitchens, cookers
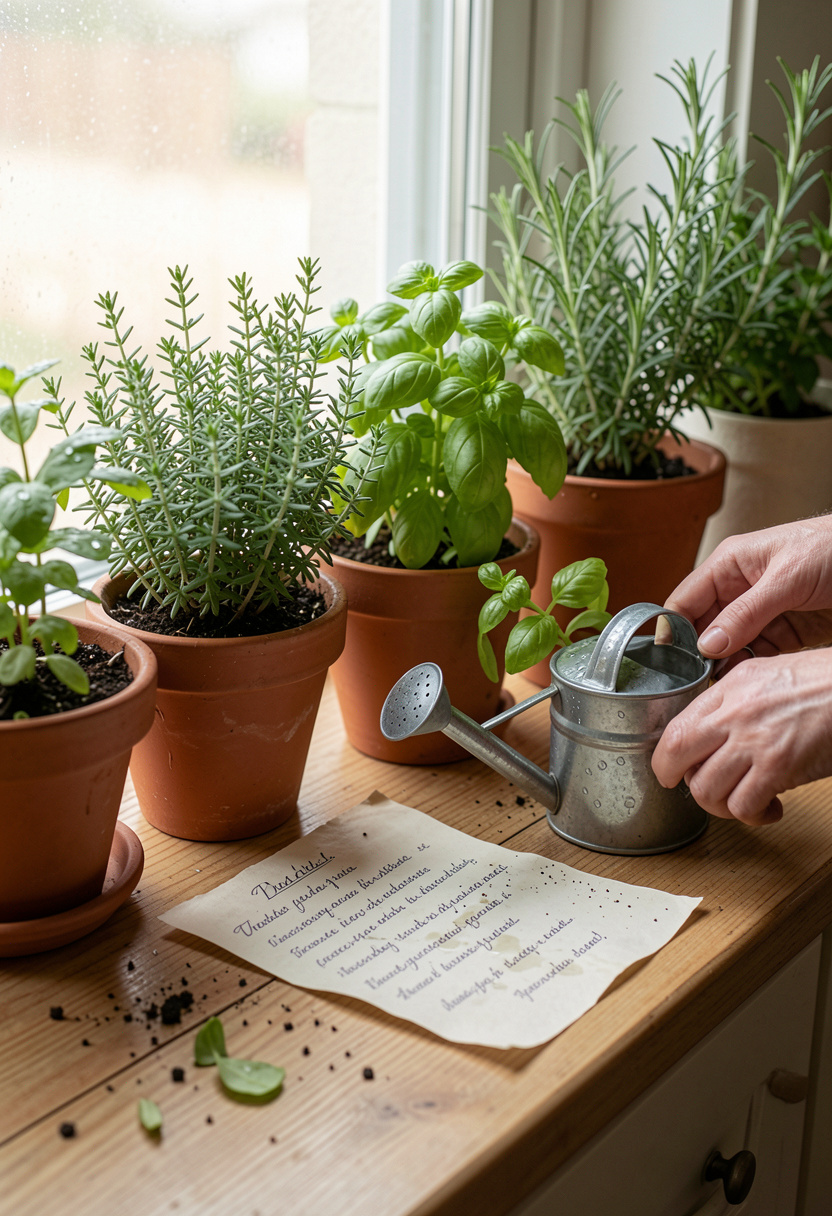
Fresh herbs are the cheapest luxury. I built a deep sill and keep basil, thyme, and rosemary in terracotta pots that cost around $5 to $15 each. Rotate pots so the sun reaches all plants and use saucers to avoid rings on the sill. Ugly truth: herbs die fast if you overwater; let topsoil dry slightly between waterings. Guests always smell the kitchen before they see it.
Shop this idea:
What You'll Need to Get This Look
Countertop & Storage
- Marble look quartz slab around $1,200 to $3,500
- Acacia floating shelves 24 inch around $30 to $120 each
- Tambour roll up door kit around $60 to $300
- Under counter mini fridge around $150 to $600
Wall Decor & Open Shelving
- Large format porcelain slab around $200 to $1,500
- Glass front cabinet doors around $50 to $200 each
- Blown glass pendant light around $80 to $350
Textiles & Soft Goods
- Sage linen tea towels set around $15 to $40
- Woven runner rug 2×6 around $30 to $150
Greenery & Freshness
- Terracotta herb pots set around $10 to $40
- Set of glass pantry jars around $20 to $80
Budget Swaps
- Aged brass spray paint around $8 to $20 (spray old pulls)
- Peel and stick porcelain tile around $25 to $120 (backsplash swap)
- Under cabinet LED strip lights around $15 to $60 (thrift + new mix)
Shopping Tips for These Looks
Measure Twice, Order Once: Measure island depth and cabinet heights and compare to product specs, then order samples like quartz chip samples from vendors such as Marble look quartz slab around $5 to $15.
Thrift Then Fill: Hunt for vintage hardware at flea markets, then replace with matching new Brass cup pulls 3 inch around $8 to $25 to get the curated look for less.
Seasonal Clearance: Big fixtures and appliances go on sale late fall; I scored pendants during Black Friday for about 30 percent off from typical pricing at Blown glass pendant light.
Test Finishes at Home: Ordered paint and metal samples and taped them up in morning and evening light before committing, using Forest green cabinet paint around $30 to $60.
Mix New With Heirloom: Display a family bread board next to a new marble-look tray to make a new kitchen feel collected; source trays like Teak cutting board large around $25 to $80.
Frequently Asked Questions
Q: What’s the most budget-friendly way to get a luxe island look?
A: Use a marble-look quartz slab on the visible faces and cheaper plywood beneath. Try a sample of Marble look quartz slab. Also pick leather or faux-leather stools for warmth without the stool splurge.
Q: Are open shelves high-maintenance?
A: Yes, they collect grease and dust faster than closed cabinets. Keep display to 8 to 12 items and use easily washable pieces like the Matte white ceramic canister set.
Q: How do I mix metals without it looking messy?
A: Pick one dominant metal and repeat it in 3 spots, then add a secondary metal in 1 to 2 accents. Start with a Aged brass pull down faucet as your anchor.
Q: What lighting makes a kitchen feel luxury at low cost?
A: Layered lighting, especially under-cabinet LEDs plus a statement pendant, gives depth. I use affordable Under cabinet LED strip lights to great effect.
Conclusion
Start with one thing that changes both function and mood, like switching to a marble-look quartz island or adding under-cabinet LED lighting. My tip is to test small finishes first, then splurge on the one feature you touch daily. Which of these 14 kitchens would you try first in your space?