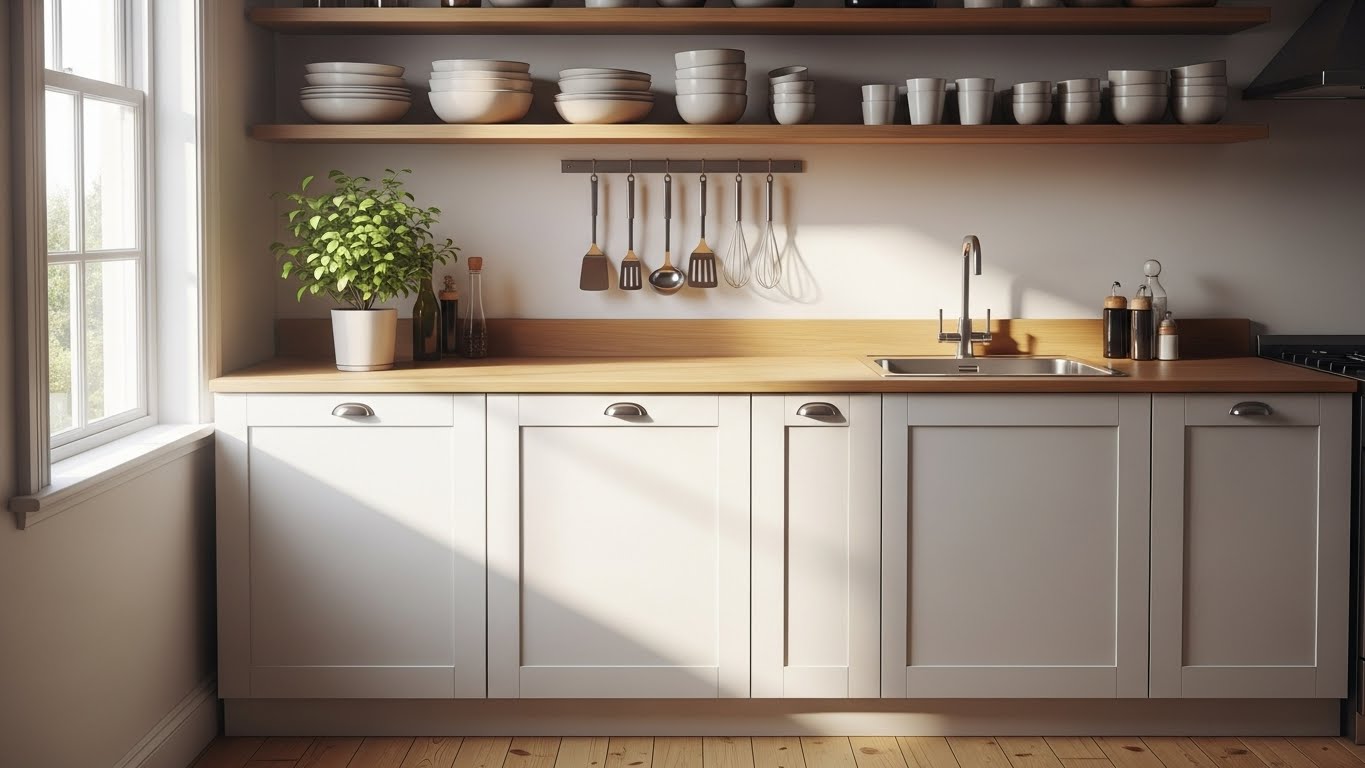
A small kitchen does not have to feel cramped. With smart storage, you can create a space that feels open and works well. These simple ideas use walls, doors, and hidden spots to clear your counters. You can do many of them in an afternoon. Start with one change and see how much better your kitchen feels.
1. Hang a Multi-Tiered Utensil Rack
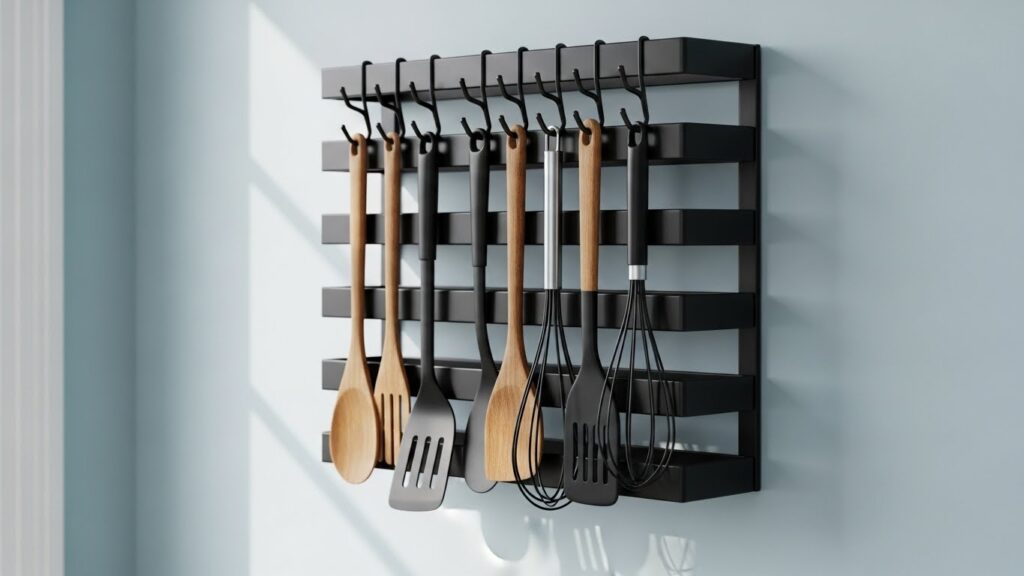
Free up drawer space by moving your most-used tools to the wall. A tiered rack keeps everything visible and within easy reach. This stops you from digging through a messy drawer while cooking. Look for a simple design that holds a lot without taking up much room. A simple DIY project involves using two narrow wooden boards and some sturdy hooks. Mount them one above the other for a custom two-level rack.
2. Install Magnetic Strips for Knives
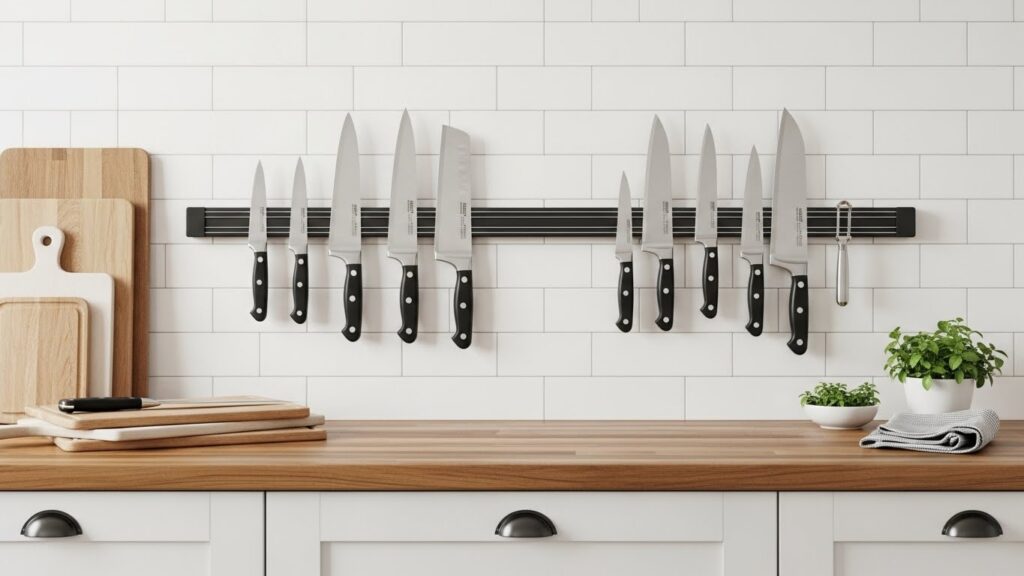
A knife block eats up precious counter space. A magnetic strip mounted on your wall is a much better option. It keeps your knives safe, organized, and easy to grab. Make sure the strip is strong enough to hold the knives securely. For a budget-friendly version, find a strong magnetic tool holder from a hardware store. It works just as well as kitchen-specific models and often costs less.
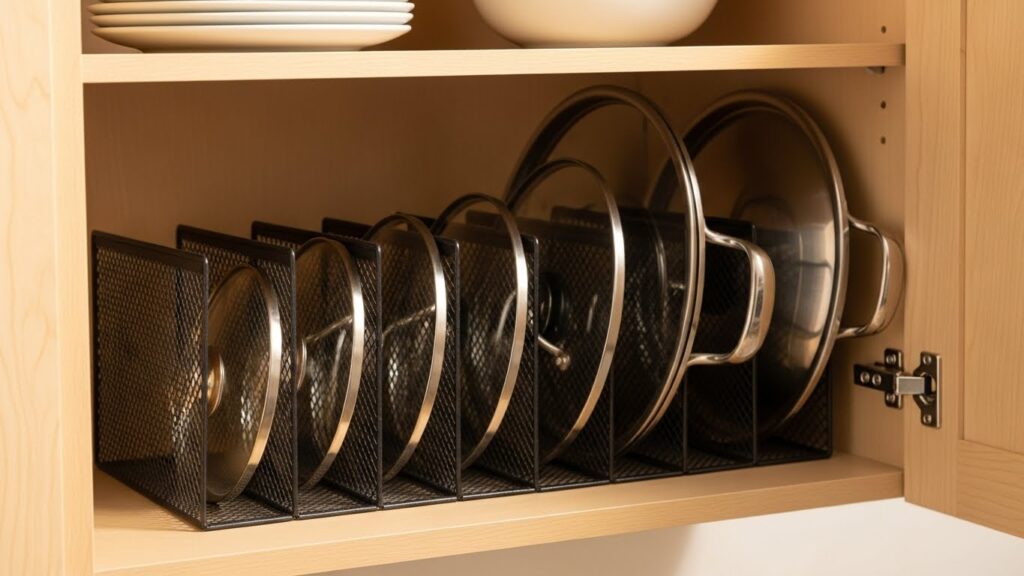
3. Use Tension Rods for Pan Lids
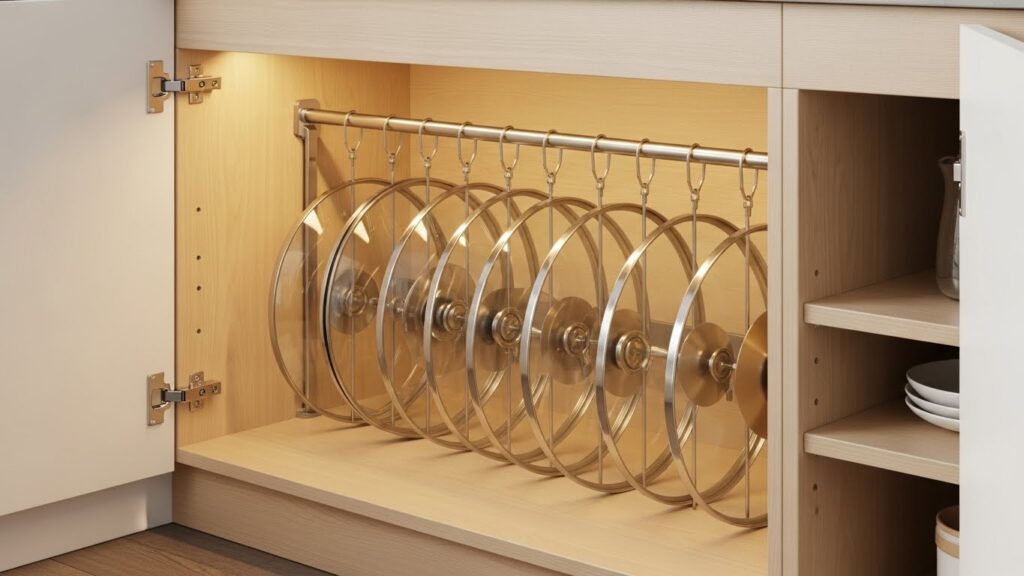
Stop pot lids from sliding around and creating noise in your cabinet. A simple tension rod can create a dedicated spot for them. Place it vertically in a cabinet to form a lid organizer. This is a quick fix that requires no tools or permanent installation. This is a great DIY that takes minutes. Just adjust the rod to fit snugly between two cabinet walls. Your lids will stand up neatly and stay put.
4. Adhesive Hooks are Your Best Friend
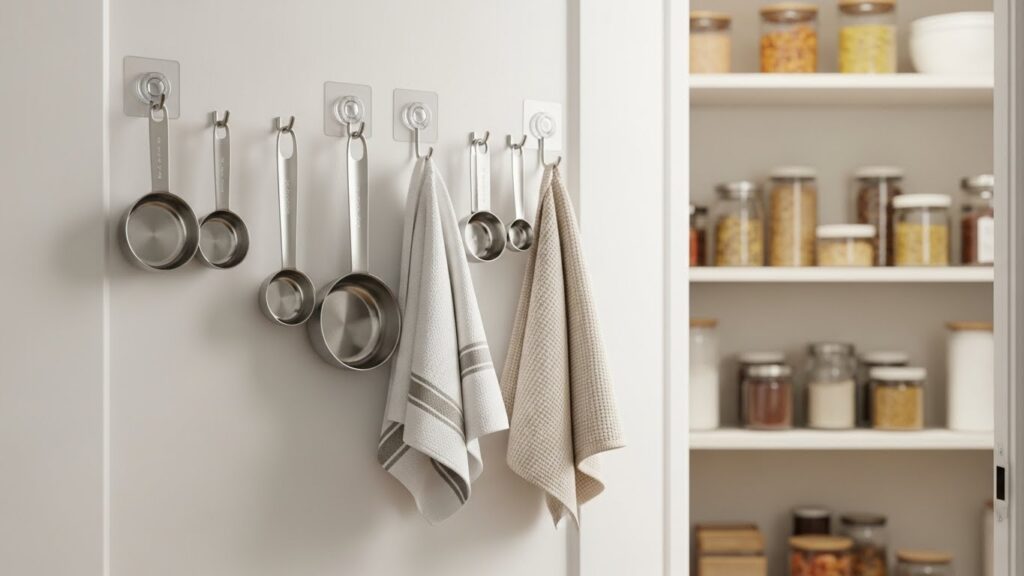
Adhesive hooks are perfect for renters or anyone who does not want to drill holes. They are strong and can hold a surprising amount of weight. Use them on the sides of cabinets, inside pantry doors, or on the wall. You can hang oven mitts, small colanders, or even a lightweight cutting board. A budget-friendly tip is to buy hooks in a multi-pack. This gives you plenty to organize multiple areas of your kitchen.
5. Stack Your Pans with Pan Organizers
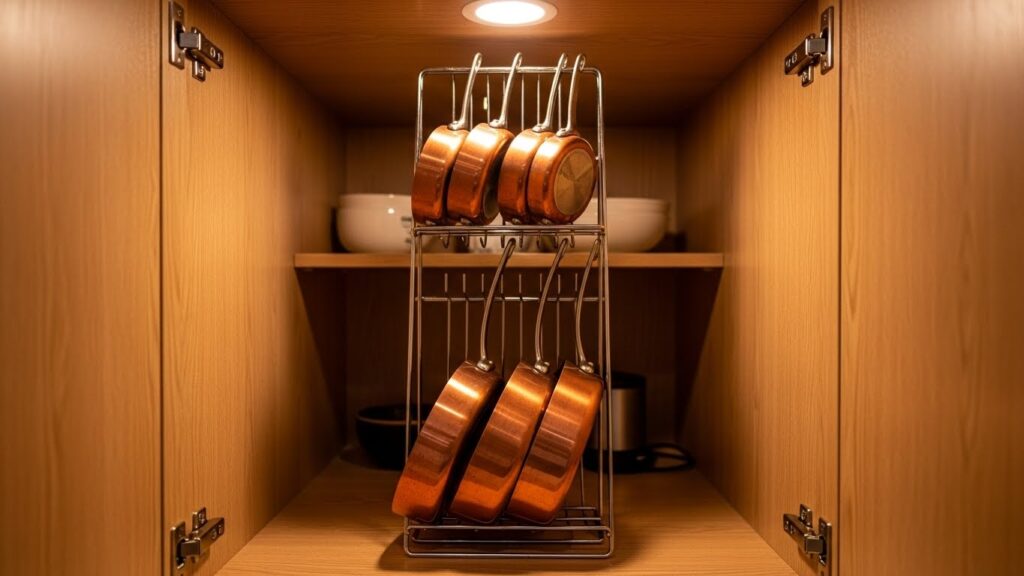
Nesting pans still requires you to lift a heavy stack to get the one you want. A pan organizer rack lets you store pans vertically. You can slide each one out individually without moving the others. This protects the cookware’s surface and makes your life easier. Look for a simple wire rack designed for this purpose. It is a small investment that makes a big difference in your daily routine.
6. Corral Cutlery in Drawer Dividers
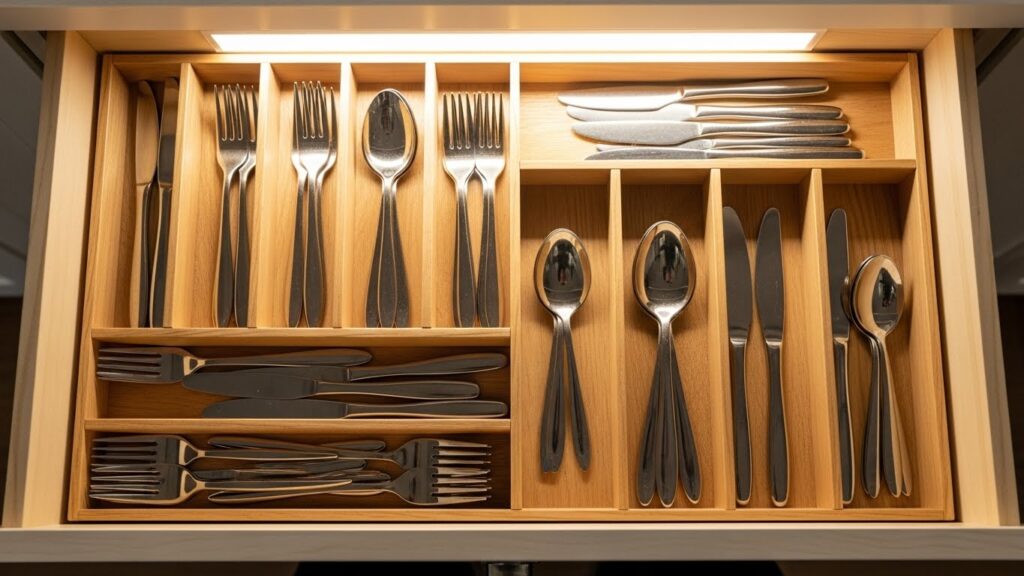
A jumble of forks and spoons makes any drawer feel chaotic. Drawer dividers create a home for every type of utensil. You can find expandable bamboo sets or custom acrylic inserts. Everything will have its place, making setting the table a quick task. For a simple DIY, use small cardboard boxes or gift boxes cut down to size. They work perfectly as free, temporary dividers until you find a permanent solution.
7. Go Vertical with a Wall-Mounted Rail
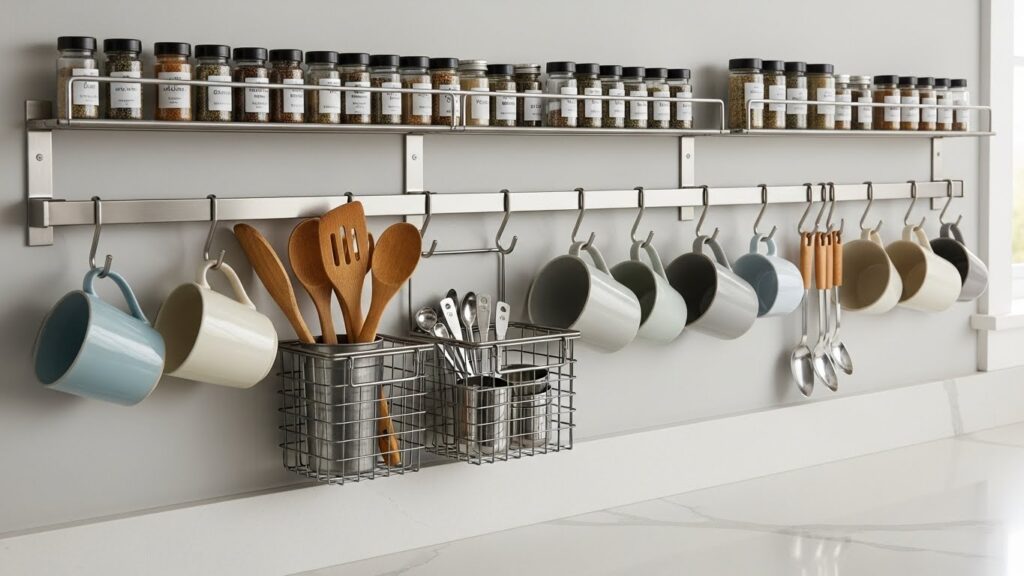
A wall-mounted rail system is like building extra shelves on your wall. You can hang hooks, baskets, and even small shelves from it. This keeps countertops clear and puts items right where you need them. You can rearrange the components as your needs change. Start with a basic rail and a few hooks. You can always add more baskets and shelves later as your budget allows.
8. Store Spices on the Inside of Cabinet Doors
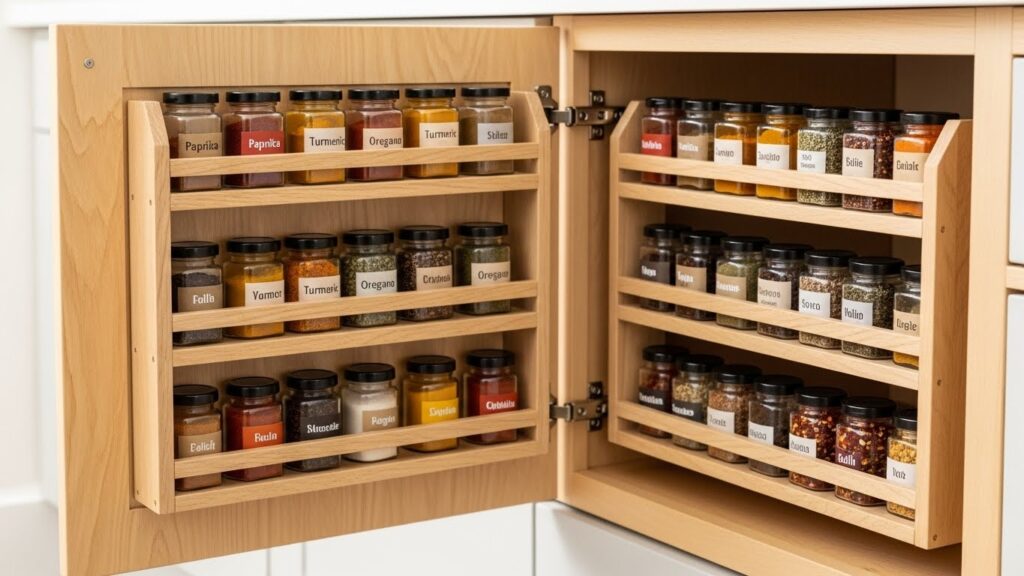
Spice cabinets can become a tangled mess. Use the vertical space on the inside of your cabinet doors. You can mount narrow shelves or a rack specifically designed for spices. This frees up shelf space for taller items and makes all your spices easy to see. A budget-friendly option is to use magnetic tins and a magnetic sheet glued to the door. This creates a fully customizable spice wall.
9. Utilize the Space Above Your Cabinets
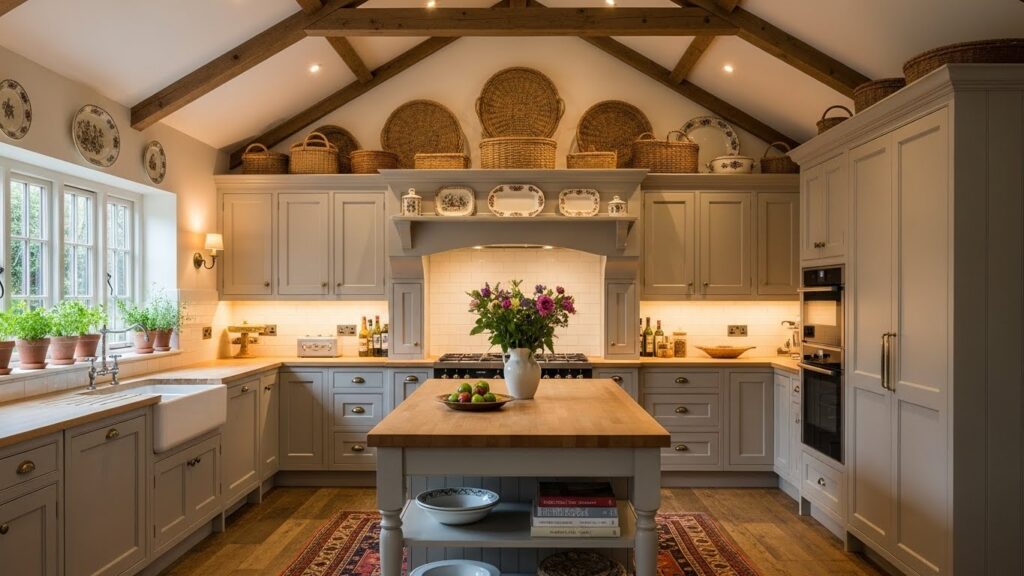
The gap between your cabinets and the ceiling is valuable storage real estate. Use it for items you do not need every day, like large serving bowls, holiday platters, or cookbooks. Choose nice-looking baskets or bins to keep things from looking messy. This keeps your main storage areas free for daily essentials. This is a great DIY storage spot that costs nothing extra to use.
10. Declutter with Clear, Stackable Bins
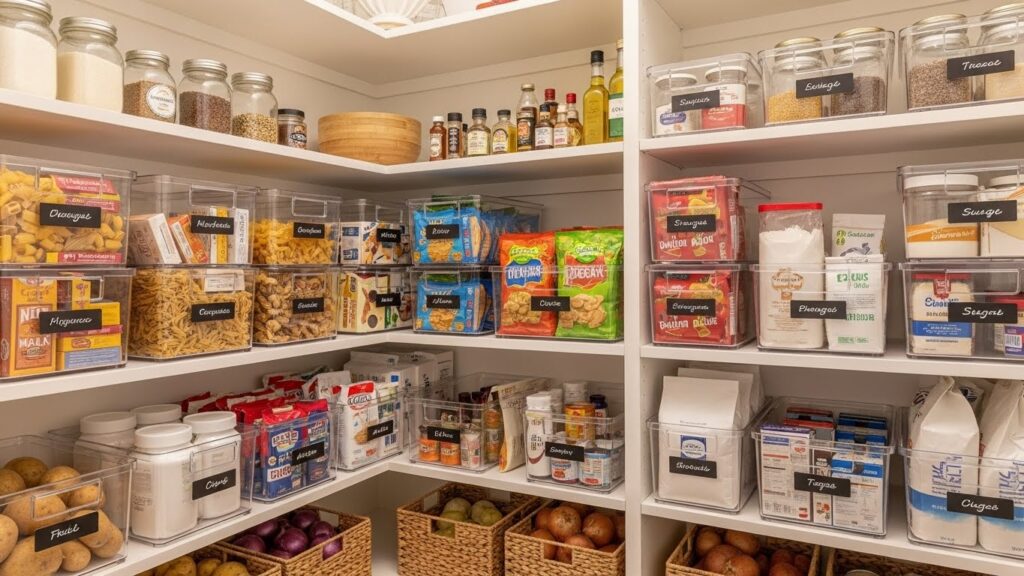
Clear bins let you see what you have without opening every container. They are perfect for grouping similar items in your pantry. Stack them to use the full height of your shelves. This method contains clutter and makes your food supplies look uniform and tidy. A budget-friendly tip is to reuse clear containers from other purchases. Just remove the labels for a simple, cohesive look.
11. Hang Mugs Under Your Cabinets
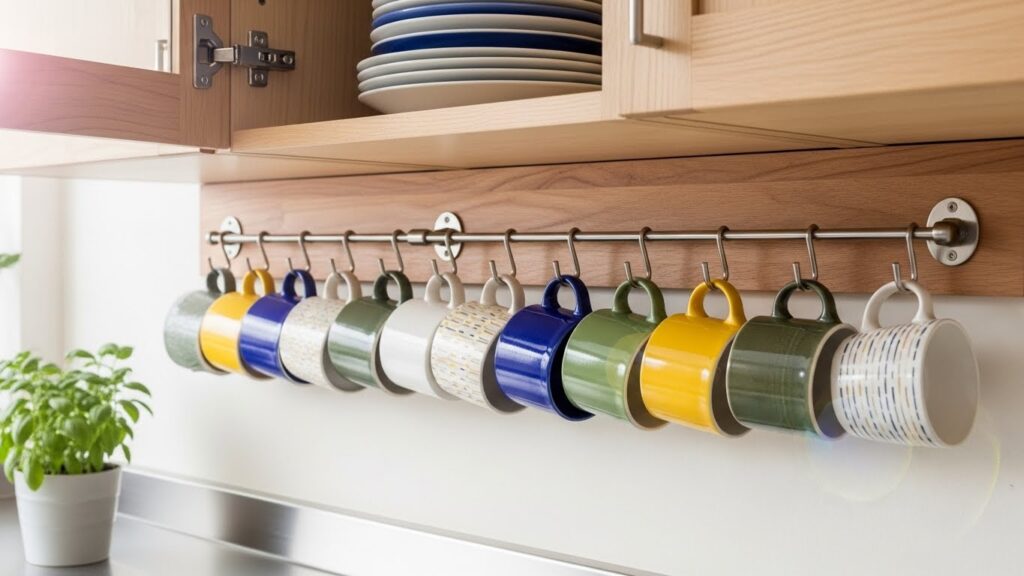
Mugs can take up a lot of shelf space. A mug rack mounted under your cabinets solves this problem. It puts your favorite cups within easy reach and frees up a whole shelf. Your mugs also become a small display of color and personality. You can find simple wooden or metal racks that are easy to install with just a few screws.
12. Create a DIY Pot Lid Holder
You do not need to buy a special organizer for pot lids. A wire file organizer from an office supply store works perfectly. Just place it in a cabinet and slide your lids into the slots. This keeps them from scratching each other and makes it easy to find the right size. This is a fantastic DIY that is both effective and very inexpensive.
13. Use a Rolling Cart for Extra Surface
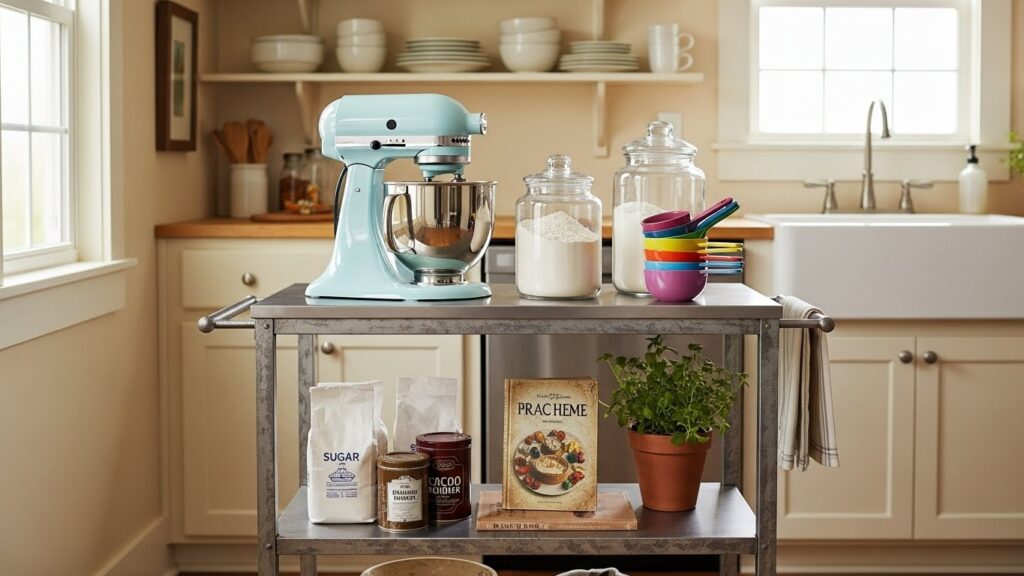
A rolling cart is like a portable kitchen island. It gives you extra prep space when you need it and storage underneath. When you are done, you can roll it out of the way into a corner or another room. Look for one with a shelf or two below. This adds a significant amount of storage without any permanent changes to your kitchen.
14. Install a Pegboard for Ultimate Customization
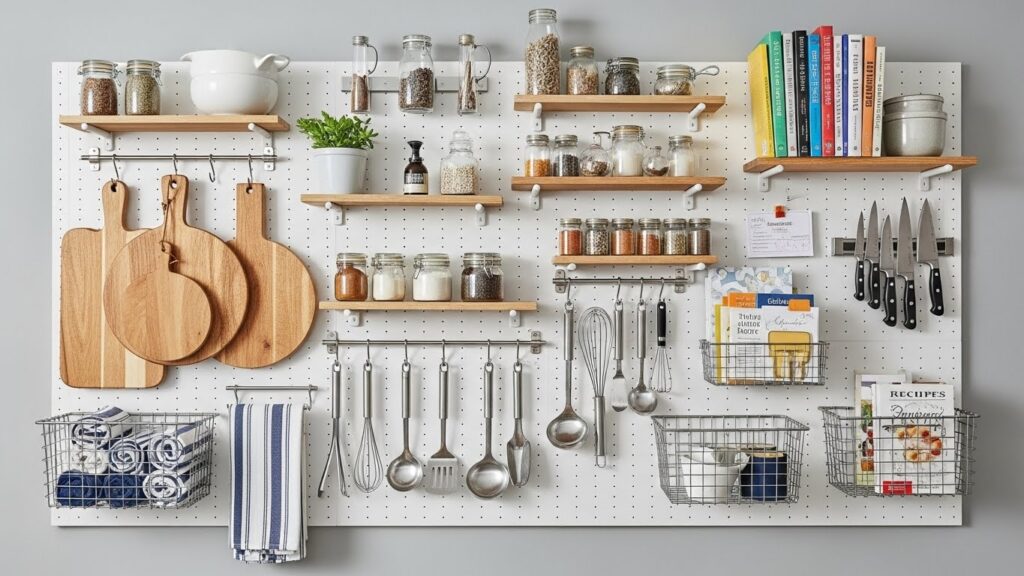
A pegboard is a blank canvas for your kitchen organization. You can move hooks and shelves around anytime you get new tools. It holds everything from pans and colanders to spices and paper towels. Paint the pegboard to match your kitchen’s color scheme. A simple DIY project starts with a standard hardboard panel from a hardware store. You can cut it to fit any empty wall space.
15. Nest Your Mixing Bowls to Save Space
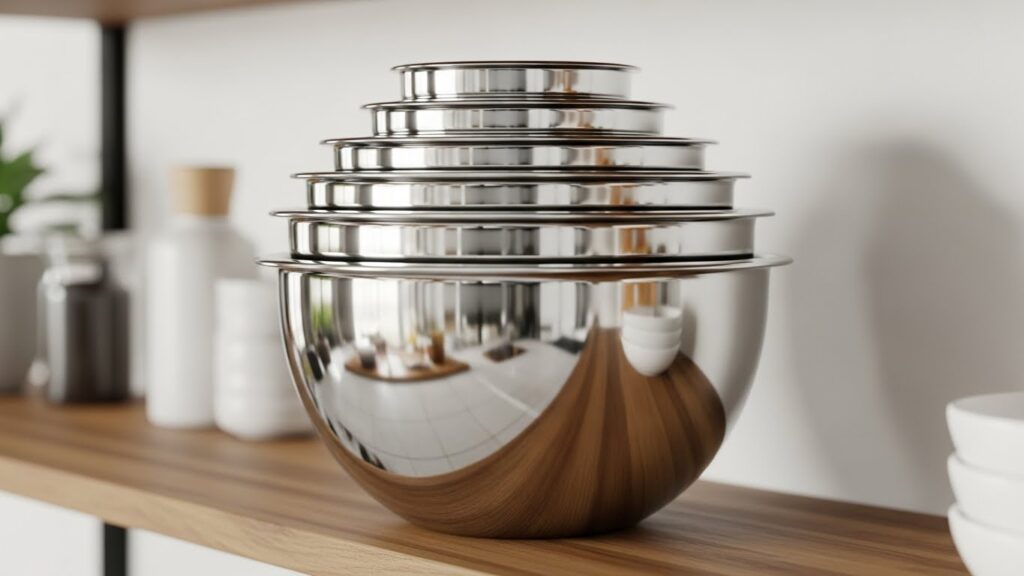
Always store your mixing bowls nested together. This is the simplest way to save space in your cabinets. If you have bowls that do not nest well, consider replacing them with a set that does. This one habit can free up a surprising amount of room. Look for a budget-friendly set where each bowl has a flat bottom, allowing them to stack securely.
16. Slide-Out Organizers for Deep Cabinets
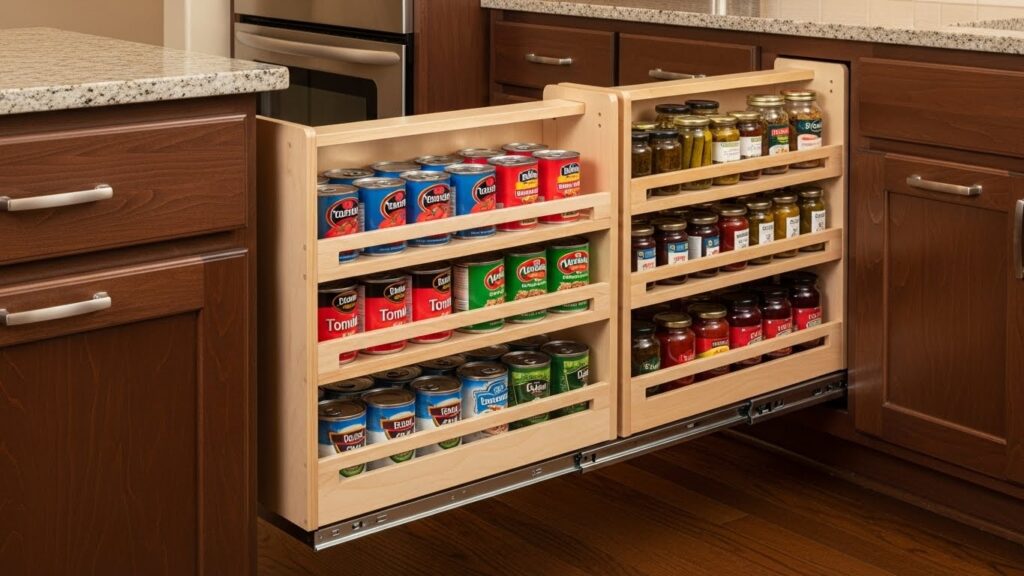
It is easy to lose items in the back of a deep cabinet. A slide-out organizer brings everything to you. You can find versions for pots and pans, pantry items, or cleaning supplies. No more kneeling and reaching into the dark corners. While custom pull-out shelves can be pricey, a budget-friendly alternative is a standalone plastic bin that you can slide in and out.
17. Hang Baskets for Fruits and Vegetables
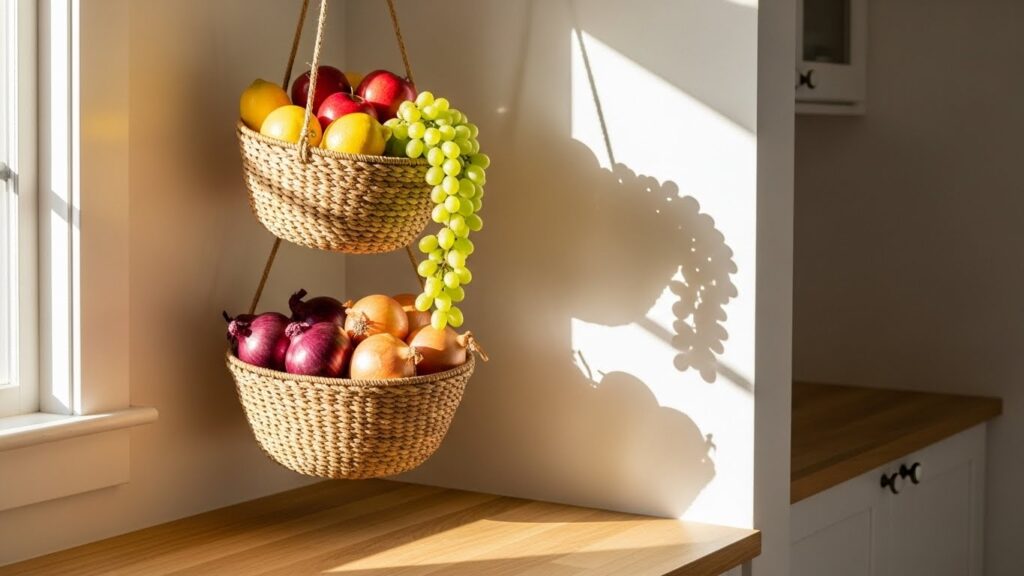
Counter space is too valuable for a fruit bowl. Hanging baskets keep your produce accessible and off the counter. They also allow for better air circulation, which can help some foods last longer. This adds a rustic, decorative touch to your kitchen. You can use simple S-hooks and a ceiling-mounted rod to create this look yourself.
18. Mount a Paper Towel Holder Under a Cabinet
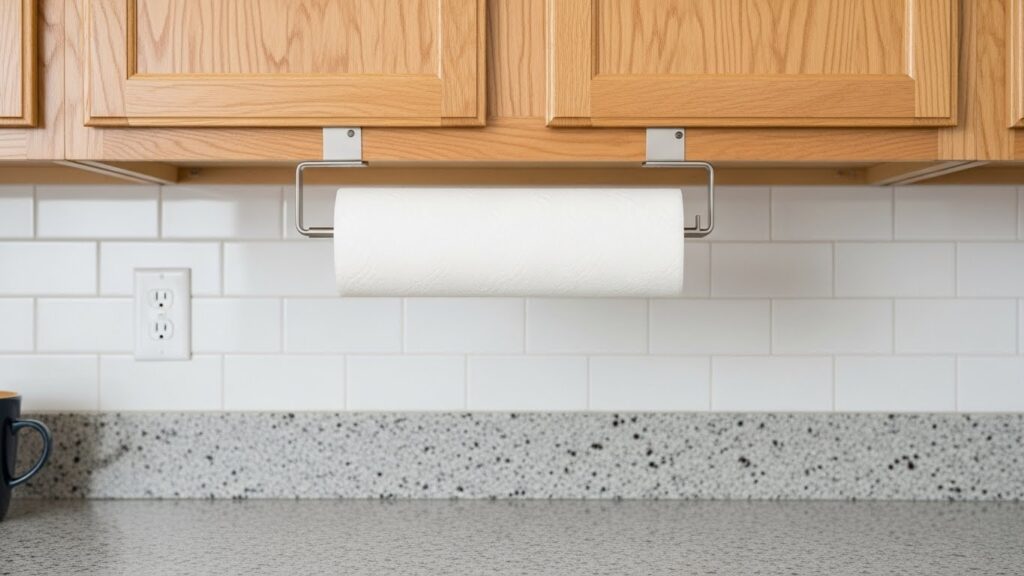
A countertop paper towel holder takes up space that could be used for cooking. Mounting one under a cabinet keeps it handy but out of the way. You can find holders that attach with screws or strong adhesive strips. This is a small change with a big impact on your usable counter area. It is a quick install that you can do in five minutes.
19. Use a Tiered Turntable for Corner Cabinets
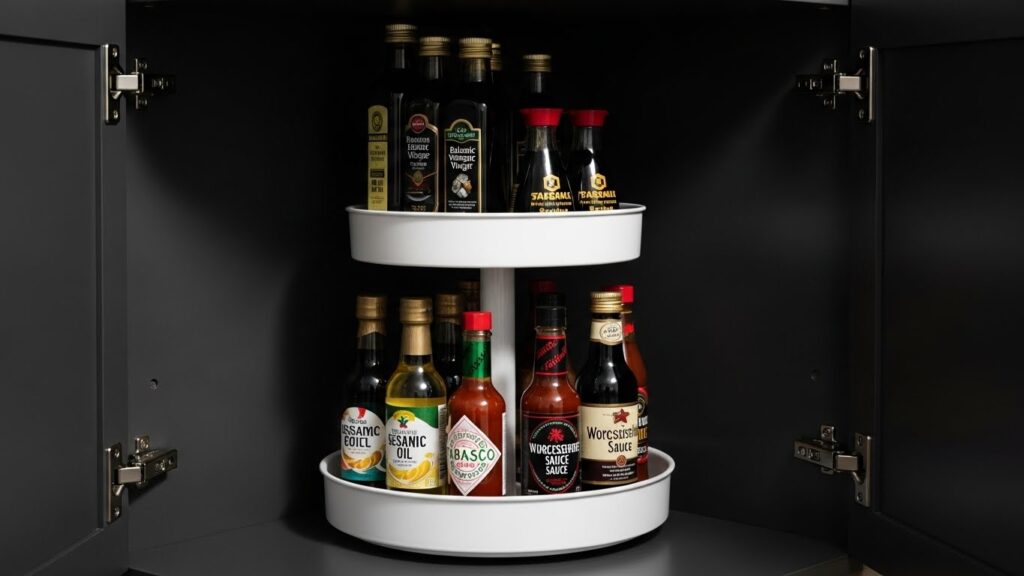
The deep corner of a cabinet is often a black hole for condiments and jars. A tiered turntable, or lazy Susan, makes everything easy to see and reach. Just spin it to find what you need. This prevents items from being forgotten and expiring in the back. This is one of the most effective tools for dealing with awkward cabinet spaces.
20. Designate a Junk Drawer with Small Trays
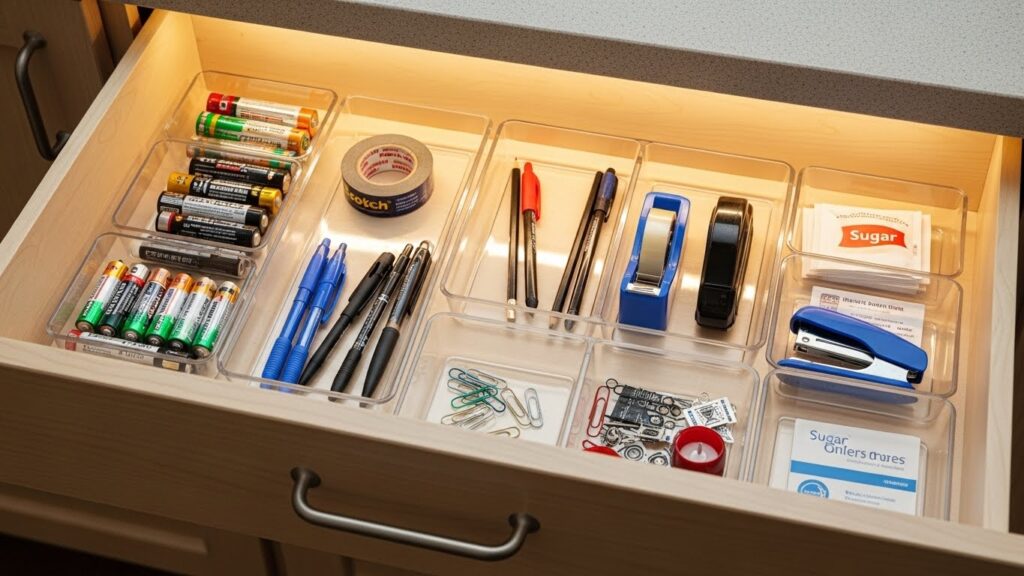
Every home needs a spot for small, random items. The key is to contain the chaos. Use small trays or containers within one drawer to keep things sorted. Designate sections for tools, batteries, and writing utensils. This prevents the drawer from becoming a frustrating mess. A budget-friendly idea is to use clean, empty yogurt cups or small cardboard boxes as dividers.
21. Stick a Under-Shelf Basket for Extra Storage
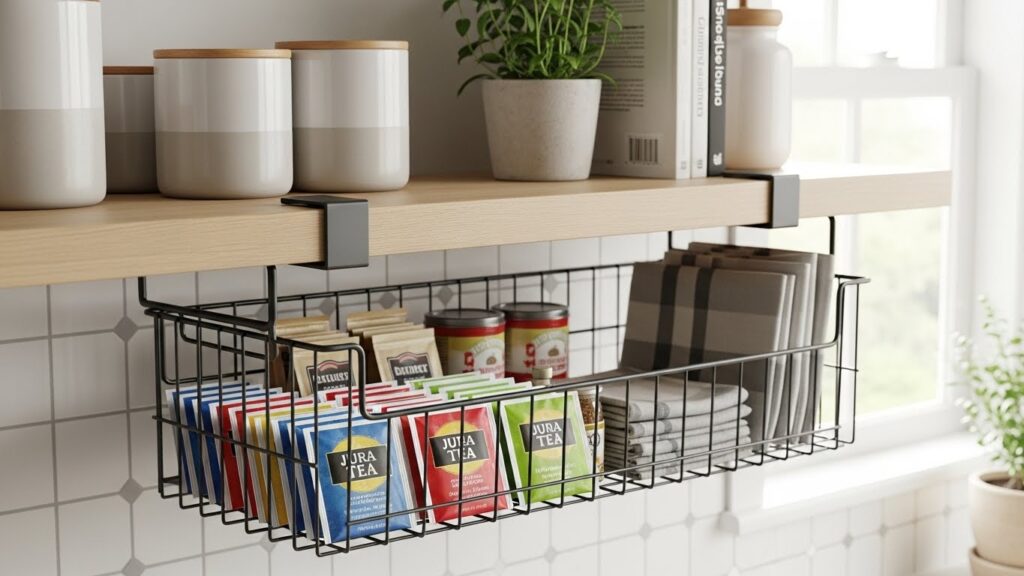
Instantly double your shelf space with under-shelf baskets. These wire baskets simply clip onto the existing shelf above them. They are perfect for holding lightweight items like drink mixes, foil packets, or napkins. They hang down, creating a new storage layer without any installation. This is a renter-friendly solution that requires no tools and can be moved easily.
22. Hang a Wire Grid for Recipes and Tools
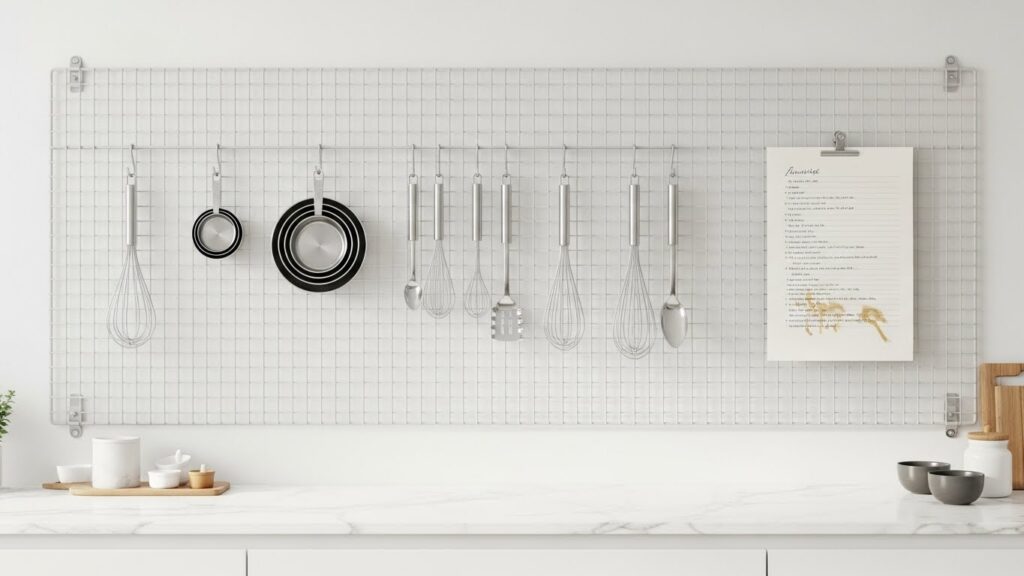
A wire grid panel is a stylish and practical addition to your kitchen wall. Use clips to hang recipes, reminders, or shopping lists. Add small hooks to hang lightweight utensils. It keeps important information visible and tools within reach. You can find these grids at most home goods stores. They are easy to hang and completely customizable.
23. Flip Down a Foldable Drying Rack
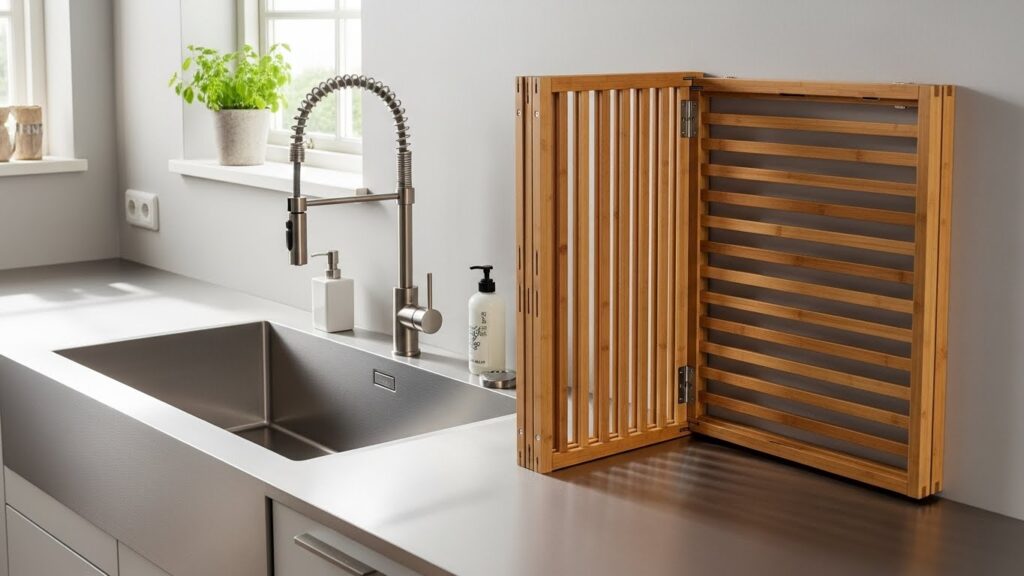
A countertop drying rack is always in the way. A wall-mounted, fold-down rack solves this problem. It provides plenty of space for drying dishes and then folds flat against the wall when you are done. This reclaims your counter space completely. Look for a model made of wood or stainless steel that complements your kitchen’s style.
24. Stash Bags in a DIY Dispenser
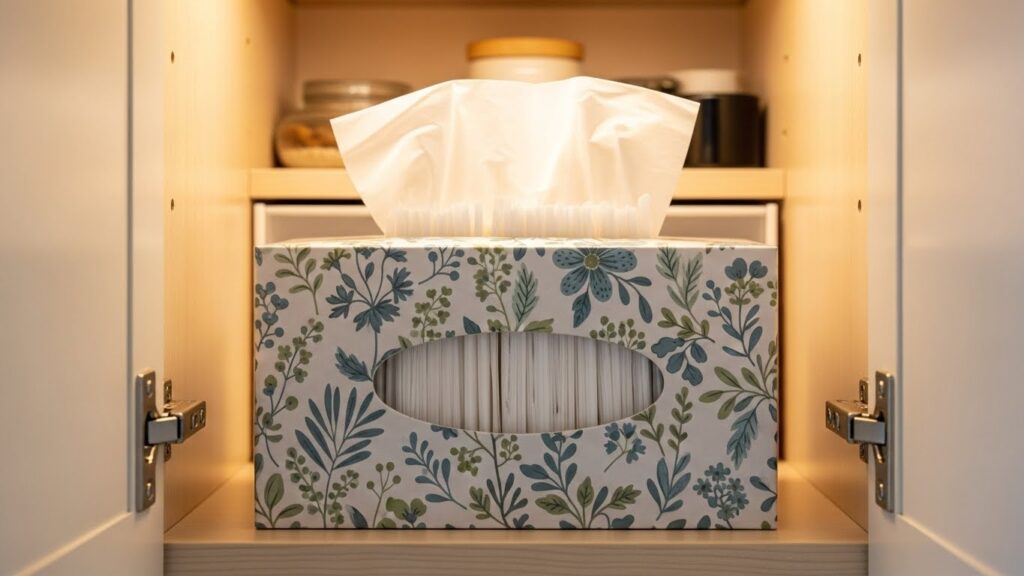
Plastic bags can quickly become a tangled ball. An empty tissue box makes a perfect DIY bag dispenser. Simply fold the bags and place them in the box. You can pull them out one at a time, just like tissues. This keeps them contained and neat. This is a great budget-friendly solution that uses something you were probably going to throw away.
25. Use a Cutting Board over the Sink
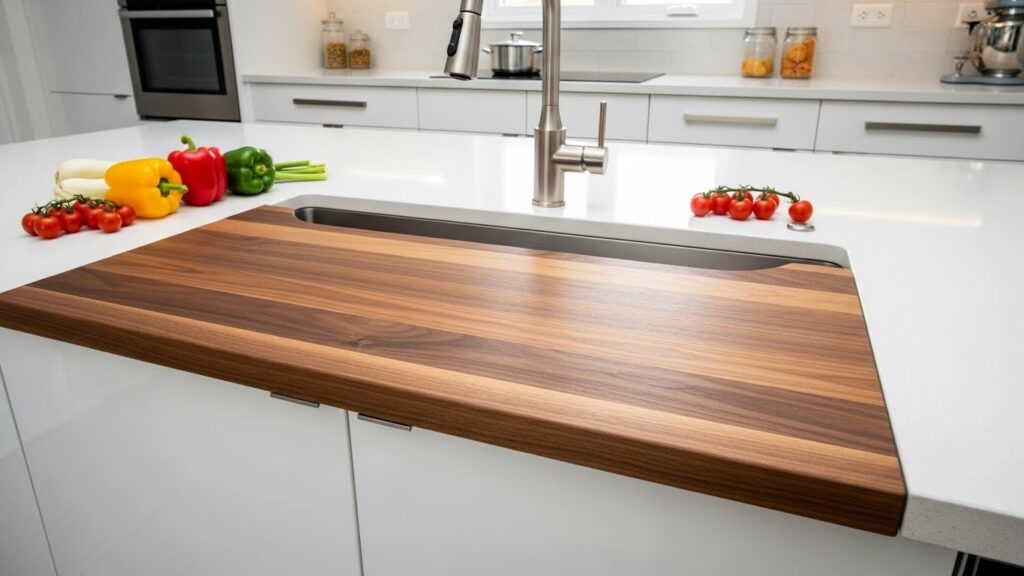
Gain instant prep space by using a cutting board that fits over your sink. This is especially helpful in kitchens with very little counter space. You can wash vegetables and chop them in the same spot. Look for a board designed for this purpose or have one custom cut to fit your sink’s dimensions. It is a simple way to add functional space.
26. Embrace the Power of a Lazy Susan
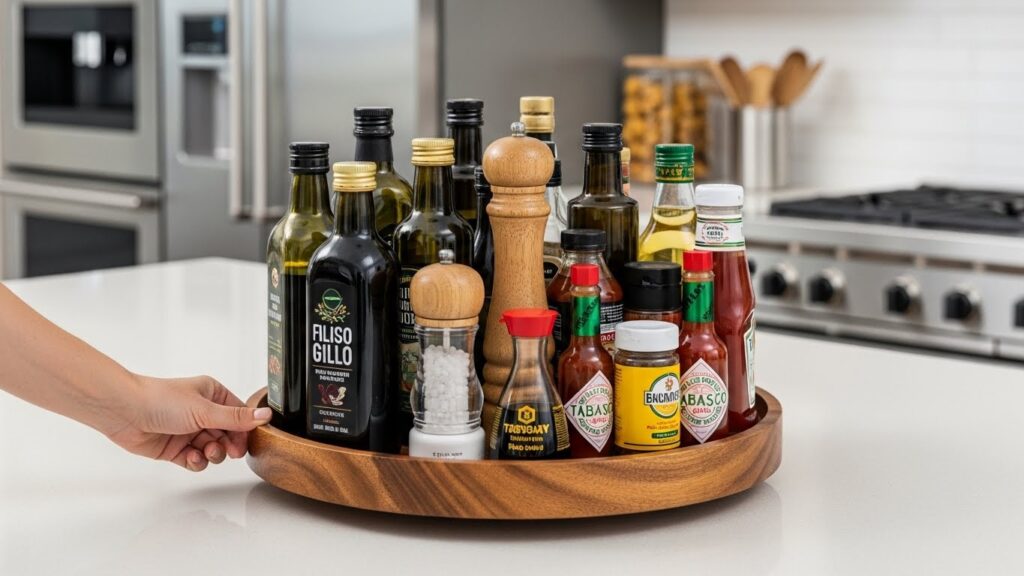
A lazy Susan is not just for cabinets. Use one on your countertop for items you use all the time. It corrals cooking oils, seasonings, and condiments into one spot. A quick spin gives you access to everything. This prevents these items from spreading out and cluttering your workspace. It is a small tool that makes cooking faster and more organized.
Choose one idea that feels doable this week. Maybe start with adhesive hooks or a tension rod for lids. Small changes add up. Your kitchen will feel more open and calm with every item you find a home for. You can build a system that works perfectly for your space and your habits.