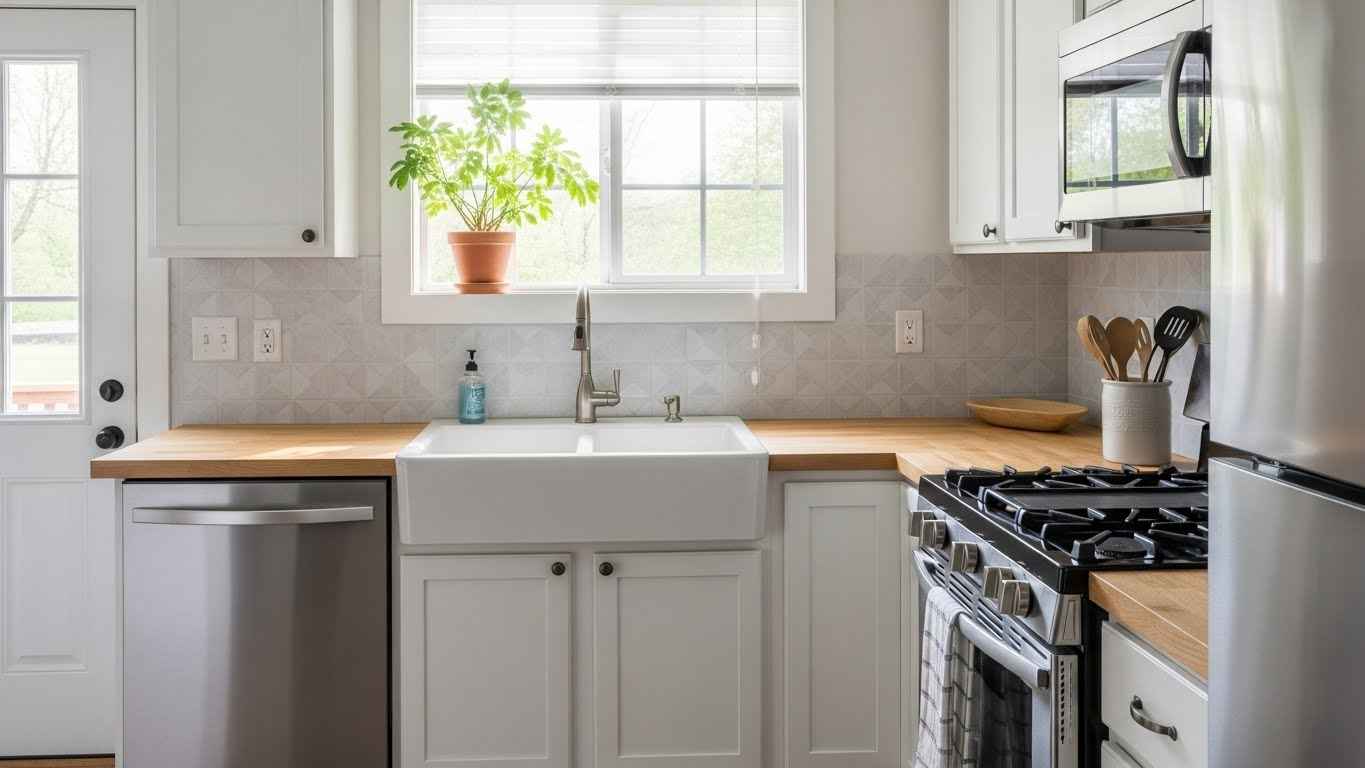
A small kitchen does not mean you have to skip on style. Peel and stick backsplashes offer a fast, affordable way to add personality. They come in countless designs, from classic tile to modern patterns. Installation is simple. You can do it yourself in an afternoon. No grout, no mess. This guide shows you 24 easy ideas to give your tiny kitchen a fresh look without a major renovation.
1. The Ultimate Tiny Kitchen Backsplash Solution
Peel and stick tiles are the perfect fix for a small cooking space. They protect your walls from splatters without permanent changes. The adhesive is strong but removable. This makes them ideal for renters. You can create a big visual impact in a small area. Measure your space carefully before you order. A budget-friendly tip is to use a sample sheet first to test the look and adhesion on your wall.
2. Why Peel and Stick is a Game-Changer
This option changes everything because it is so easy. There is no need for special tools or skills. You just clean the wall, peel the backing, and stick. It is a dry process with no waiting for grout to dry. You can complete the project in one day. For a DIY success, make sure your wall is completely flat and clean. Any bumps or grease can prevent a good seal.
3. Subway Tile Illusion for a Classic Look
Get the timeless appeal of subway tile without the cost and labor. These stick-on versions have realistic grout lines and a glossy finish. They make a small kitchen feel brighter and larger. The classic white design pairs with any cabinet color. Align the first tile perfectly to keep the rest straight. A budget-friendly approach is to use these tiles just behind the stove or sink to create a focal point.
4. Metallic Marvels for a Touch of Glam
Add a little shine with metallic finishes. Copper, gold, or silver tiles catch the light beautifully. They bring warmth and a sophisticated touch. This works well in kitchens with neutral tones. The effect is dramatic without being overwhelming. Use a level during installation to keep the lines perfect. For a DIY accent, apply a single row of metallic tiles as a border within a larger, plainer design.
5. Rustic Brick Effect on a Budget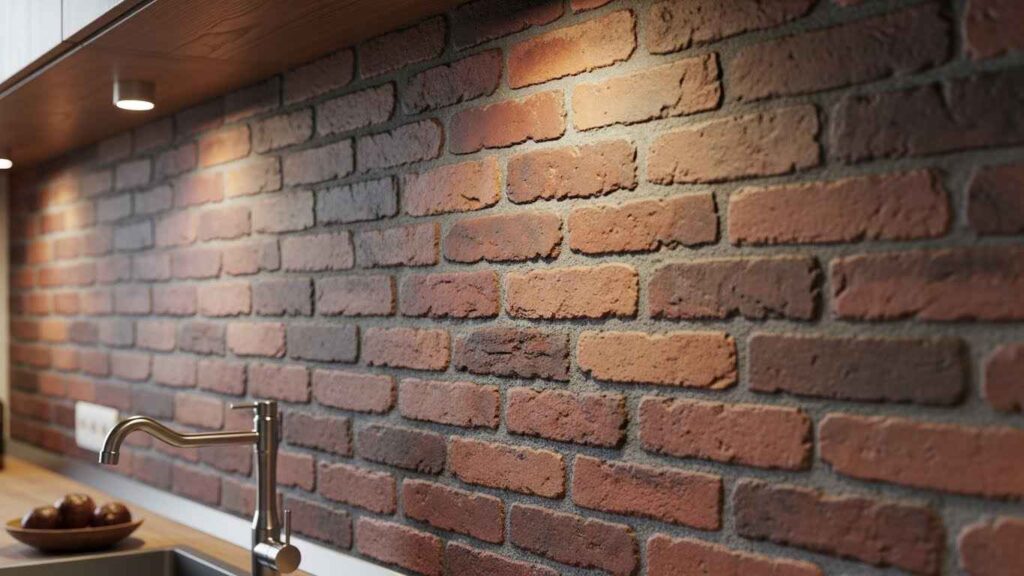
You can have the charm of a brick wall for a fraction of the price. These panels have deep texture and color variation. They add character and warmth to a modern kitchen. The rustic feel makes the space inviting. Start from the center and work outwards for the best layout. A budget-friendly idea is to use brick panels on just one wall to create a feature without covering the entire kitchen.
6. Herringbone Patterns for Visual Interest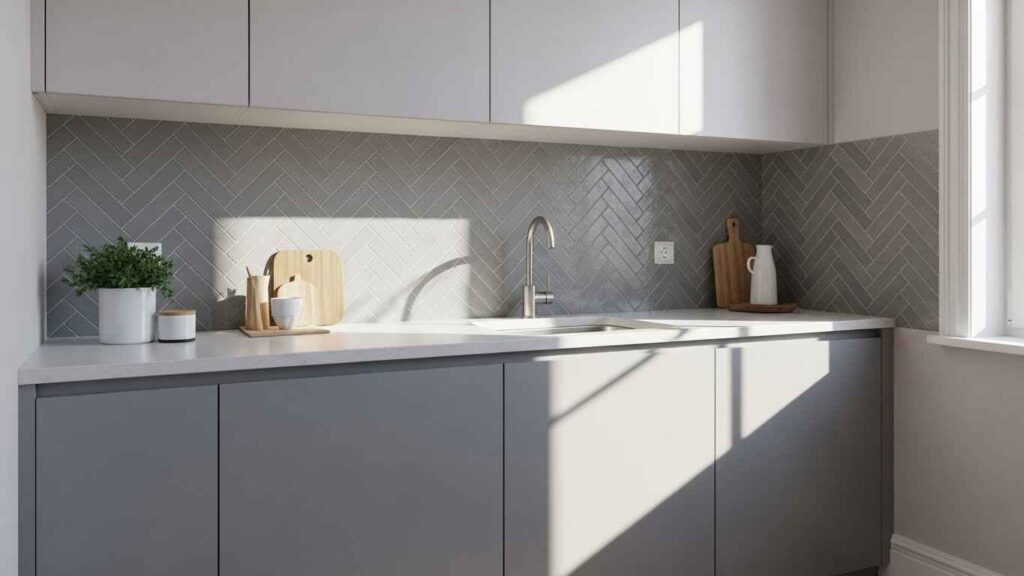
A herringbone pattern adds movement and style. The zig-zag design draws the eye and makes the backsplash a standout feature. It looks complex but is simple to install with pre-arranged sheets. This pattern works with both classic and contemporary decors. Follow the manufacturer’s guide for pattern matching. A DIY tip is to use a pencil to lightly mark guide lines on the wall before you start sticking.
7. Geometric Shapes for a Modern Vibe
Clean lines and bold shapes define a modern kitchen. Hexagons, triangles, or diamonds create a graphic statement. These patterns are often sold on easy-to-apply mesh sheets. They look custom and high-end. Press firmly on all edges to prevent lifting. For a budget-friendly update, choose a geometric pattern in neutral colors. This ensures it will not clash with your existing appliances and cabinets.
8. Moroccan-Inspired Tile Magic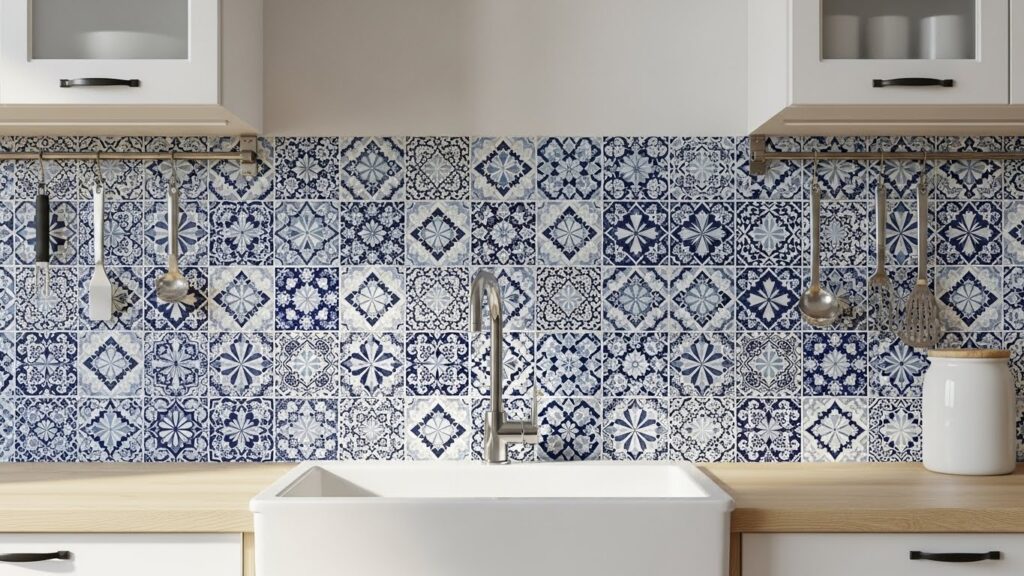
Intricate patterns inspired by Moroccan design add artistry and color. These detailed sheets can transform a plain wall into a work of art. The repetitive designs are calming and beautiful. They bring a unique personality to your cooking space. Work with a partner for aligning large sheets. A DIY suggestion is to use these ornate tiles in a small nook to create a beautiful surprise without overwhelming the room.
9. Elegant Marble Lookalikes
Achieve a high-end marble look without the high cost. These sheets feature realistic veining and a polished finish. They make a small kitchen feel more spacious and refined. The timeless design will not go out of style. Wipe the wall with rubbing alcohol before application for the best stick. A budget-friendly trick is to use marble-look panels behind open shelving to show off the pattern.
10. Mosaic Magic in Minutes
Small, colorful tiles set in a mesh sheet create a mosaic effect. This adds texture and a handmade feel. The variety of colors and materials available lets you customize your look. It is a great way to incorporate multiple colors. Use a roller to secure the entire surface. For a DIY project, mix and match sheets from different mosaic packs to create your own unique color story.
11. Go Bold with Large Format Patterns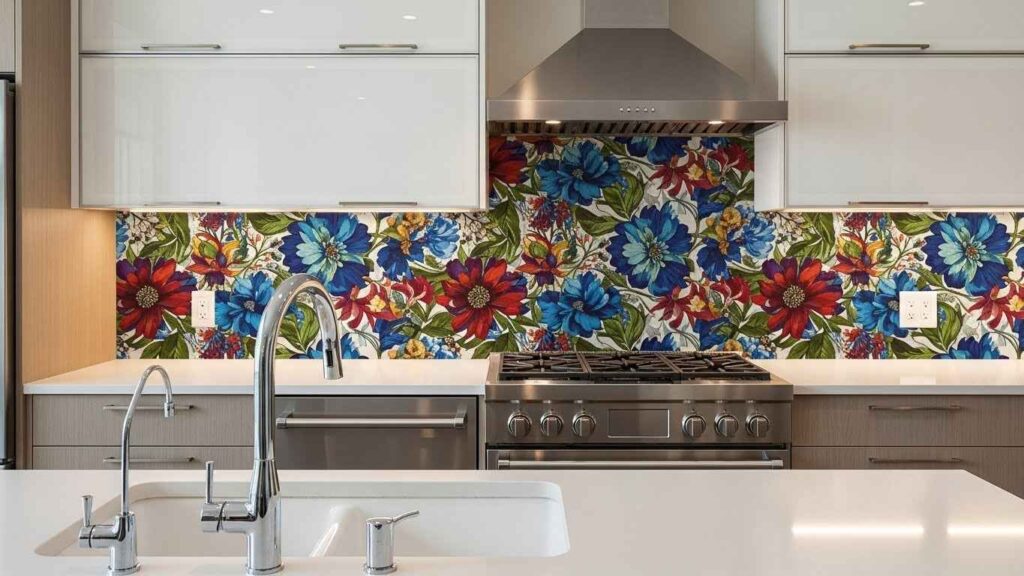
Make a statement with big, bold prints. Large-format sheets with floral, abstract, or graphic patterns act as instant art. They are perfect for covering a large wall quickly. This approach is less busy than small tiles. Smooth out air bubbles as you go with a squeegee. A budget-friendly idea is to use a single, dramatic panel behind your stove to serve as the kitchen’s main visual feature.
12. Coastal Vibes with Sea Glass Tiles
Bring the calm of the beach inside with sea glass tiles. Their soft, frosted colors in blues and greens are soothing. The translucent effect plays with light beautifully. This style creates a serene and airy kitchen environment. Check for color consistency between sheets before installing. For a DIY coastal theme, pair these tiles with natural wood accents and simple white dishes on open shelves.
13. Industrial Chic with Faux Tin
Get the look of vintage pressed tin with easy peel and stick panels. The embossed patterns add incredible texture and depth. A dark metallic finish complements an industrial style with exposed pipes and concrete. It is durable and easy to clean. Apply to a primed surface if your walls are porous. A budget-friendly tip is to use these panels in a kitchen island facing to add character on multiple sides.
14. A Pop of Color with Solid Sheets
Sometimes a solid block of color is all you need. A bright hue like cobalt blue or sunny yellow instantly lifts the room’s energy. It is a simple yet powerful design choice. Solid sheets are also the easiest to install and cut. Use a sharp utility knife for clean cuts around outlets. For a DIY color test, paint a large poster board with your desired color and tape it to the wall for a few days.
15. The Beauty of Beveled Edge Tiles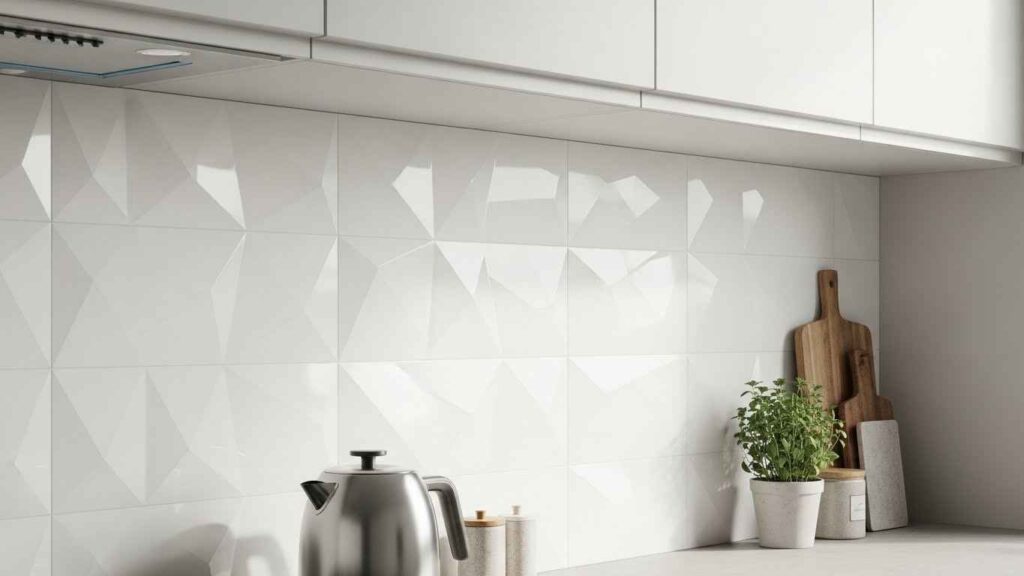
Beveled edges on tiles catch the light, creating shadows and depth. This gives a flat wall a three-dimensional quality. The effect is elegant and understated. These tiles often mimic high-end ceramic ones. Wipe away any adhesive that seeps out immediately. A budget-friendly strategy is to combine these with less expensive flat tiles in a border pattern to get the luxe look for less.
16. Seamless Stainless Steel Finishes
For a sleek, professional kitchen look, choose stainless steel. It matches your appliances and is incredibly easy to clean. The reflective surface helps bounce light around, making the space feel larger. Large sheets mean fewer seams. Remove the protective film only after installation is complete. A DIY maintenance tip is to clean it with a mix of dish soap and water to keep it looking new without streaks.
17. Create a Focal Point with a Mural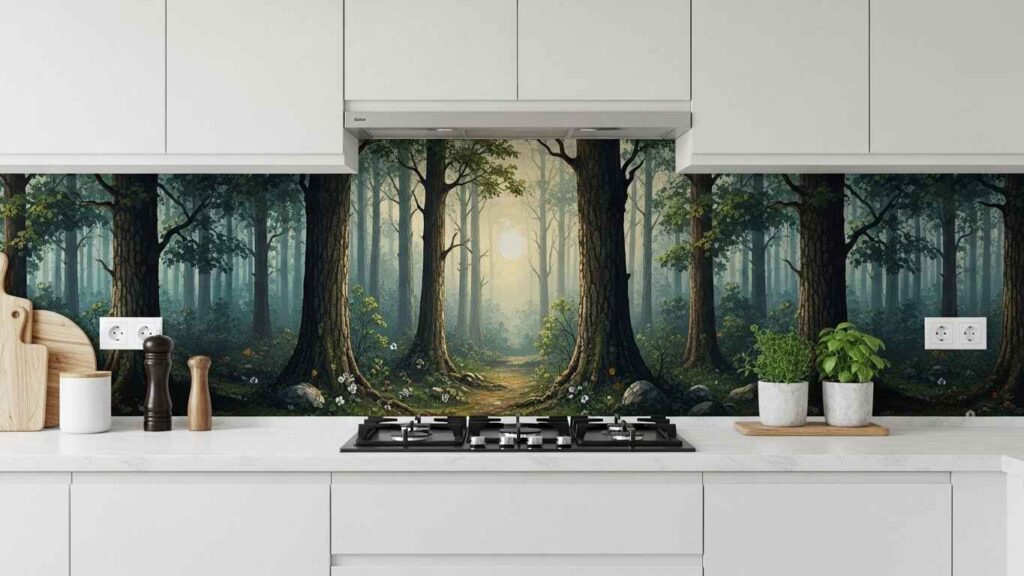
Turn your backsplash into a piece of art with a full mural. Scenic landscapes, abstract art, or botanical prints can cover the entire area. This creates a stunning conversation piece. It is a very personal way to decorate your kitchen. Apply the mural in sections if it comes in panels. For a budget-friendly version, look for removable wall decals that you can arrange into your own mural design.
18. Nature-Inspired Leaf and Floral Prints
Bring the outdoors in with leaf or floral patterns. These designs add a soft, natural element to your kitchen. They are calming and work well in spaces with wood and stone accents. The look is gentle and inviting. Avoid stretching the material during application. A DIY idea is to use a botanical print behind glass-front cabinets, so the pattern peeks through for a layered effect.
19. Art Deco Glamour in Your Kitchen
Channel the roaring twenties with bold Art Deco patterns. Think sharp lines, sunbursts, and rich colors like black, gold, and deep green. This style adds instant drama and sophistication. It makes a powerful style statement. Take your time with alignment on these detailed patterns. A budget-friendly approach is to use Art Deco tiles as a single stripe or border to add a touch of glamour without going full period style.
20. Chalkboard Backsplash for Functionality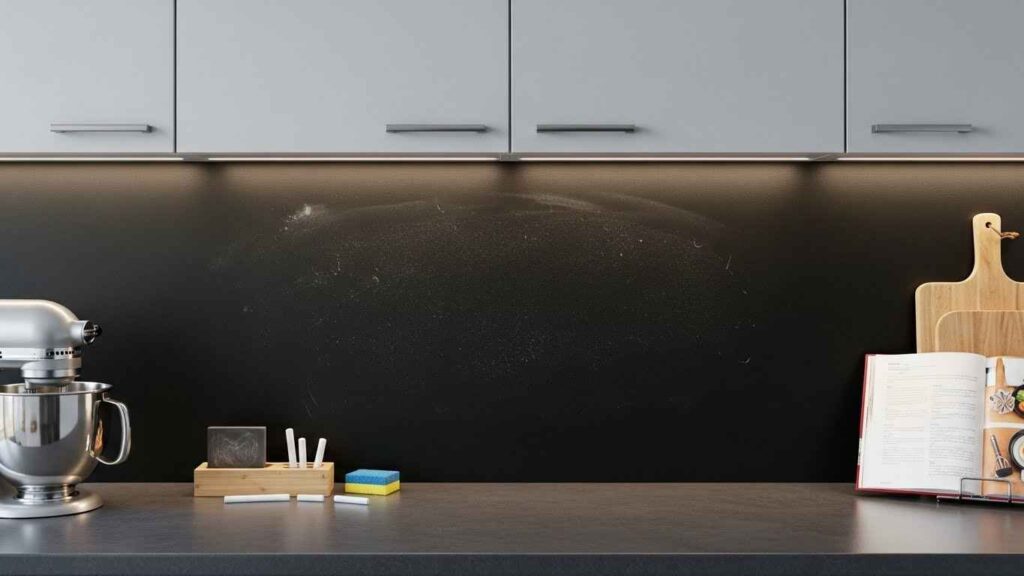
Combine style with function. A chalkboard backsplash lets you write grocery lists, recipes, or messages directly on the wall. It is great for families and adds a playful, interactive element. The matte black finish is also very modern. Season the chalkboard by rubbing chalk sideways over it first. For a DIY family center, frame a section of the chalkboard with washi tape to create a dedicated area for notes.
21. Mirrored Tiles to Expand Space
Mirrored tiles are a smart trick for a tiny kitchen. They reflect light and the room itself, creating an illusion of depth and space. This makes even the smallest galley kitchen feel open and airy. Handle tiles by the edges to avoid fingerprints. A budget-friendly tip is to use mirrored tiles only on the wall opposite a window to maximize the reflection of natural light.
22. Terrazzo Trend Made Easy
Terrazzo is a fun, speckled pattern that is very popular. It adds a playful, modern touch with its mix of colorful chips in a solid base. It is visually interesting without being too busy. This look is cheerful and contemporary. Mix sheets from different boxes to vary the chip distribution. For a DIY project, use terrazzo contact paper on your countertops to coordinate with the backsplash.
23. Mix and Match for a Custom Design
Do not be afraid to combine different styles. Use a solid field tile and add a decorative border. Or mix two complementary patterns. This allows you to create a look that is uniquely yours. It is how you achieve a custom design on a standard budget. Plan your layout on the floor first. A budget-friendly method is to buy small quantities of a pricier decorative tile to use as an accent alongside a more basic, affordable one.
24. Your Step-by-Step Installation Guide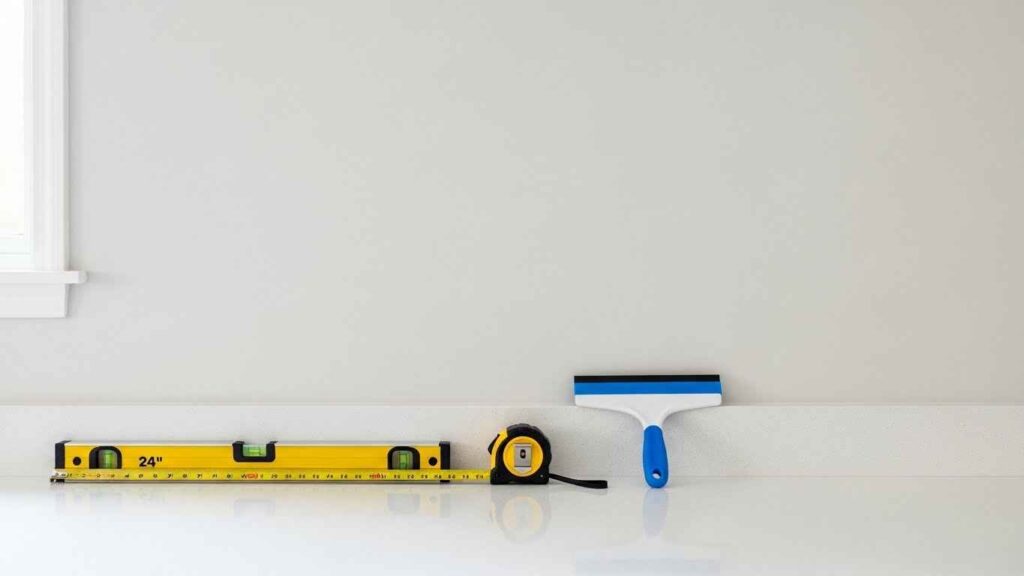
Start with a clean, dry, and smooth wall. Measure the area and plan your layout from the center outward. Use a level to draw a straight starting line. Peel off a small part of the backing, align the tile, and stick the top section. Slowly peel off the rest of the backing while smoothing the tile down with a squeegee. Work slowly to avoid bubbles. For a DIY success, have a utility knife on hand to make precise cuts around outlets and corners.
Choose one idea that speaks to you. Pick up a sample or a small pack this weekend. A small change behind your sink or stove can make your entire kitchen feel new. You can do this.