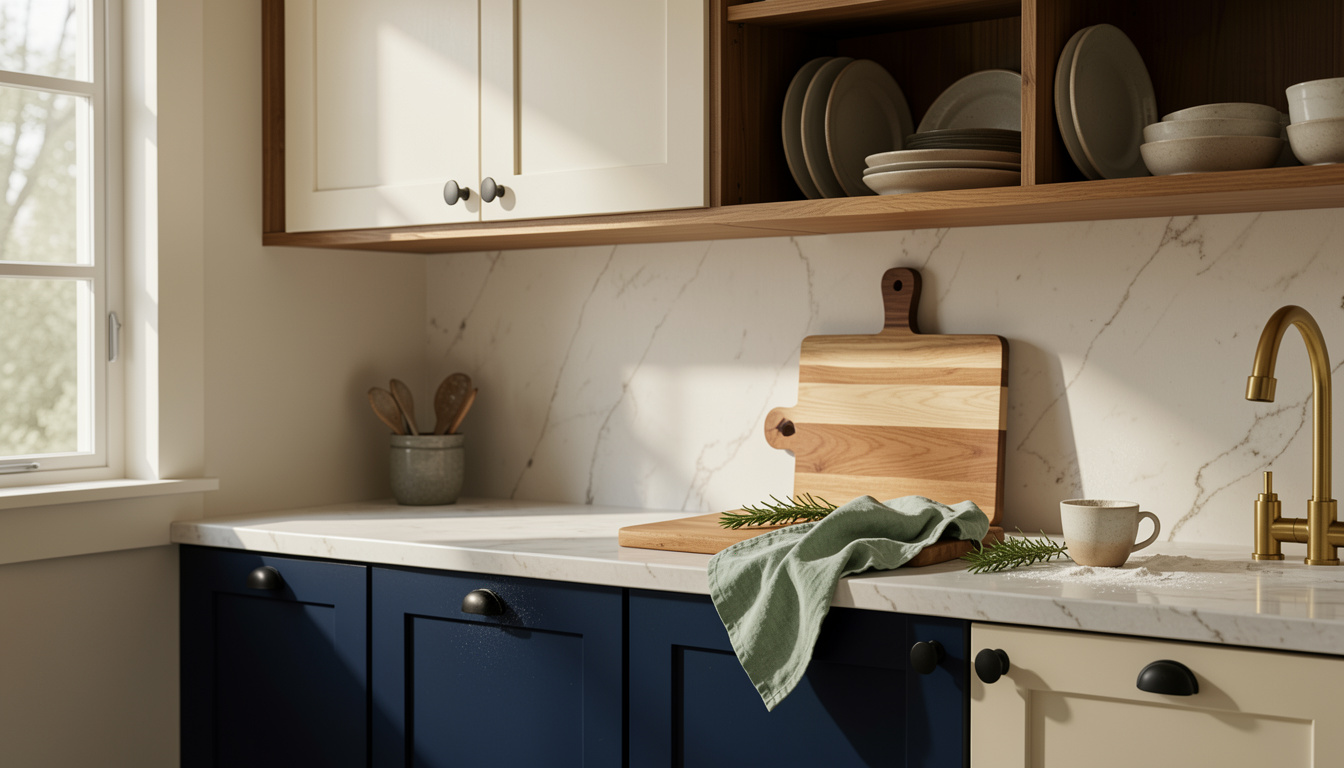
I painted my lower cabinets a deep navy and the uppers a soft warm cream. It was how to update kitchen cabinets cheaply and the whole room finally felt intentional.
I spent about $180 including paint, brushes, and new knobs. In this guide I show exactly where to spend, what to skip, and which two paint tones play together without feeling trendy for one season.
A short practical note: two-tone kitchens are one of the kitchen looks people keep choosing right now (Houzz trend observations), and modest updates often recoup a large share of cost (Remodeling Magazine cost vs value reports). This method suits painted cabinet boxes, laminate doors you can paint, or renter-friendly removable panels.
1. Start with the Foundation: Counter and Cabinet Reset
Start here because the paint tones read best against the counter and hardware. I chose a warm cream for uppers to keep light and a deep navy for lowers to ground the room.
Pick a paint kit that’s formulated for cabinets like Rust-Oleum Cabinet Transformations Kit and a high-build primer such as High build bonding primer for cabinets. Tools matter: use a painters high density foam roller set for a smooth finish.
The visual principle is contrast and balance: light above to lift, dark below to anchor. Keep the cream at or above eye level and the navy on the base cabinets only so your eye can travel up.
People mistake matching the countertop to the lower color. That flattens the room. Instead let the counter be a neutral stage between the two tones.
2. Layer Warmth with Wood and Linen Textures
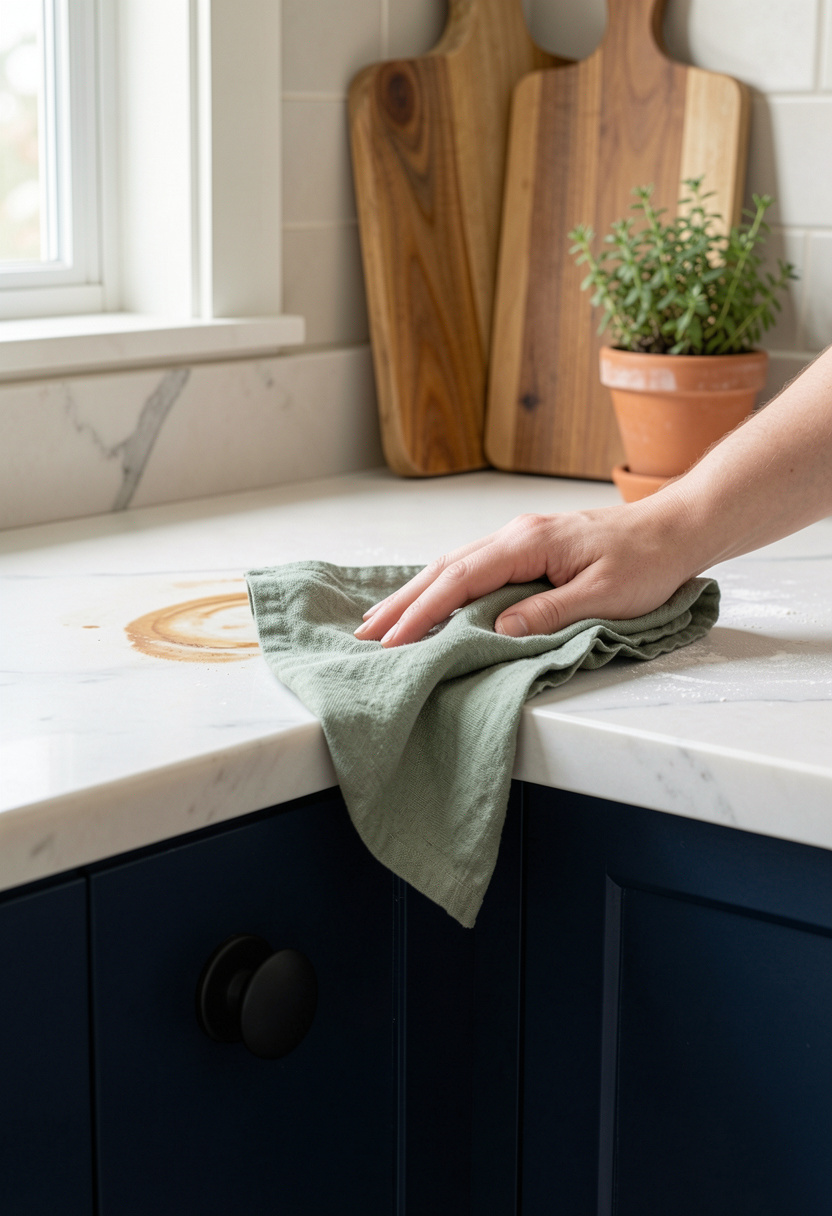
Wood and linen stop painted cabinets from feeling sterile. I added a single 24-inch shelf and leaned an oversized acacia board for warmth.
Grab an acacia floating shelf 24 inch and a large acacia cutting board 18×12. Soft goods like sage linen dish towels set of 4 add quiet color.
This is texture contrast at work. Wood grain warms the navy and cream, linen softens bright finishes, and an oversized cutting board at a 15 degree lean becomes art.
A common mistake is too many small bits. One large board plus one small stack of towels reads curated. If you pile too many small accents it reads cluttered.
3. Add Height and Drama with Open Shelving
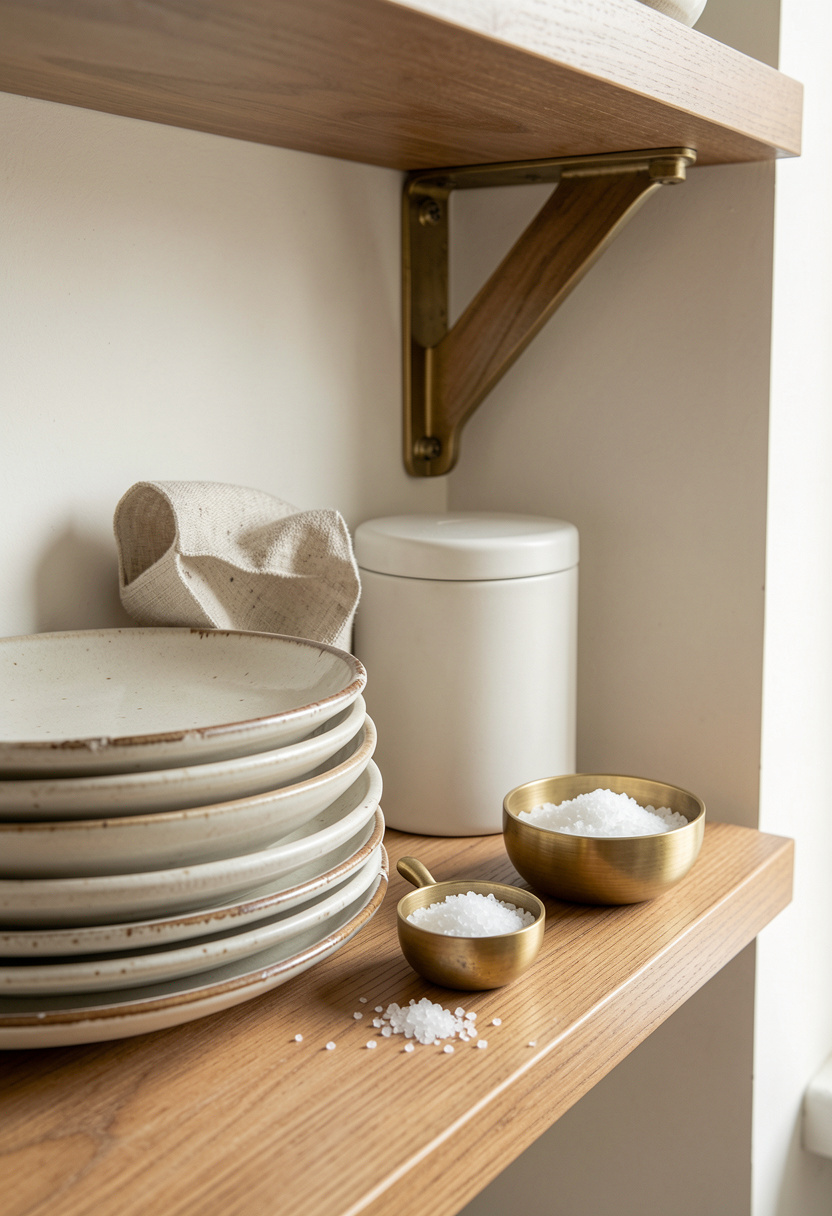
Open shelving is where two paint tones look intentional. Place shelving about 18 inches above the counter and keep shelf length under two thirds of the wall span for proportion.
Mount sturdy floating shelf brackets industrial and style with a stoneware dinner plates set of 4 plus a matte white ceramic canister set with acacia wood lids.
The visual trick is negative space. Leave two-thirds of the shelf breathing room and group items in odd numbers for rhythm.
Don’t use open shelving to store every mug. It becomes a dust trap and a styling headache. Instead reserve it for pretty daily items and hide the rest.
4. Create Ambiance with Warm Diffused Lighting
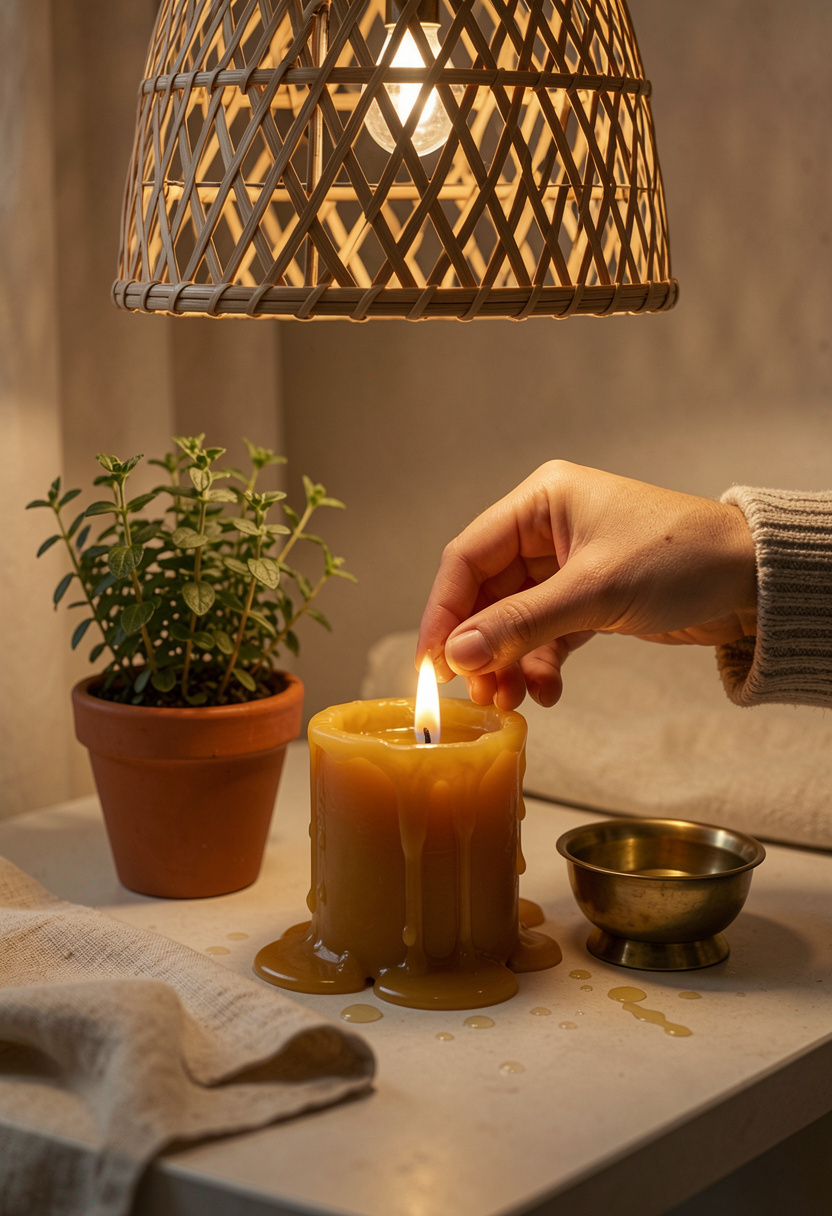
Lighting makes paint tones cozy. I installed under-cabinet LED strips for task light and a rattan pendant above the prep zone for atmosphere.
For under-cabinet light try rechargeable led under cabinet lights and a rattan pendant light 15 inch in the center.
Think layers: task light first, then warm accent light. Use dimmable or rechargeable pieces so you can soften them for evenings.
An ugly truth: bright cool LEDs make the cream read flat. Choose warm-tone LEDs and soft shades to keep the two-tone look inviting.
Common Styling Mistakes to Avoid
Mistake: Painting every surface in the same light tone
Why it doesn't work: The room lacks depth and feels flat.
Do this instead: Anchor with a darker lower cabinet tone and add matte black cabinet knobs 1 inch.
Mistake: Crowding open shelves with mismatched items
Why it doesn't work: Creates visual noise and dust trouble.
Do this instead: Style in groups of three with a matte white ceramic canister.
Mistake: Skipping primer to save time
Why it doesn't work: Paint peels and chips sooner.
Do this instead: Use a high build bonding primer for cabinets.
What You'll Need for This Look
Foundation Pieces
Large acacia cutting board 18×12 around $25 to $60
Matte black cabinet knobs 1 inch approx $10 to $30 per set
Rust-Oleum Cabinet Transformations Kit around $60 to $120
Textiles & Soft Goods
Sage linen dish towels set of 4 $18 to $35
Natural fiber kitchen rug 24×36 $25 to $70
Lighting
Rechargeable led under cabinet lights $20 to $60
Rattan pendant light 15 inch $40 to $150
Finishing Touches
Matte white ceramic canister set with acacia wood lids $30 to $60
Small terracotta herb pots 3 pack $12 to $30
Beeswax dinner candles set $10 to $25
Budget Swaps
[Thrifted oversized cutting board] (similar at HomeGoods for less; Amazon backup: Large acacia cutting board 18×12) $15 to $40
Shopping Guide for This Look
Buy paint kits during spring sale: paint kits drop in price; watch for coupons on Rust-Oleum Cabinet Transformations Kit $60 to $120.
Thrift hack: hunt for vintage cutting boards and brass bowls; pair with an Amazon backup like Large acacia cutting board 18×12 $25 to $60.
2025 trend tip: matte black hardware with warm wood is still favored; see matte black cabinet knobs 1 inch $10 to $30.
Splurge vs save: splurge on a good faucet and save on pendants; compare matte black kitchen faucet single handle $120 to $350 and rattan pendant light 15 inch $40 to $150.
Conclusion
Start with the easiest win: paint the base cabinets the darker tone and swap out knobs. That single change gave my kitchen a dramatic mood without a full remodel.
My last tip is to live with your choices for a week before buying more pieces. Small edits tell you where the next spend should go.
Which cabinet color pairing are you leaning toward for your kitchen?